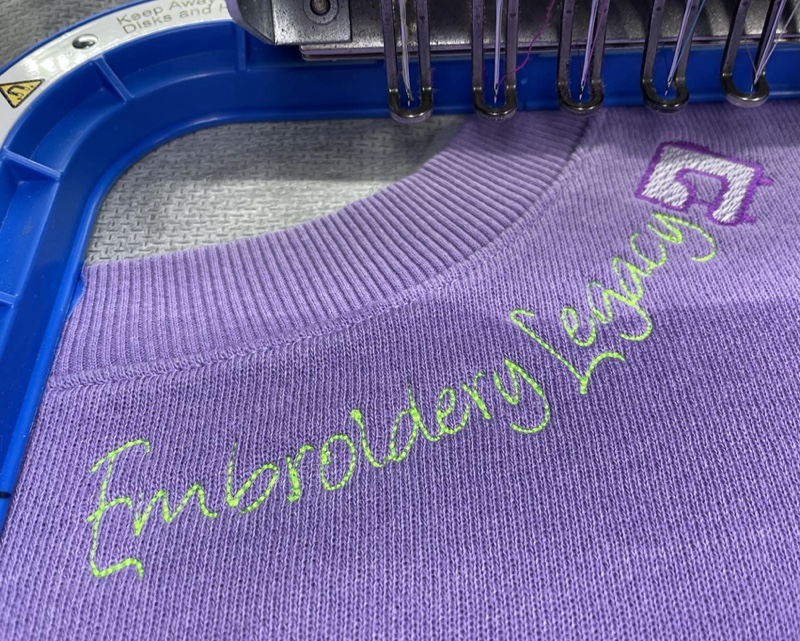
Embroidered necklines are a great way to add intricate details to your garment. Embroidery can add a modern touch to any shirt. However, getting the placement right on your machine can be difficult. This technique makes it simple…

Embroidered necklines on blouses, dresses, and t-shirts can give a personalized look to your garment and create a unique look. Let’s move past the idea that embroidering necklines is too tricky. We will help you master this skill and get the best results.
How to Embroider a Neckline
Want in on a neckline secret? Embroidered necklines are easy to create! This trick involves a camera, a grid, and your embroidery software. If you can see it on your screen, it will be where you want it.
The trick is to hoop the neckline first and take a picture. You’ll use that picture as artwork, then work off that picture at full size and stitch!
We’ll dive deeper into this technique shortly, so don’t worry if it doesn’t make total sense.
Embroidery Machine Designs For Necklines
Neckline embroidery is an interesting placement and jazzes up even the most boring shirts! But nothing is stopping you from putting any design along the neck!
Here are a few great ideas…
A fun motif embroidery design can nicely hug your neckline (play around with something southwestern, sports, or tribal-related).

Check out our Southwest Style embroidery designs.
A curved embroidery design can hug the bottom of your neckline for a polished look.

Check out our gorgeous floral neckline embroidery designs.
Continuous embroidery script similar to that used in quilting.
ESA fonts allow you to easily adjust the size of your lettering. A few clicks of your mouse is all it takes.
Vintage embroidery lace can be an elegant embellishment to any garment.

Our vintage lace embroidery designs were created in the 1950s by European Schiffli Masters. They are a perfect addition to any garment!
Embroidering A Neckline Tutorial
Remember what we said above? Hoop first, take a picture, digitize, then stitch! Let’s go into further detail.
Items needed to embroider your neckline
- Embroidery machine
- One shirt (sweatshirt or T-shirt) with a boat (oval) or crew (round) neck
- Lightweight fusible embroidery stabilizer
- Grid mat (you can also use a plastic kitchen cutting mat from the dollar store. Mark in 1-inch squares with a permanent marker. They’re reusable, and you can cut them to size to fit in your hoop.)
- Embroidery font or embroidery design
- Scissors
- Iron
- Painters tape
- Camera (cell phone or a digital)
- Printer
- Echidna Hooping Station (not necessary, but it makes things a whole lot easier)
- Embroidery software
Don’t have software? Try a free 30-day trial of Hatch, a user-friendly embroidery software where you use it like you own it.
Step 1: Turn the shirt inside out and lay it on a flat surface.
Step 2: Cut two pieces of fusible stabilizer. One piece should surround the entire area to be embroidered. The other piece should be placed 45 degrees to the neckline.
This prevents stretching when you hoop your shirt.

Step 3: Use your Echidna Hooping Station or whatever you use to help hoop. Mark the center with painter’s tape

Step 4: Turn your shirt right side out. Mark the center of your shirt with painter’s tape or washable marker.

Lay down a grid template (cutting mats from the dollar store work great!). You can make a hole or a colored dot to know where the center of the grid is.

Step 5: Using the center line as a guide, place the hoop so that the edge is lined up with the edge of the hoop.
It is always important to have the grain of the shirt parallel to the edges of the hoop.

Step 6: We marked the edge of the hoop with magnetic markers. This helps us know where to place the hoop when we remove the shirt and put the stabilizer on.

Step 7: Hoop your shirt with a stabilizer.

Step 8: Take a picture of your hoop, making sure to be straight down.

Taking a picture at an angle will cause your results to be off.

Step 9: Save the picture as artwork (.png or .pdf) – you will use this as “artwork” over which you will digitize
Step 10: Open a new workspace in your embroidery software and Insert your picture as artwork into your workspace. Rescale to inches (if that is the measurement you used on your template). This way, you digitize your embroidery at the same “real” size as the shirt.
Since you placed a grid in 1-inch squares, this will help you size the artwork to 100%. If you need, you can digitize a line along a line in the picture and use it as a measure.

Step 11: Click and drag your image so it resizes the template with the guidelines of your embroidery software. You want the center of the picture at the center of the grid (0,0) on your screen.
Be sure to lock your artwork (in Hatch Ctrl+K).

Step 12: Insert the lettering (or design) of your choice. In this example, we’re using the ESA font, Angelina.
Adjust your sizing, spacing, and curve to match the neckline.
In your Hatch software, change to “any shape” baseline, allowing you to add nodes to change your text shape. Click your baseline, then click your spacebar to change to a curve. Your letters will follow suit. Play with the nodes to get the desired layout.

Step 13: Print the artwork from your workspace and print at 100% (life-size). This will give you an accurate center point. The picture you print should be the same as your shirt in the hoop.

Step 14: Tape the artwork in place to match the neckline.

Step 15: Load your design into your machine and place your hoop in your machine. Position your needle either over the design start (to match) or the dead center (if you use center start).

Step 16: Trace your design before stitching. This will ensure you won’t hit your hoop with your presser foot.

Step 17: Optional: Place a piece of water-soluble stabilizer on top of a heavier shirt, such as a sweater. This will prevent the stitches from sinking into the shirt.
Stitch & your new shirt is ready to wear.

Conclusion: Lining Up Your Hoop & Design Is Key
With this easy technique, getting the proper placement is easy! Remember:
- Hoop squarely – the better the hooping, the better the stitching
- Digitize at 100% every time. Check that the hoop in your software is the same size and shape as the one you are using.
- Take your time and measure twice so you only have to stitch once!
We know you’ll come up with some amazing things after a little inspiration and instruction. We can’t wait to see what you create next.
P.S. Check out our high-quality embroidery designs to perfectly embellish your next embroidered shirt!

thank you so much for the neckline tutorial. Never too old to learn
Our pleasure! Always something new to learn no matter the age 🙂
Thank you very much for this tutorial as always your instructions are very precise and clear. 2 questions- is the design mirrored when the other side of the neck is to be embroidered or is it digitized separately and for necklines with a placket can your designs be split in the software? I don’t know how much sense I am making.
Hi Farzana, when possible designs will be mirrored within the software, editing may be required depending on the application.