Ready to step up your sock game? Let’s cover all things machine embroidery on socks! Explore exciting placements and the best methods to bring your sock designs to life.

From fun patterns to personalized touches, we’ve got ideas to suit every style. We’ll discuss how to embroider your socks with and without a sock hooping aid. Whether you’re new to embroidery or a seasoned pro, get ready to kick off your shoes and dive into a world of creativity with our step-by-step tutorial!
Materials Needed To Embroider Socks
Here are the materials you need:
- Pair of socks
- Cutaway or tearaway stabilizer (we used medium-weight cutaway)
- Embroidery adhesive spray
- Pins
- Embroidery hoop (hoop size is up to you)
- Sock embroidery hoop (optional)
- Embroidery design
How To Embroider Socks: Pin Tutorial
We’ll start with a sock and lay it flat.
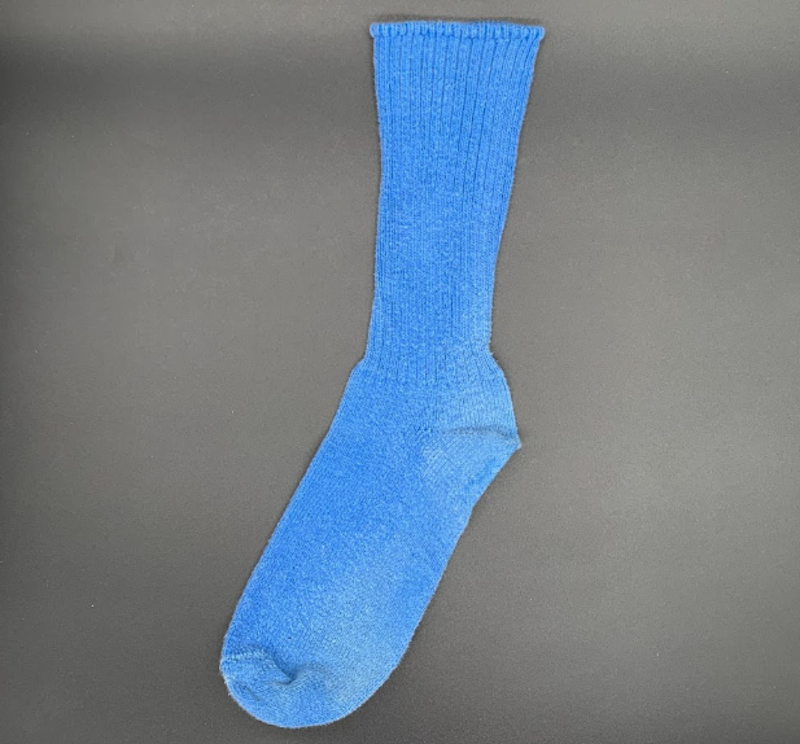
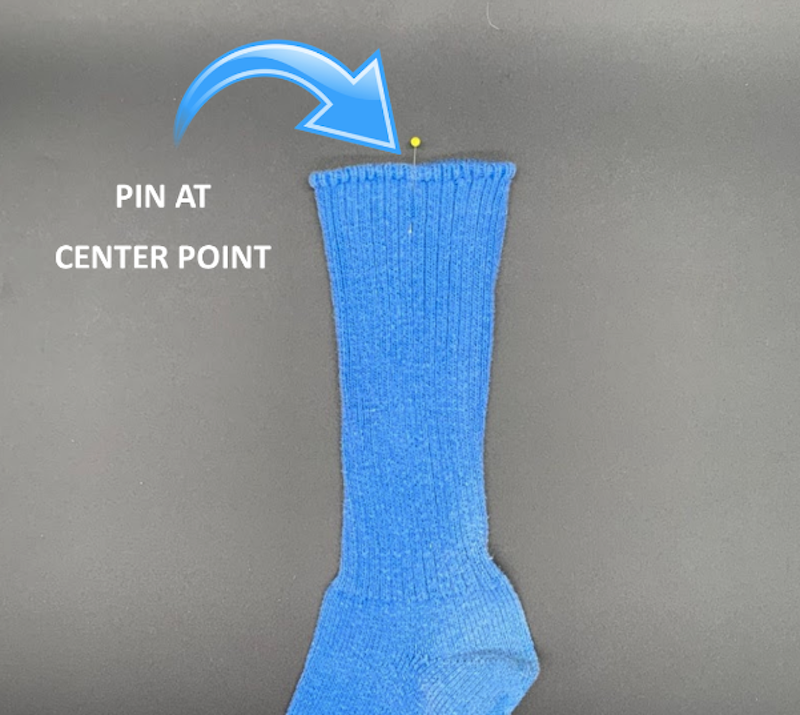
Place a pin at the halfway point of the sock. This ensures that the design stitches on the side of the leg where it will be noticeable.
To embroider your sock, use the floating hooping method. This method is suitable for small items like socks, hankies, patches, etc, but not for large items like shirts, coats, or bags.
Want to learn more about the difference between floating and hooping in machine embroidery?
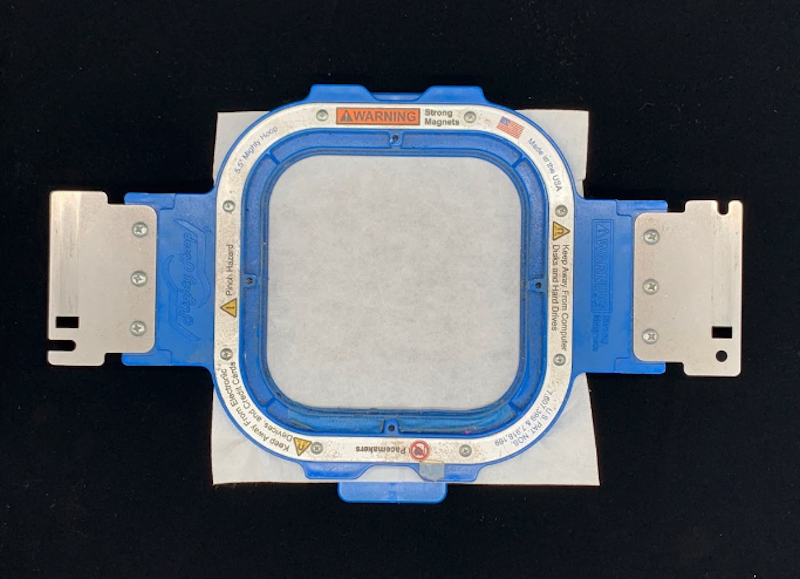
To float your sock, first hoop the stabilizer. Then, use a light temporary embroidery spray on the stabilizer. Attach the sock and pin to expose the sewing field.
Start by hooping a piece of stabilizer. We used a medium-weight cutaway.
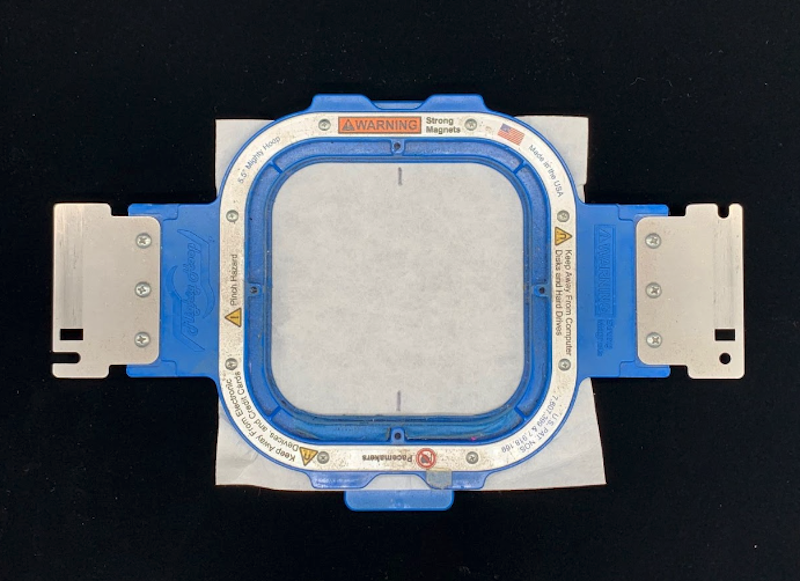
Mark a line for the center point of your hoop for alignment.
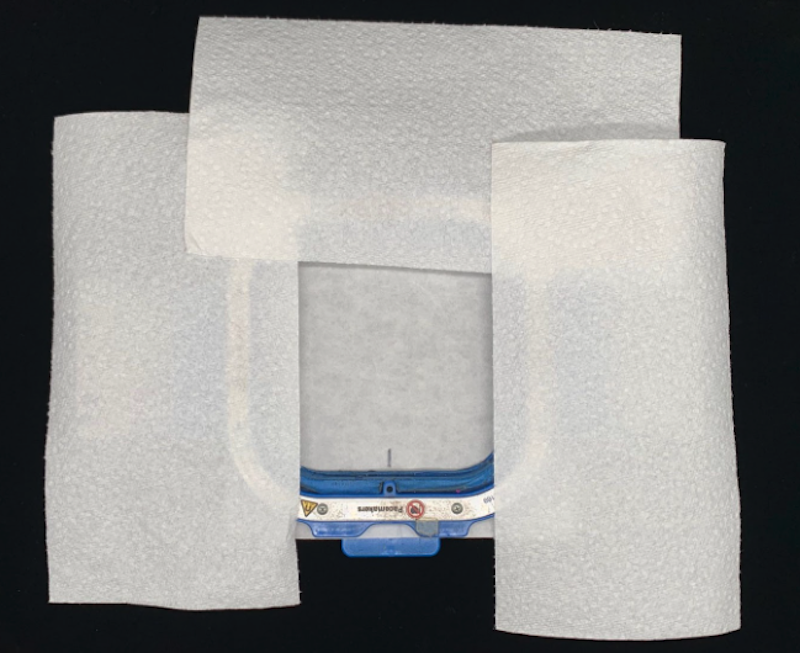
Lay paper towels over the edge of the hoop to protect it from overspray.
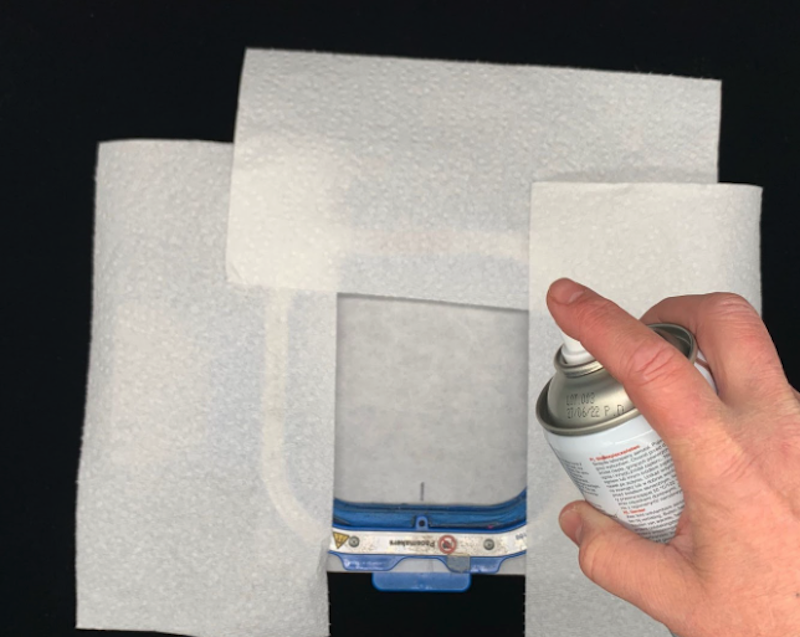
Give a light spray of temporary embroidery spray- remember, less is more!
Want to learn more about how to master embroidery adhesives? Explore how to use adhesives correctly.
Attach your sock to the stabilizer, aligning the pin with the alignment mark you made. You will use pins to provide more support. Make sure you use the sock’s ribs to help with alignment. You will want to stretch the sock out slightly so that when worn, it looks natural.
It will look like this stretched out:
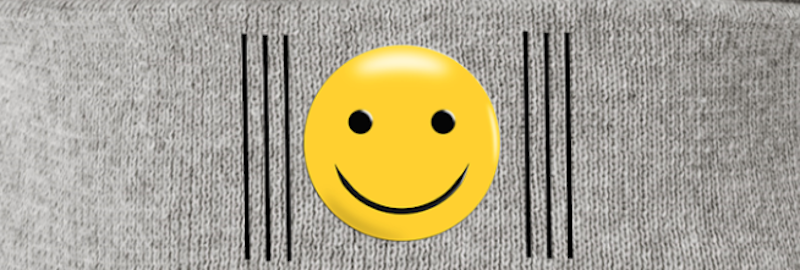
And it will look like this at rest:

But trust us, it will look great when worn!
To pin, start by stretching each side of the sock a bit. Then, pin through the stabilizer to hold it down.
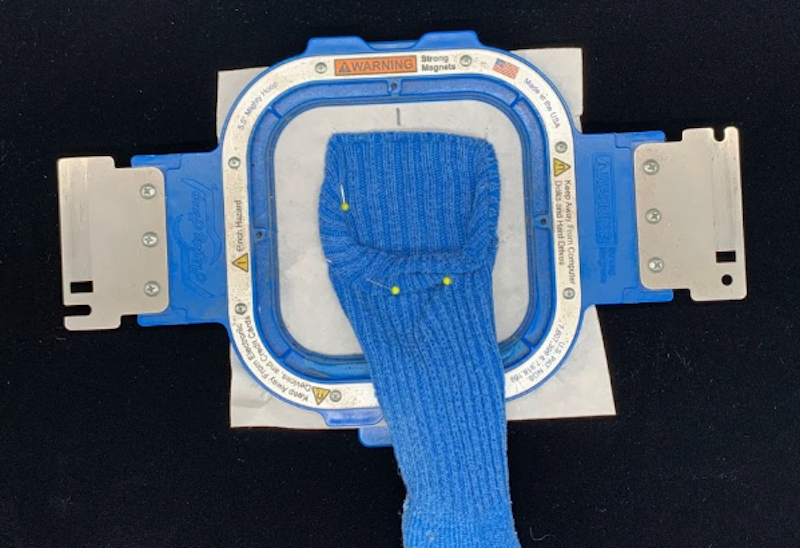
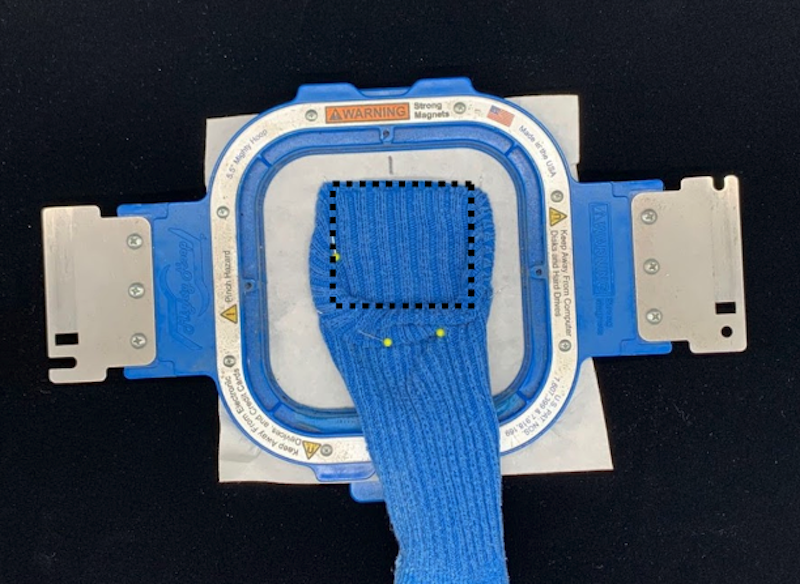
When pinned correctly, you will pin in each corner near the top and use two more pins to create a “box .”You will also use a pin to hold back the excess.
The box below is our stitch area:
Now, prepare your embroidery design!
Check out our 30,000 high-quality embroidery designs to perfectly embellish your socks.
When you lay your design flat, it should be large enough to be seen but not more than ⅓ of the sock. Depending on your design, you can go a little larger or smaller.
If you have embroidery software, you will want to use a knockdown stitch on heavier ribbed socks to ensure a stable surface.
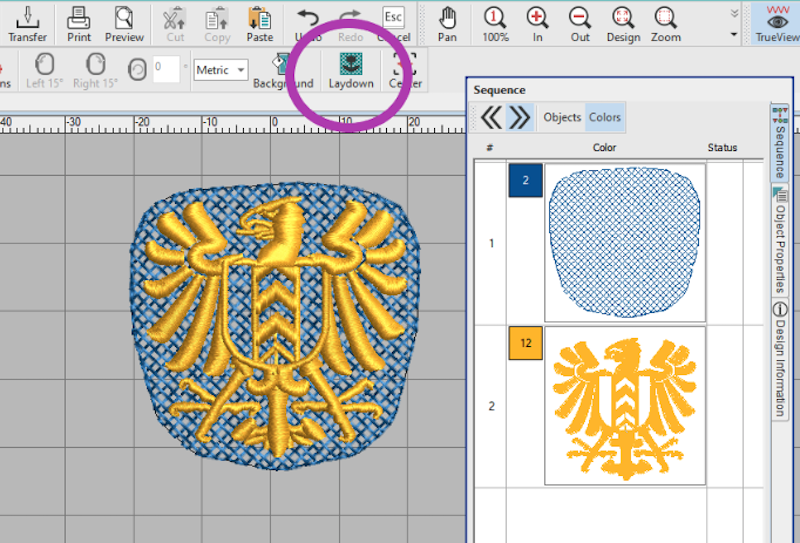
Match your thread to your sock, and you will have a perfect base for your design. Here is what the laydown stitch looks like on our sock:
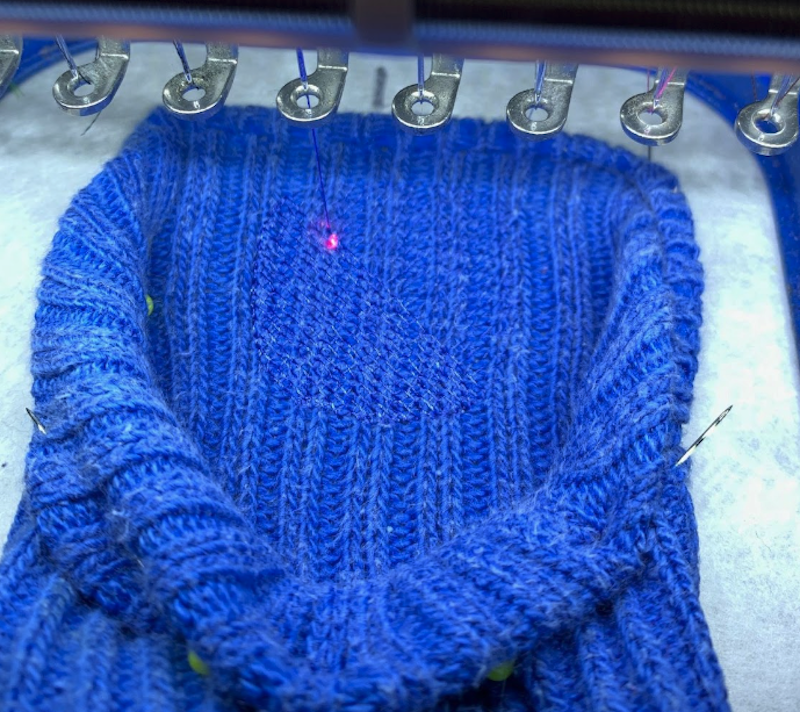
Stitch your design on your embroidery machine and then carefully trim the stabilizer.
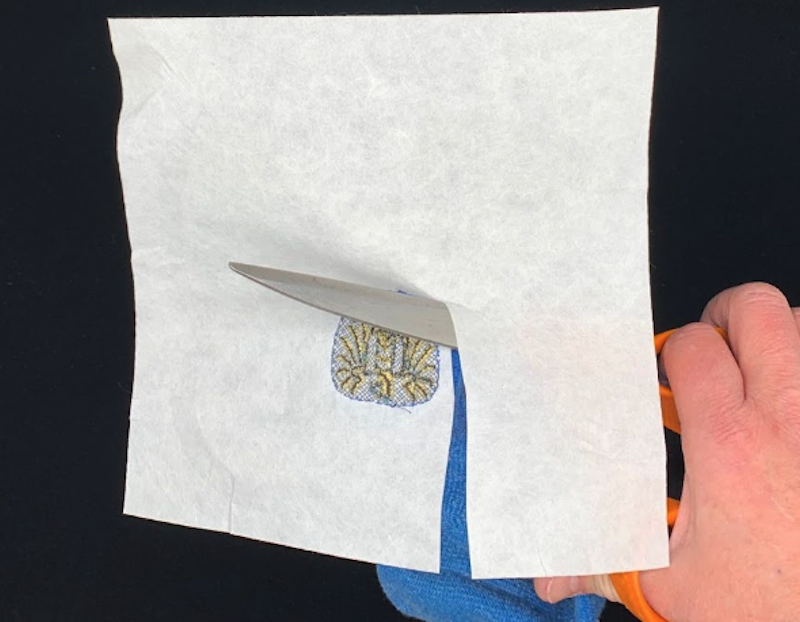
You have now finished your embroidered sock.
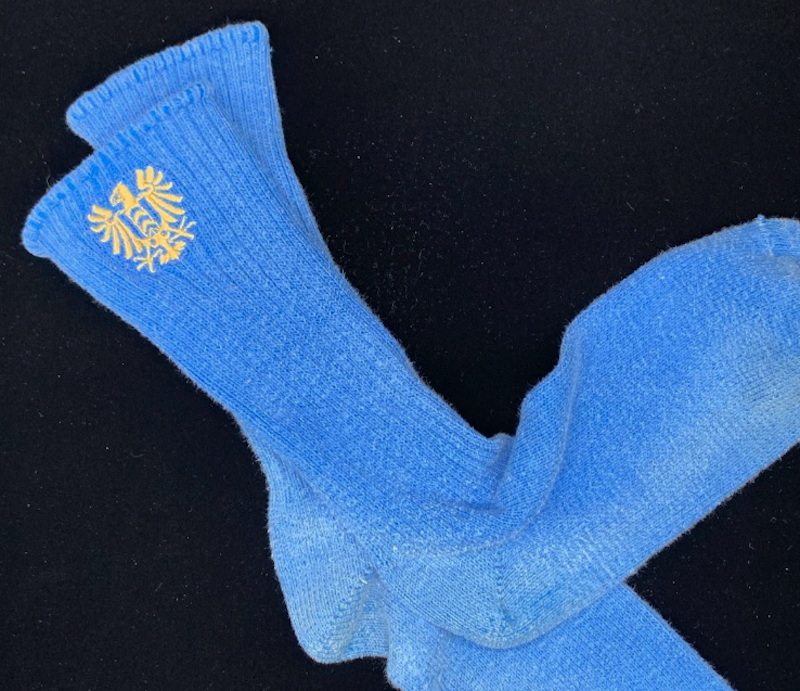
How To Embroider Socks: Sock Hooping Aid Tutorial
A sock hooping aid is a handy wire frame that safely holds back the sock in the machine.
You should never use your fingers to hold back fabric when stitching!!
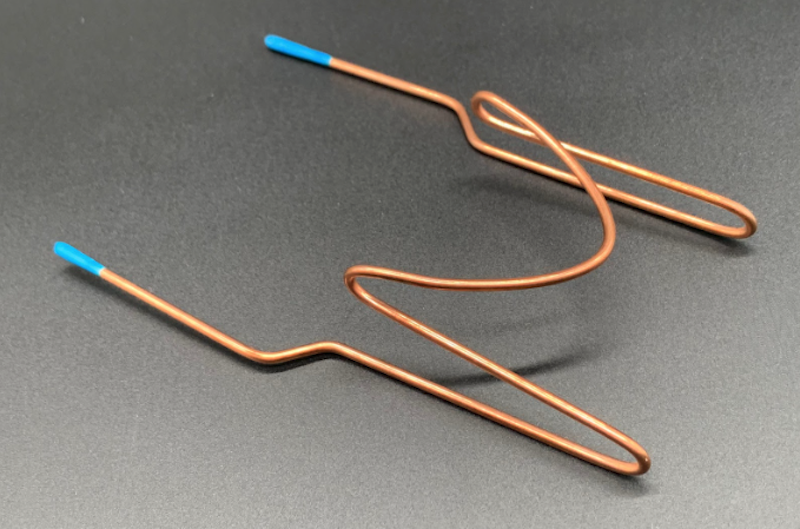
Interested in using a sock hooping aid? Check out our recommended embroidery products page to learn more.
Using this method, we will turn our sock inside out.
While the sock is inside out, insert the sock hooping aid as shown below.
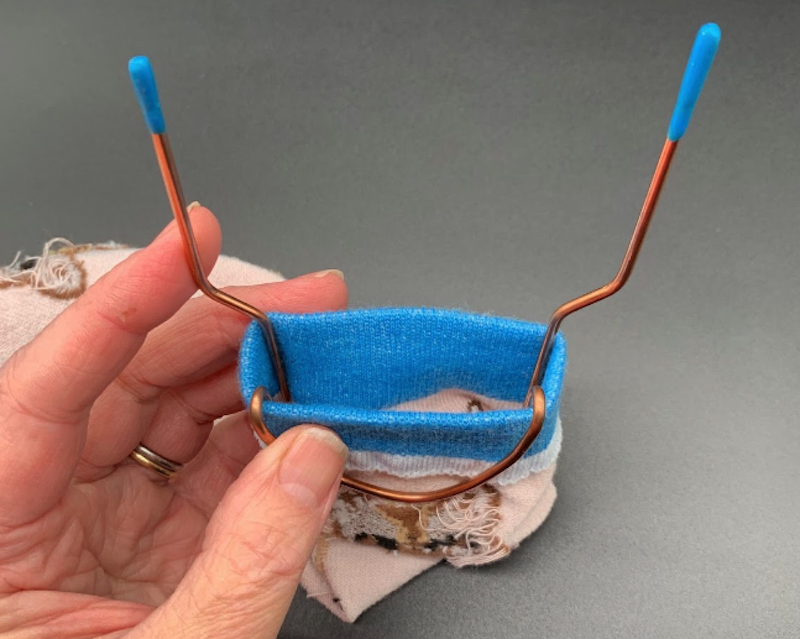
Pull the edge of the sock up over the protected end of the aid. Align the prong with the edge of the sock to make it lie flat while using it.
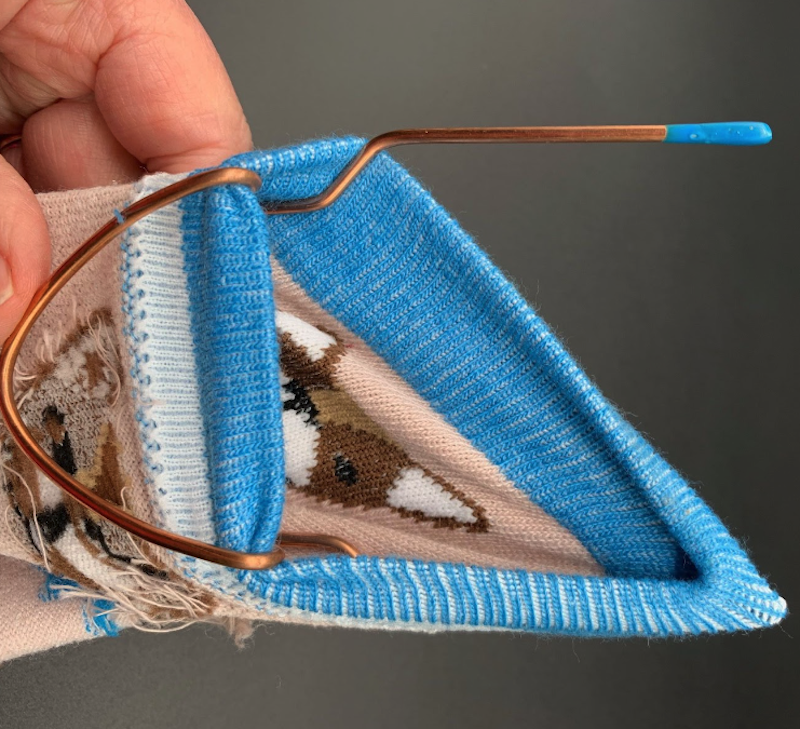
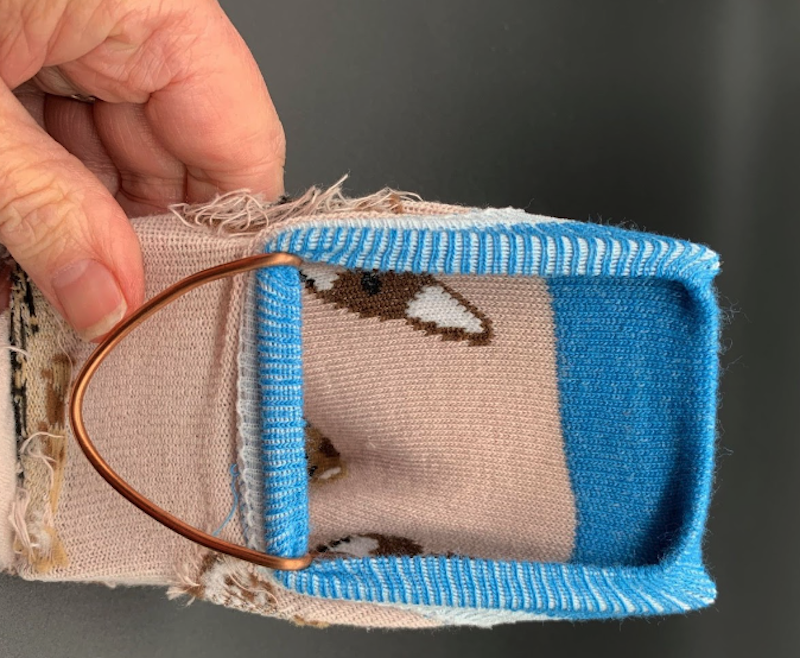
Prepare your embroidery hoop. We use a lightweight tearaway stabilizer and a slightly larger hoop to give room for the hooping aid.
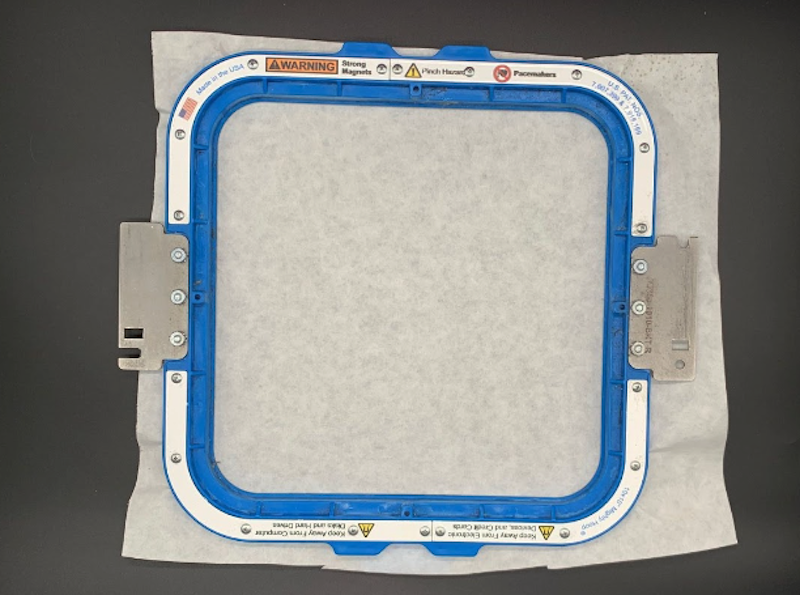
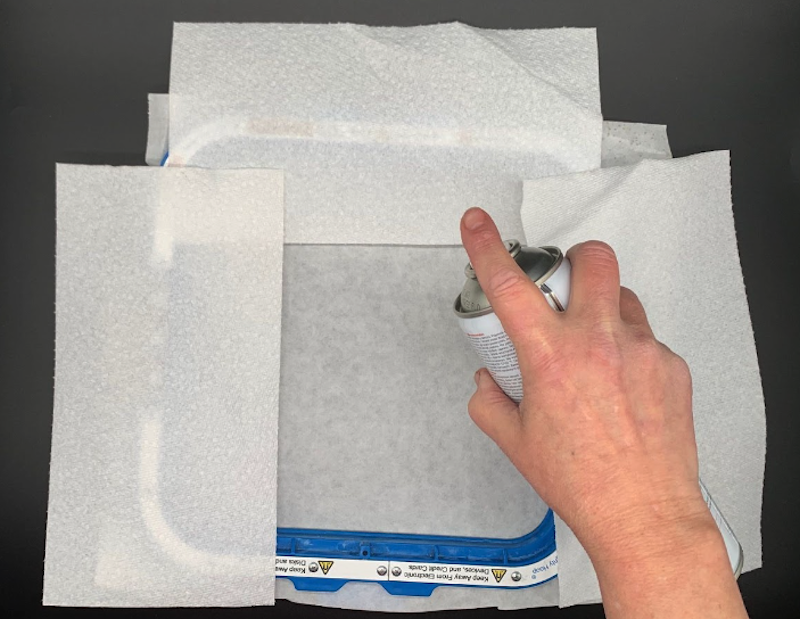
Cover the hoop with a paper towel, then lightly spray the stabilizer with temporary embroidery spray to protect it.
Lightly spray the sock to give it a little extra stick to hold it firm.
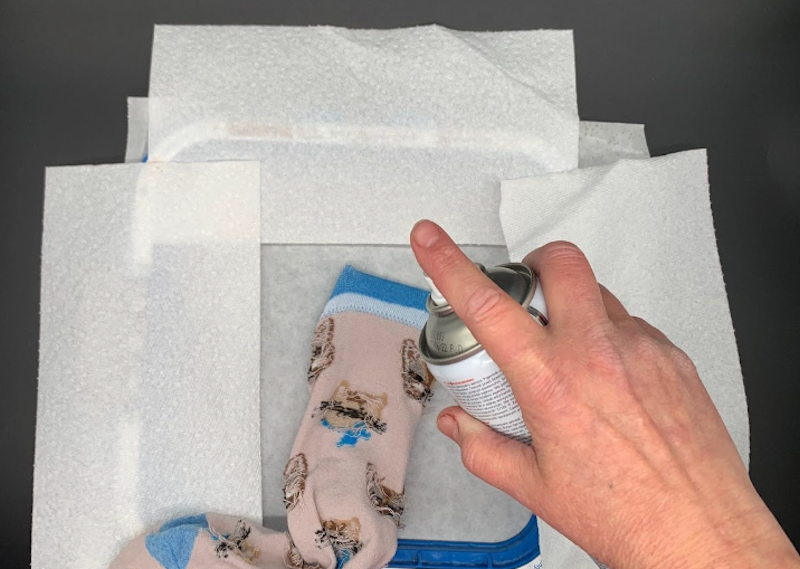
Once you safely attach the sock and the hoop to the stabilizer, you can add a pin for safe stitching.
Be sure to outline your design on your sock to prevent hitting anything.
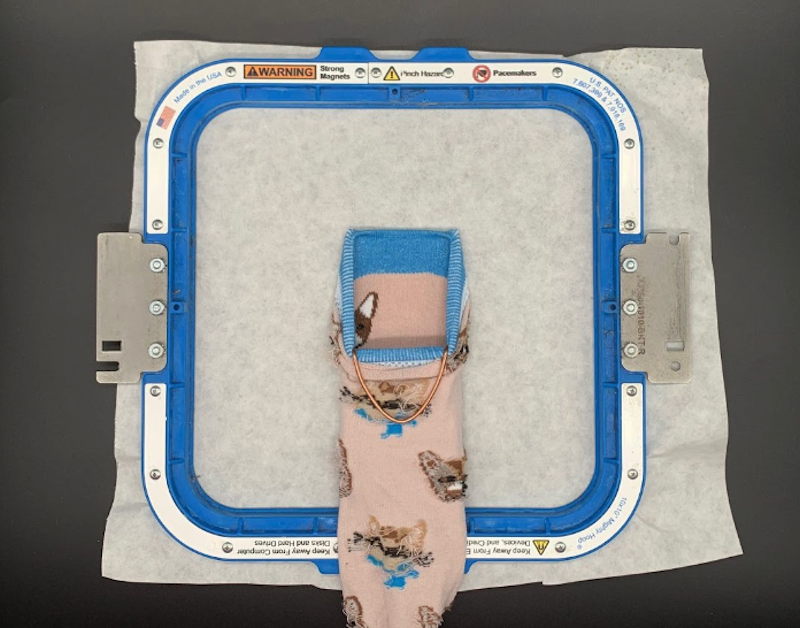
Place your frame in the machine and stitch out your design.
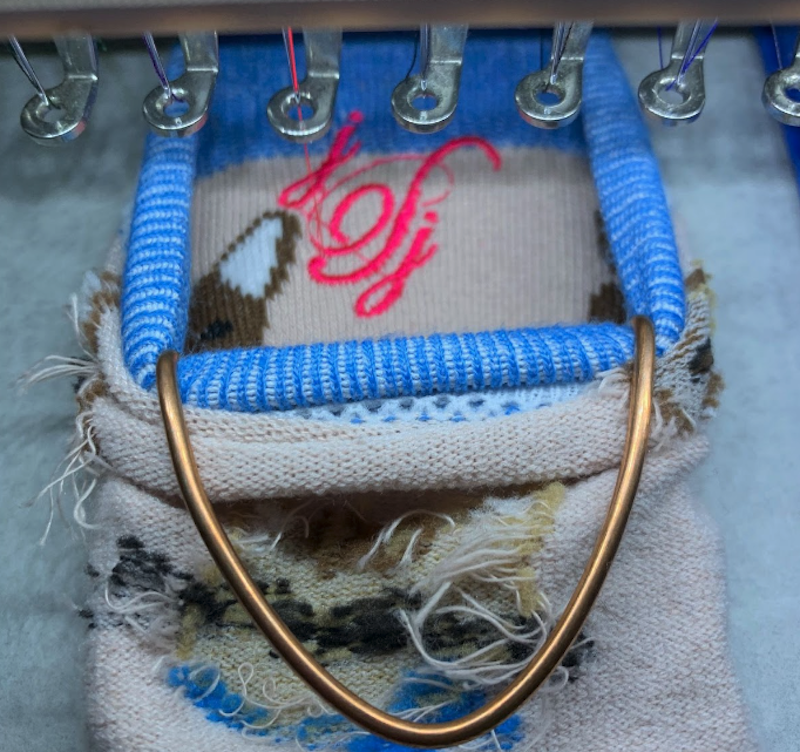
Remove or trim the stabilizer, turn your sock inside out, and you’ve embroidered your sock!
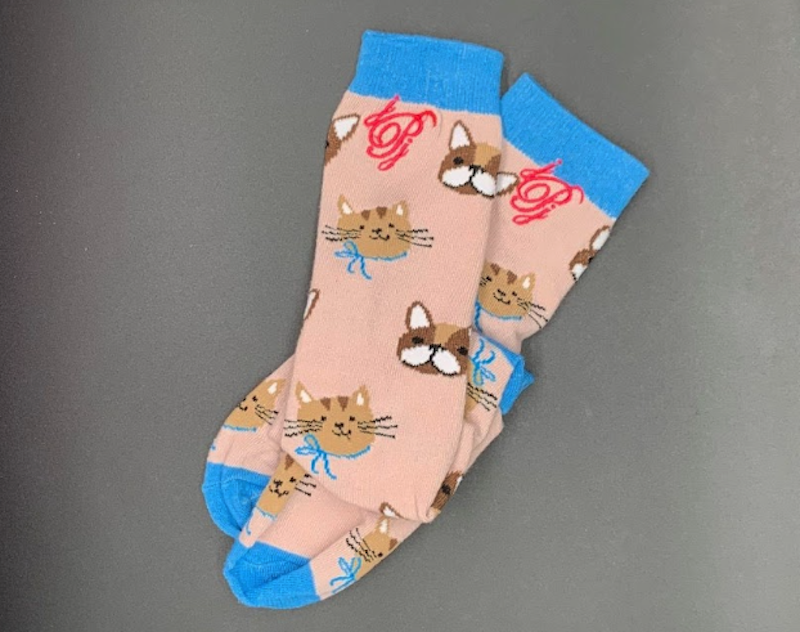
Embroidering Sock Cuffs
Embroidering a sock cuff is easy, but one step differs from the instructions above.
You will not turn the sock inside out to embroider a cuff; instead, you will embroider on the wrong side!
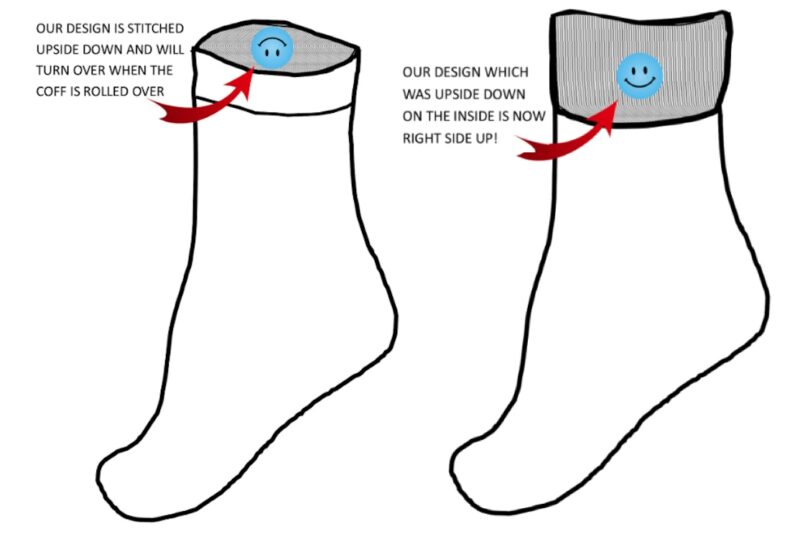
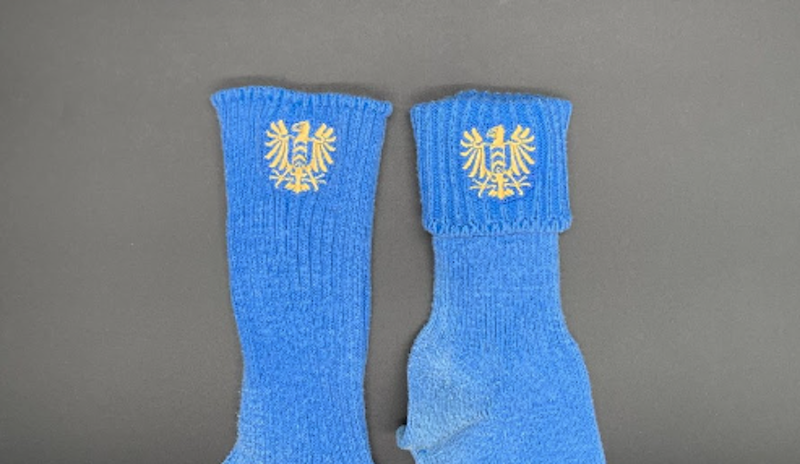
Remember, the inside of the sock becomes the outside when you turn it over to create the cuff. You will also turn the design upside down. If you stitch on the inside of the sock and then turn it down to make the cuff.
Here is the same design on the same pair of socks, just different placements:
Conclusion: Best Results For Sock Embroidery
Tips to get the best results on your socks:
- Choose smaller, less complicated designs.
- On thicker socks, use a knockdown stitch to create a stable surface. Match the thread color to the base sock color.
- Take time to pin your socks in the hoop for better results!
- Never put your fingers in or near the machine when it is stitching!
Embroidering on socks opens a world of creative possibilities! Add flair to everyday socks or create personalized gifts that stand out; you can show personality with every step!
PS Check out our Embroidery Legacy Design Club to learn how to save on our huge collection of 30,000 quality designs. Or, if you’ve never tried our designs before, download our Free Embroidery Legacy Design Kit.



Leave A Comment