Oh my gosh! You threaded the wrong color. The hoop moved. The machine stopped. You can’t start over…. We have all had these “oops” happen. Instead of living in dread, there is hope, my friends! Fear not, as we will discuss some solutions to common embroidery mistakes below! While we can’t fix everything, you will find some solutions for making up for life’s minor accidents.
")
In this blog, we will look at embroidery mistakes and some ways to solve them, the tools you should keep on hand, and how to approach correcting problems. We touch upon stains and dirt and how to remove or lessen their effects, and we also share some tips to avoid mistakes from happening in the first place.
How To Remove Stitching In Embroidery Mistakes
Let us start by talking about why you would want to take the time to remove stitching.
Why should I try to remove the stitching?
Stitching the wrong name, wrong size, or the wrong color on an expensive item like a shirt or backpack is frustrating and very expensive! Having to replace items costs you money if you can find them; working on heirlooms and one-of-a-kind items is even more frightening!
Likewise- you might have a garment you want to hand down from one person or another or have found a garment you love at a store that has embroidery or monogram you wish to remove. Whatever the case, when you decide to remove embroidery, you have to go in fully armed with information about what needs to be done.
Sometimes you can’t remove the stitching, and the garment becomes a tester or, better yet, stitched material upon which you can practice.
When Can You Remove Embroidery?
Let’s start with the good news…
- Stitching on Woven fabrics (the heavier, the better).
- Less dense stitching. The less dense the stitching, the fewer stitches you take out. Also, the fewer previous needle penetrations leave a mark.
- Satin stitch. If you have to make a mistake, a satin stitch will be your friend. Satin stitch has back and forth threads anchored down on the backside of the stitching and are the easiest to remove.
- Longer stitch tatami. Tatami stitch is a dense fill with short off-set stitches which mimic the tatami floor mats found in Japan. Due to the density and the pattern of the stitch, you need to remove this differently, but it is possible!
When Can You Not Remove Embroidery?
Okay, now for the bad news…
Often there are situations in which you can’t remove embroidery, or if you remove it, there is an irreparable mark left on the garment.
- Ultra-dense designs. If you have an ultra-dense design with too many stitch points, it may have irreparably damaged the garment, and it will leave you with a hole. Now, of course, you can apply interfacing and restitch, but the garment structure may not allow for that

- Slinky sheer or loose weave fabric. Gauze, silk, lightweight knits, and the new microfibre and performance knit only begrudgingly give up stitches and depending on the garment, it may be more cost-effective to start anew. These fabrics can only tolerate having stitching put in, much less taken away, and attempting this might leave holes or tears.
- Leather and vinyl. Unless you plan to re-embroider with a larger design, leather and vinyl will have holes that can’t be fixed, and in some cases, vinyl and other artificial “pleather” can tear apart as the needle points are like a perforated edge.
Tools Needed To Fix Embroidery Mistakes
So what do we need?
- Patience!
- Clipper style stitch eraser (many people also use mustache trimmers, eyebrow shapers, etc.)
Want to know which stitch eraser we recommend? Watch the video above where we test 5 of them! Then click here to view our list of reccommended Stitch Erasers/Removers.
- Good embroidery scissors
- Tweezers
- Patience
- Lint roller to remove fuzzies and threads
- Seam ripper
- Razor or surgical blade (If you are careful and gentle)
- Did I mention patience….
Hopefully, you will not have to become an expert on removing stitches, but to do the best job, you need to understand how the stitches are formed and where to cut for best success. First, here are some things to keep in mind…
ALWAYS always always start from the back. Why? Because there is a wonderful protective layer of interfacing between you and the garment. This acts as a barrier you can work against without fear of damaging the garment.
If you have not read our Complete Guide To Machine Embroidery Stabilizers, it is a must! You will learn what stabilizer is, why it’s so important, and what type should be used when. Click here to read more.
Patience is perhaps your most valuable tool. It takes time to remove machine embroidery, and you will need to weigh the time it takes against the value of the garment. If it is “ruined” already, you may want to use it for practice stitch removal. You will be tempted to use a razor or scalpel but please, resist that! You will have better success with patience, a seam ripper, and tweezers.
Removing Embroidery Stitches
Let’s talk stitches.
The goal in stitch removal is to take out the bobbin thread. Commercial embroiderers primarily use black and white bobbin threads, making it fairly easy to see where to clip, but many working with smaller machines can wind their own bobbin with matching threads. Though the stitches may be different, the method is similar. Here are the three most common stitches you will see:
- Satin stitches
- Tatami stitches
- Straight stitches
How To Remove Satin Stitches
Large satin stitch objects and letters applied to heavier woven fabrics are by far the easiest to remove. The satin stitch is made by a long back and forth of the top thread on the top of the stitching and a bobbin lock stitch below.
If you have ever done an “H” test to check for bobbin tension, you will recall that looking at the back of the stitching reveals columns of top thread and bobbin thread. Cutting the bobbin stitch below will allow you to pick out the released stitches above. From the BACK side, the stitches should look something like this.

If you have a stitch eraser (several different banded erasers like a barber’s clipper), follow the manufacturer’s directions, and gently work the eraser back and forth over the backside until you see the stitches being clipped. When it’s properly done it will look like fuzz. Periodically stop and check the top to see how much success you have had and return to the back to clip more as needed.
Remember that you will not remove all the stitches from your garment on your first pass, but you can remove most and then return with tweezers or embroidery scissors to finish the job. Please remember that any of these methods can cut your fabric if you are too aggressive.
If you only have small embroidery scissors or a seam ripper, you can accomplish the same results but work a few threads at a time. Try not to slide the scissors or ripper along in one big push as you can poke through your garment.
How To Remove Tatami Stitches
Okay, tatami is a bit different, but it is possible to remove with patience. Tatami is made with a brick-like stitch. Even though the stitches are off-set, you will find the same type of top and bobbin threads but tipped at an angle.

A stitch eraser works very well on tatami and other patterned stitches but work slowly and carefully from the back. Since the tatami stitches are usually smaller, you may have to remove stitches and then remove the fuzz with a link roller to see your progress. Tweezers will help pull bobbin threads and tease apart wads of thread.
How To Remove Straight Stitches
If you are lucky enough to have caught your mistake and just have lines of basting or straight stitch, you can use fine scissors or tweezers to periodically clip the bobbin thread (on the backside) and pull it out. That will give you a satisfying reward of simply pulling the top thread and watching it pop out!
Got frustrated and pulled on threads? Tore the material or made a knot? Have stitch marks that won’t come out?
When life gives you lemons, make lemonade. Sometimes things just do not work out, and you need to be creative. Here are some ideas to help you salvage your garment.
- Carefully apply iron-on backing to a hole in a garment. If the hole is large, you can patch it with similar material and then embroider it with a different or larger design.
- Applique a piece of material onto the garment- it requires you to change your design but can save the day.
- Have a large hole? Make a larger one and embroider a cutwork design. Sometimes these oops are happy accidents! Interested in quality cutwork designs to help conceal those areas you need to cover? Click here to check out our Embroidery Legacy cutwork lace designs, perfect for any project.
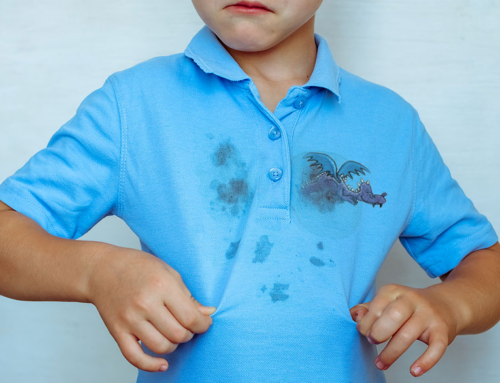
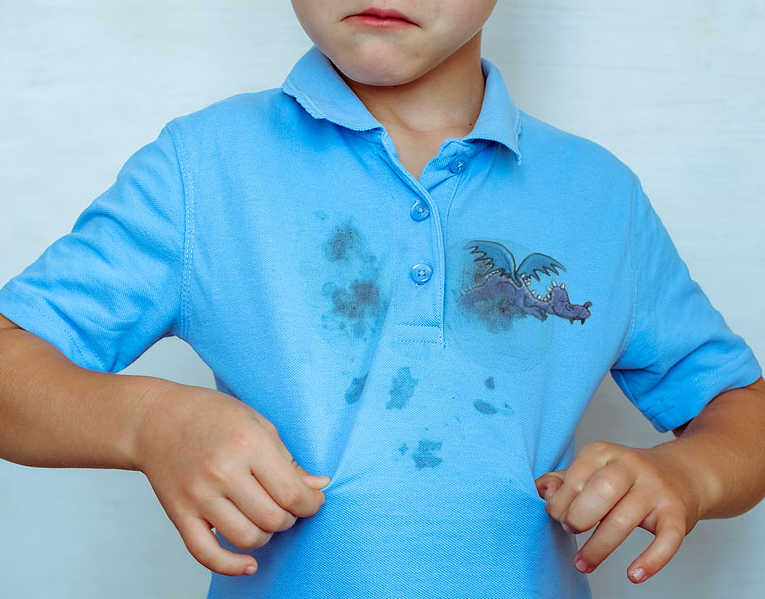
Tips For Stain Removal In Embroidery
Stains happen! Everything went well; you look down and… an oil spot! Or you stabbed yourself and have a blood spot (ouch!). Now you are in stain removal territory. Please remember to test any methods on an out-of-the-way area on your garment since different fabrics and dye methods can be disturbed by stain removal.
Different types of stains
- Oil: the most common. The goal here is to absorb the oil. Do not rub! You will spread it. Baby powder, baking soda, talcum powder, chalk, cornstarch, or waterless mechanic’s soap can be sprinkled over the oil and let sit for 30 minutes to absorb as much oil as possible. Then, use a spoon to scrape the oil and powder off the garment.
- Dirt: depending on what kind, damping a cloth and blotting (not rubbing) will be your best option.
- Blood: is made up of proteins, so anything which breaks it down will help. Surprisingly nature gave you the best solution- saliva! The enzymes in your saliva break down protein, and if you don’t mind licking your fabric, that is an excellent first option. Remember, if you wet the fabric, never use hot water because it will set the proteins or bleach. You can also use hydrogen peroxide, but it is pretty harsh and can bleach out the color. Pre-soaking the fabric with a laundry pre-treater and then washing in cold water helps.
- Stabilizer: if it is water-soluble, a good soak in cold water will help. If it is iron-on, do not try to iron it further! If you want to soften the adhesive, hold the iron above the fabric for a few seconds and gently peel off the stabilizer. To further remove the adhesive, apply a damp piece of fabric over the adhesive, press, and immediately remove. Repeat this as many times as needed. Make sure to use a new piece of fabric every time.
- Pen marks: if it is a ballpoint pen, use hairspray- this “oldie but goodie” works well.
- Scorch marks: the key here is to work quickly! The sooner you remove the stain, the more fully it will come out. Primarily in linen and cotton, scorch marks will come out with lemon juice or hydrogen peroxide, but these must not be left on for long, and peroxide can bleach out colors. The least invasive way is to soak the item in ice water for 24 hours.
How To Avoid Embroidery Problems
Wouldn’t it be easier not to make a mistake? Sure! Here are some tips to help you avoid most of the problems above and develop your embroidery skills.
- Stitch-outs. Practice, practice practice. If you can save $50 by garment by testing on a 50 cent scrap of cloth, why not? Please make sure that your test material is similar to your finished garment. You can save old or “oops” garments for testers.

- Good quality embroidery designs are one of the best ways of ensuring success! Always purchase designs from a reputable digitizer who offers embroidery designs tested and checked for problems.
Want embroidery designs that stand out but are also amazing quality? Check out our large variety of close to 30,000 embroidery designs by clicking here. They are guaranteed to run smoothly on your embroidery machine from start to finish.
- Clean and organized workroom. Having a sensible and clean workroom can make a difference. Check out our How To Set Up Shop For A Home Embroidery Office article for some great tips to be organized by clicking here. These tips do not only apply to a business setting, but they can also be applied in your craft room!
- Proper hooping. The use of a quality hooping station can also make or break your project, as the quality of any embroidery project starts with how well your material and stabilizer are hooped. If you’re interested in some valuable techniques and tricks to help you hoop easier, check out our Complete Embroidery Hooping Guide by clicking here.
Are you a beginner to embroidery or need a reminder of the basics in embroidery? Check out our Embroidery for Beginners blog by clicking here for your complete guide to everything embroidery! From everything machines, threads, stabilizers, designs, and software-related, we’ve got you covered! The sooner you know your stuff, the less likely you are to make mistakes!
Conclusion: Take Mistakes As Learning Opportunities
As with anything, the more you know, the fewer mistakes you will make. The same goes for embroidery. Although mistakes do happen, and believe me, they happen to everyone, they do come to be a great learning lesson. The more educated you are, the less likely you will make those mistakes again.
As you’ve read, fixing embroidery mistakes can be easily done. You can remove stitches based on the stitch type used, fix embroidery mistakes by using scissors or other embroidery tools, or if you’ve stained your garment or embroidery, there are stain removal techniques based on the supplies you’ve used.
We also offered several tips to avoid having to encounter embroidery problems. These include working slowly. If you’re removing stitching, understand what stitch type is used to remove them best. Test your design before you hoop an expensive garment, work cleanly and have an organized workspace, and lastly, use quality designs from a reputable digitizer!
P.S. Try our free Embroidery Legacy Kit, which includes 11 fan-favorite designs, to experience the exceptional quality of our embroidery designs. As we always say, the proof is in the stitching!

Can I change an embroidery #1 into a #3?
My gift graduation Throw year 2021 instead of 2023
I cannot return this gift even though the year is wrong.
Yes definitely! You can use embroidery software to edit your design files 🙂 Here is a free 30-day trial of Hatch Embroidery Software if you’re interested in something user-friendly https://www.digitizingmadeeasy.com/hatch-embroidery-free-trial/