
Have you ever wondered why embroidery patches are so popular and widely used? And also, how to make your own with an embroidery machine? If so keep reading! This complete guide will show you how to easily make your own custom patches.


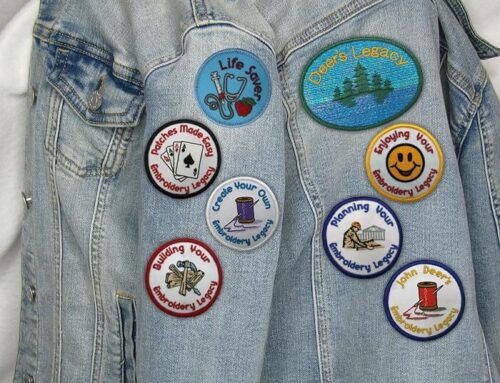
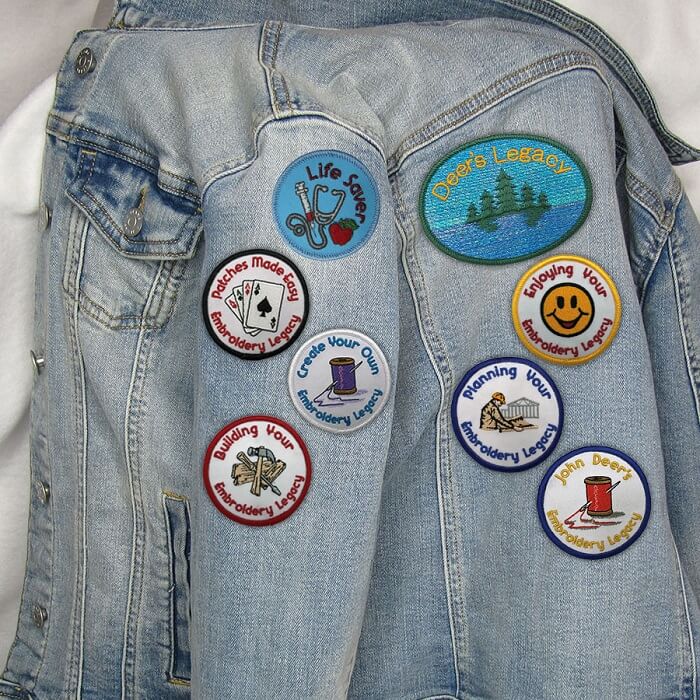
Embroidery patches are an artistic way to share a piece of yourself with the world. They can easily be attached to a cap, backpack, or jacket. Custom embroidery patches are a creative way to showcase your interests while also humbly highlighting your embroidery talents.
Not only are embroidery patches an art form to show off your personality, but they’re also versatile and compact for any garment you attach them to.
This article will cover:
- The Deer’s Embroidery Legacy’s 60+ year history in making professional embroidery patches (and why our expertise will give you the best-embroidered results possible)
- 2 easy ways to make custom professional-looking embroidery patches
Are you looking to make custom Embroidery Patches? Why not express yourself! Our family has produced patches since 1958 for companies like Disney, the NHL, and boy scouts! Passed on and from generation to generation and now refined to utilize today’s modern technology, we want to share our patch-making knowledge with you.
So how do you make custom embroidery patches? What is the process? Although there’s an endless list of methods suggested online today, we’re here to help you get the best results possible (trust me, a simple satin stitch doesn’t cut it).
If you want flawless embroidered results, we’ve refined two new ways to create custom embroidery patches! This article will show you how to make them quicker and easier than ever before using our time-tested techniques merged with our new innovative processes.
P.S. Want a more in-depth look at how to make patches? Check out our free workshop for a replay of our twice sold-out Patches Made Easy webinar. Did we mention we’ll also give you a free circle embroidery patch so you can apply what you learn yourself? Click here for your free sign-up now.
The Deer’s Embroidery Legacy’s History in Making Embroidery Patches
Before we dive into these new patch making methods, I thought you might enjoy learning about how these new techniques came about.
In 1958 my grandparents started our company as Dress CREST Embroidery. You might have noticed I emphasize the word CREST. Why? Because that (and emblems) is what patches were primarily called back in the ’50s.

The funny thing is that it was a secondary service when they started the company. The primary focus was the DRESS part, which was geared to creating yard goods and lace for the garment industry. After the first couple of years, Patches/Crests became the business’s focal point, and from the ’60s to the ’90s, emblems were our core business. By the time the 90’s hit, we had two factories, 6 Schiffli machines, and 136 multi-heads running. We produced millions of patches every year and for decades. We made patches for dozens of large companies such as Disney, Girl Guides, the NFL, MLB, and Boy Scouts.
Most of my earliest childhood memories include embroidered patches. In the early 70’s we still only had one factory with four Schiffli machines which was literally in our backyard! It made for an interesting childhood as instead of watching TV after school I would come home and go into the factory.
My Grandfather, Grandmother, Mother, and even my Great-Grandmother were always somewhere in the factory working. Every employee was like an Aunt or Uncle, and looking back, my education in embroidery started around the age of 4! I remember being picked up and sat on the production table to help glue down the patches’ tails left behind by the merrow machines.
My favorite machine was the original manual pantograph machine my grandparents started their business with. Mainly because one of my favorite people as a child was the Puncher/digitizer, my Uncle Herman. He was a giant of a man, muscular with a chiseled jaw and thick accent just like the Terminator. I remember watching him for hours as he moved the pantograph with precision to the rhythm of the machine.

As a schiffli master digitizer, his job was creating patches for 12 hours a day, one stitch at a time with no margin of error. Looking back, I was unknowingly taught a lot of the foundational principles of creating embroidery. As he would explain what he was doing, I would politely smile… All the while thinking the Flintstones was staring in minutes.
A decade or so later, at the age of 17, I started my digitizing career on the very same machine, sitting on the same wooden box Herman sat on. And yes, at the time, the irony of it did hit me as I worked my 12 hour days creating patches just as Herman did.
From 12 to 17, my grandfather ensured that my summer holidays and afterschool jobs all revolved about learning every aspect of the embroidery industry. My jobs included working on a clicker, a shuttle boy, a watcher, a stitcher, and an artist in the pre-computer age. At 17, when I started my apprenticeship as a puncher and worked on our manual pantograph creating designs was just a little different than today. The Looms were spanned up with 20 yards of material, with no trimmers or reverse, and embroidering between 114 to 680 units at a time depending on the quarter of the machine.
I’ve realized that the time I was born into this industry is the biggest blessing in my career. Not only witnessing but having the privilege of work from a Manual Pantograph to Jacquard paper tape, to eight-channel tape and, from DOS to modern-day Digitizing programs. I have quite literally had the opportunity to see this industry evolve.

My Grandmother Irene is now in her 90’s, and she has said to me time and time again how she can’t believe how much embroidery has changed in her lifetime. It’s been an honor to witness it firsthand. I know my Grandmother is proud of all she accomplished and the fruit is having seen all three of her Great-Grandchildren now working into the same business she and her husband started in 1958. This is her Legacy, and God willing will be my grandchildren’s Legacy as well.
The Deer’s Embroidery Legacy’s new game-changing patch techniques are intertwined within our past, our present, and our future.
2 Ways to Make Flawless Custom Embroidery Patches Easily (Plus Bonus Tutorials)
Our history and today’s current technology were considered when we engineered our two new ways to create custom embroidery patches. The quality of our designs and processes we developed to produce them are revolutionary.
Our foundation as manufacturers with over 60 years of experience in the embroidery industry will give you both quality and production-friendly results. Every file has been manually digitized and tested; these are not created using an automated software process that spits out mediocre results.
We’ve developed two innovative layouts geared to give you a choice that best suits your needs; DIY Patches Made Easy design files and Ready-Made Patches.
1. DIY Embroidery Patches Made Easy


These expertly digitized embroidery designs allow you to insert your designs or lettering into the patch outlines. Where you’re looking to create a single patch on a single-needle machine or multiple patches on a multi-needle machine, these designs allow you to create custom patches with any materials of your choice easily at the press of a buttom!
Our new DIY Patches Made Easy design files will help ensure you’ll get the best results possible and allow you to use a variety of different shapes, fabrics, and colors to truly customize your patches.
These DIY embroidery design files replicate the professional result of commercial borders, which are created using a specific machine. This replication will give clean and crisp edges on your patches; an attribute which the commercial border machines are famous for.
These expertly digitized embroidery designs allow you to insert your designs or lettering into the patch outlines. At the press of a button, easily create custom patches with any materials of your choice!
Check out the different shapes we offer in our DIY “Patches Made Easy” embroidery design files by clicking here.
Please note that we do not include EMB files with any of our DIY patches as the files are not to be resized and will embroider perfectly at the size they were digitized for. We do include SVG files for those who have a plotter of any kind so you can pre-cut your patches the perfect size.
DIY Embroidery Patches Made Easy Tutorial
Step 1: Prep your patch.
Prepping your patch is very important. You can use any fabric you’d like from your fabric stash; felt, cotton, poly, etc.
For professional embroidery patches, we highly recommend “Patch Backed Poly Twill.” This fabric is specially formulated with patches in mind. It has a diagonal weave that produces a heavy hold and weight. Check out our unique twill by clicking here. Our twill fabric uses buckram to add extra stabilization, ensuring your patches lay flat and have a stiff authentic patch feel.
You must back your patches by using either of these stabilizers. Just remember whichever you use will alter how you proceed with the steps below:
- A no show mesh product (with the fusible interfacing on the one side) or
- A double-sided fusible (such as tacky patch fusible stabilizer)
You can easily apply the stabilizer with either a household iron or a heat press using a temperature of 260F for approximately 12 seconds.
- When using a no show mesh stabilizer product, take a teflon sheet, and put it on the very bottom, so it doesn’t stick. Then take your fabric, and no show mesh fusible and line them up, so the shiny side is to the bottom of the fabric. Then put another teflon sheet on top. The fabric and tacky patch fusible will be like a sandwich in between the two teflon sheets. Put it under the heat press for 12 seconds.

- When using tacky patch fusible stabilizer, it’s essentially the same thing. Put your tacky patch over the fabric, then place a piece of teflon on top, line them all up and put it all under the heat press for 12 seconds. Then hoop or cut it as you please for a tacky patch back.

I highly suggest using tacky patch fusible in your patch-making process for several reasons. First, it has a double adhesive, so it sticks on one side and becomes tacky on the other side when you put it down. This eliminates the use of “spray adhesives” during the patch-making process.
Secondly, using tacky patch fusible will also give more stability to your patches than when only using a no show mesh product. Third, the reverse side has a released piece of paper that is perfect when using your plotter.

Interested in Tacky Patch Fusible Stabilizer? Click here for more.
Prepping your patch this way will give your patch a backing to reduce fraying. Once it’s adhered to the actual fabric and you cut it, there will be no fraying on the edges, getting you a step closer to creating that perfect patch.
Step 2: Cutting your patch design
How you proceed with this next step will depend on if you have a cutting machine.
- Using a cutter machine: with our DIY Patches Made Easy design files, we include the SVG file. Simply insert your patch SVG file in your cutter and place your fabric with a stabilizer onto your matt. Have your cutter machine cut out your perfect patch shapes.

- If you do not have a cutter machine: simply run the stitch file you received within your DIY Patch Made Easy design file onto your fabric and stabilizer. Once finished, cut along the stitch outline. You want to cut directly on the stitch outline, don’t leave any of it hanging out. It is sized to fit perfectly within the design files of the patch.

Step 3: Adhesive Backing
Depending on which stabilizer you used will determine how your patch will adhere.
- If you use no show mesh stabilizer, you must use a spray adhesive (such as 505) on the patch’s back to stick it down.

- If you use tacky patch stabilizer, you will simply peel off the back, and the adhesive will be present, giving you a tacky back (hence the name).

Step 4: Embroidering Your Patch
When embroidering your patch, you can use 3 different types of stabilizers, with one having a greater advantage over the others.
Depending on which stabilizer you use for your custom embroidery patches, it will change the method you’ll follow during your process. You can use one of the following:
- DIY Tear Away Patches
- DIY Wash Away Patches
- Prep Patch Film
- Tear away stabilizer is probably my least favorite product to use, although it can be functional.
When using tear away stabilizer for your DIY patches, follow these steps.
- Hoop your tear away stabilizer.
- Run your placement stitch.
- Adhese your patch.
- If you used a no show mesh fusible then spray 505 or KK to have it stick.
- If you used tacky patch, then simply peel off the paper to expose the adhesive side.
- Line up your shape perfectly with the outline that stitched.
- Put the hoop back on your machine, and it will do a double run stitch where it will go around twice for strength and then do a zigzag stitch and finish the outer side.
- If you want to use mylar, add it in at this step and secure it using painter’s tape (don’t forget to lower your design’s stitch density when using mylar!).
- You can customize lettering for your patches within your Hatch software using ESA fonts (or other embroidery software, of course).
- Stitch the rest of your design.
- Remove your hoop. Your design will already start to come loose due to using a tear away. When you tear away your patch, some little fluffies are left on the outside of the patch. I usually take a soldering iron to try to burn away some of the excess stabilizer.

- Wash away stabilizer will help your results improve drastically.
When using a wash away stabilizer for your DIY patches, follow these steps.
- Hoop your wash away stabilizer.
- Run your placement stitch.
- Adhese your patch.
- If you used a no show mesh fusible then spray 505 or KK to have it stick.
- If you used tacky patch, then simply peel off the paper to expose the adhesive side.
- Line up your shape perfectly with the outline that stitched.
- Put the hoop back on your machine, and it’ll do a double run stitch where it will go around twice for strength and then do a zigzag stitch and finish the outer side.
- If you want to use mylar, add it in at this stage and secure it using painter’s tape (don’t forget to lower your stitch density when using mylar!).
- You can customize lettering for your patches within your Hatch software using ESA fonts (or other embroidery software, of course).
- Stitch the rest of your design.
- Remove your hoop. Cut close to the edge of your patch, dip your fingers in water and dab the outside of your patch to melt away the excess stabilizer. This will give you better results with a cleaner product.

- Prep patch film is my preferred method and will give you the best professional-looking results possible. It is engineered for patch-making purposes. It is heat-activated and made specifically for poly material, although you can use other materials with it.
When using prep patch film for your DIY patches, follow these steps.
- Hoop your prep patch film
- One side is smooth, and the other side is bumpy. The smooth side should be hooped upward, while the bumpy side is faced downward.
- Run your placement stitch.
- Adhese your patch
- If you used a no show mesh fusible then spray 505 or KK to have it stick.
- If you used tacky patch then simply peel off the paper to expose the adhesive side.
- Line up your shape perfectly with the outline that stitched.
- Put the hoop back on your machine, and it’ll do a double run stitch where it will go around twice for strength and then do a zigzag stitch and finish the outer side.
- If you want to use mylar, add it in at this stage and secure it using painter’s tape (don’t forget to lower your stitch density when using mylar!).
- You can customize lettering for your patches within your Hatch software using ESA fonts (or other embroidery software, of course).
- Stitch the rest of your design.
- Remove your hoop. Simply pull the film away from the patch, and it will give you a perfect finished edge. The prep patch film is the most secure of the three options.
Interested in Prep Patch Film? Click here for more.

Step 5: Post Patch Sealing
You’re almost done! You will want to seal your patch using a post-patch iron-on seal.
The post-patch iron-on seal is a double-sided heat-activated seal applied to the back of your finished patch for a clean, polished result. It will hide all of your jumps and trims and give your patch a professional feel and look on its unfinished side.
Interested in Post-Patch Iron-On Seal? Click here for more.
To use the post-patch iron-on seal, you simply cut a piece of it to your patch’s size. Put the post-patch seal on top of your patch and sandwich it in between two pieces of teflon. Place it under your hot press or your iron at 380°F for 15 seconds.

Take off your top piece of teflon and let it cool down a little bit. Be careful it’s not too hot when you peel it off, or you will have residue left on the bottom teflon.

Once it’s cooled a bit, peel the post-patch seal off and rip off the patch’s outer exposed seal while it’s still warm. Peel off the paper part of the post-patch seal from the design (you may need to use tweezers for those small leftover pieces).

Once it’s cooled a bit, peel the post-patch seal off and rip off the patch’s outer exposed seal while it’s still warm. Peel off the paper part of the post-patch seal from the design (you may need to use tweezers for those small leftover pieces).
You now have a professional-looking DIY patch with a clean backing.
Want an overview of the best patch-making materials available to create unique professional-looking patches from scratch? Click here to learn what we suggest. We know from experience which products will help produce the best-embroidered results.
2. Ready-Made Embroidery Patches

Our ready-made embroidery patches are finished embroidery patches (minus the personalized design you choose to stitch inside of them). They are designed to save you time and give you the most professional results possible. These patches are completely ready to be embroidered. Manufactured with commercial specifications, including true merrowed™ borders, these are the real deal.
Simply insert your logo/lettering within our “perfect placement” embroidery files, hoop the patch (we’ll show you how with bite-sized video tutorials), and hit the start button.
Having a finished patch with a merrow™ border already completed instantly increases your profits and saves you a minimum of 3000 stitches of production time.
To check out the different shapes of our ready-made embroidery patches, click here.
Ready-Made Embroidery Patches Tutorial
Step 1: Hoop your stabilizer
We do recommend using tear away stabilizer when using our ready-made patches.

Step 2: Embroider your placement stitch
Run the outline of where you will put your ready-made patch.

Step 3: Adhesive backing
Put some adhesive spray onto the back of your ready-made patch. Place it within your placement stitch and hoop back on your machine.
Step 4: Blanket stitch
A loose blanket stitch will run on top of your ready-made patch to hold the patch in place with few stitches. Your patch is secure for when you run your custom embroidery design on the inside.

Step 5: Remove blanket stitch with scissors from the back
Remove your hoop and turn your hoop upside down. Cut away the blanket stitch with scissors, and it will pull out in one piece.

Step 6: Post patch sealing
Remove the patch from the stabilizer and apply post-patch iron-on seal to have a professional-looking patch with a clean backing. Set your iron or heat plate to 380°F and place under for 15 seconds, cut a small slit into post patch iron on backing for an easy entry point after it has been fused.
Your patch is completed within a fraction of the time.
Check out our new blog, “11 Affordable Supplies Needed To Make Amazing Machine Embroidery Patches,” by clicking here, for a summary of the different stabilizers you can use, which ones are easiest to work with, and which products will help you achieve a professional finish on all of your patches.
Conclusion: You Can Make Embroidery Patches Easily with Professional Results
Patch-making has been the foundation of our business for decades, and we’ve produced millions of patches. Our extensive history and experience make us patch-making experts, and we’re honored to share our knowledge and new techniques with you.
To create the perfect professional custom embroidered patch, we suggest using one of two methods. To make things easy, our DIY Embroidered Patches includes design files that you must load into your embroidery machine, which simulate a merrow border patch. These were not created using automated software that can at times produce poor results but instead were manually digitized for flawless results every time. Using these design files allows you to create patches.
Try out our Ready-Made Embroidery Patches that have the real deal merrow border and are completely ready to be embroidered to make things even easier.
Want a more in-depth look at how to create embroidery patches with professional results? I highly suggest you sign up for our free workshop for a replay of our twice sold-out Patches Made Easy webinar now. It’ll teach you everything you need to know about embroidery patch making. Plus, you’ll also receive a free circle embroidery patch to try these techniques free! Click here for your free sign-up now.
Leave A Comment