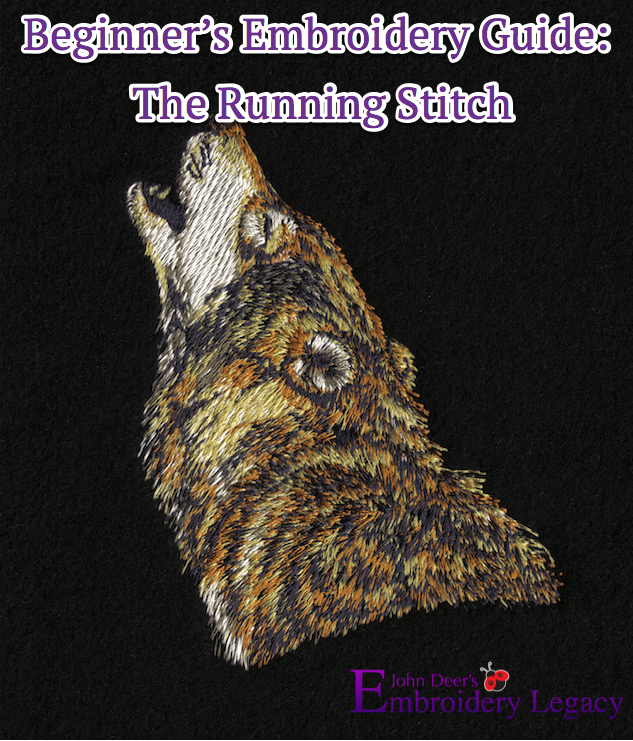
In the beginning, there was the Running Stitch, and from that single stitch, all the other stitch types were formed.

Putting all theatrics aside, that statement is very true. Thirty-seven years ago, when I was trained as a Schiffli puncher (on the pantograph machine shown below), we produced designs one stitch at a time. Everything from outlining objects to satin stitches to fill stitches was done with a single stitch type, the running stitch! Even the creation of underlay in its various types was constructed one stitch at a time.
Although today running stitches are mainly used for embroidery techniques like outlining, detail, and redwork embroidery designs… EVERY stitch type in existence stems from the basic running stitch.
I know the thought of creating designs that way may seem to have been mind-numbingly dull, but the truth is it was anything but that! Every aspect of an embroidery design and each movement on the pantograph had to be thought out carefully to produce visually pleasing designs that were also production-friendly.

It’s important to realize that the theory behind the simplest stitch type in existence is now present in all the automated stitches that our software creates today. Keep in mind that machines are now far more precise than the Schiffli looms of yesteryear.
Side note: Want to see live footage of the Schiffli machine above in action? Click here to watch a brief video on our history in the embroidery industry.
Considering that the Schiffli looms at that time had been manufactured in the 1930s and 1940s, they didn’t move with nearly the precision or speed that today’s machine frames do. This is mainly because these looms embroider on 20 yards of fabric at a time.
One of the most important things I had to consider as a Schiffli puncher was to ensure the machine always had adequate movement (minimum stitch length of 1.5mm) and never stitched in the same place more than once. Why? Because this creates what we call embroidery birds nests.
What is an embroidery bird nest, and why does it happen? Click here to learn more and how to avoid embroidery bird’s nests.

Having the loom stitch in the same place was a lot more of a critical issue than one you might experience nowadays. Currently, if you see a machine stitch in the same spot multiple times, you might get a little worried that you’ll create “hard” stitches on your machine, which could potentially lead to ‘birds nests’/thread breaks.
Today thread breaks are very irritating, and no one enjoys re-threading a machine, but it meant potentially creating hundreds of thread breaks simultaneously in the old days. I’m sure you can imagine it was pretty nerve-wracking. Plus, we used rayon thread back then, which is nowhere near as strong as polyester thread (currently the most popular and used thread of choice).
Want to see learn more about the different types of embroidery thread? Click here to check out our Complete Guide to Embroidery Thread.
Basic Rules of the Running Stitch In Machine Embroidery & Digitizing
Slowly but surely, my rules of working with the running stitch evolved over the years to adapt to today’s software and technology.
Instead of 1.5mm of movement between thread penetrations, it is now .5mm. I do consider .5mm to be in the red/danger zone as when your machine stitches as the mass of the thread and needle is approximately .3mm. Too many .5mm stitches close together will eventually create hard stitches and unfriendly or distorted designs.
I like to consider 1mm of movement the yellow zone, it will get you out of the danger zone, but for the most part, I’m always trying my best to create 1.5mm of movement between stitch penetrations. 1.5mm is what I like to call the green zone, and it promotes production-friendly designs with minimal hard stitches.

There is a difference between the maximum stitch lengths of a running stitch, depending if you’re stitching on a wearable or non-wearable item. The maximum for wearable items is 7mm, any longer, and the stitches could snag if you were to lean against any rough objects, like a brick wall. The maximum for non-wearable items is 12.1mm. If you go over 12.1mm your machine’s trimmer will activate and cause your machine to stitch out “invisible embroidery”!
How To Achieve The Perfect Running Stitch
Now, this is where having the right software can be a huge advantage. Hatch embroidery software has implemented a feature I’ve used within my commercial platform for decades.
While creating your embroidery designs, the software has a setting within its stitch processor that automatically removes short stitches. If the program sees any duplicate stitches within .3mm of each other, it will automatically remove them from the stitch file (or design) that you embroider out on your machine. This is a great built-in safeguard and is one of just many reasons why Wilcom is one of the most respected software companies in the embroidery industry.
Click here to download a FREE 30 Day trial of Hatch; we even include bonus educational videos to get you playing with the software right away.
As we’re now familiar with the running stitches’ minimum and maximum stitch lengths, we still have to keep in mind how stitch lengths are affected by the type of fabric the design is sewn on. This is especially relevant when it comes to underlay stitches (which once again are running stitches).
For example, the underlay stitch length on a cotton fabric would significantly differ when applied on terry cloth. The shorter stitch length applied to cotton would disappear into the knap of the terry cloth, making the underlay ineffective.
This is another example of where Hatch’s intelligent and intuitive stitch processor would take over. Think of it like using the autopilot on an airplane! With the click of a button, you can change fabric types, thanks to the fabric assist tool. The fabric assist tool will automatically adjust the stitch length of the underlay as well as the type needed for the specific fabric you’ve chosen. The best part is, there’s no magic wand involved… It’s just embroidery magic!
One word of advice I do have when it comes to controlling stitch penetration of the running stitch with today’s software is, you need to know how left-click (which are straight points) and right-click (which are curves) react while creating your running stitches.
I’ve found that I have far more accurate control of the exact placement of my stitch penetration when I use my left click/straight inputs. When I use the curve/right-click, the software tends to input more stitches to account for the curve of the objects.
Here’s a quick video tutorial showing how this technique can improve the quality of your embroidery designs using your mouse or pen. Check out the video below:
I know this almost goes against what you learned if you’re familiar with using graphics programs for print, but always remember, ink is not our medium; thread has a physical mass and weight.
The Running Stitch: Is Digitizing Theory Important?

I’ve always kept up with digitizing software, and I must admit that I’m blown away by what it’s evolved into! I wouldn’t believe you if you told me about today’s software’s capabilities back when I first started on that Schiffli loom all those years ago. Today’s software is now object-based in the same way graphics programs are.
Yes, objects, stitch types, and properties can be changed with the single click of a button now in embroidery software programs. Yet, you still need a solid foundation of old-school digitizing theory to understand what those properties are, what they do, and how to use them to create designs properly.
To clarify, in the old days, I used to do details and realistic effects using running stitches as my fine tip paintbrush. The only issue is that when you want to resize a running stitch design 100% larger, it is still a running stitch and doesn’t account for the details needed for the increase in size. So now I find myself using the automation in the software to create objects that will translate more accurately. Am I throwing away the fundamental theory I learned when I was 17? By no means! I’m adapting to the tools within the software and controlling the stitch length (running stitches) within those properties. Why work harder when you can work smarter?

I have been a Wilcom user for decades, and I’ve always thought very highly of their software. I even used Wilcom platforms when I worked in the commercial embroidery industry, running two embroidery factories while doing work for companies like Disney, Coca-Cola, and the NFL, to name a few.
A few years ago, we became an official Wilcom Hatch Reseller, and I know that we’ve already made a substantial impact within the home embroidery market and industry. I love explaining and showing home embroiderers the incredible advantages of working with true object-based platforms for embroidery. It’s something new, and the excitement in their eyes, when they see the capabilities in front of them, is priceless!

Knowing the old school theory behind embroidery and combining it with today’s modern software allows me to embroider without limits; virtually anything is possible! Even with the advances in today’s software the theory I was taught is still very relevant. Maybe even more so now, software developers are doing a great job at automating processes. But when things go wrong, and they will, it’s the old school theory that is needed to fix the issues. I wouldn’t be creating the designs I’m doing today without the theory I learned before embroidery software was even available.
I consider being born when I was an incredible blessing. It was a perfect time as I got to experience how embroidery was done 100 years ago yet also grow with the explosion of today’s modern software and technology. One thing I’m sure of is that the theory of yesterday is the foundation that empowers you to drive the software of today. Understanding the basics, even of the simplest stitch type/running stitch, is the first step to becoming an Embroidery Artist.
I even created a grand prize-winning design within the commercial industry using only the Running Stitch! It took me three days to draw and plan and a full day to digitize. Check out the video below:
Want more cool embroidery videos? Subscribe to our Embroidery Legacy YouTube channel for tons of helpful tips & tricks, we release a new video weekly!
How Can You Learn The Running Stitch Theory?
Now I’ve been telling you how important it is to learn the theory behind the running stitch, but have you been wondered where you can learn it?
Digitizing can be scary for some. Maybe it’s new and intimidating, or perhaps you’ve been too overwhelmed and gave up. But we’re here to help! Anything is possible with the right education and teacher. We’ve taught thousands of beginners, just like you, all across the world how to digitize their own designs and use the running stitch, and we can teach you too!
Every existing stitch type is a variation of 1 of 3 stitch types; the running stitch, the satin stitch, the fill stitch. But to run, you must first walk. Learning about the running stitch and its theory is essential to using any other stitch type.
If you’re interested or looking to start your Digitizing journey, we’d be happy to assist you with making sure your footing is right to learn how to walk and then run. We highly suggest enrolling in our Digitizers Dream Course where we discuss the why and when to do things, while also teaching the age-old theory and secrets behind creating smooth running designs in a way that’s easy to understand.
One of the best parts is this course is done at your pace and there is no time limit to complete it, so don’t worry about feeling rushed. We’ve taught almost 10,000 people how to digitize (including a 93 year-old student!), so you can learn too!
We hope you’ll join us in our Digitizers Dream Course to learn how to digitize with the three primary stitch types, as we dig further into theory, to help you create embroidery designs creating visually stunning results.
Conclusion: The Running Stitch Is Most Basic Embroidery Stitch Type… But Incredibly Important!
In conclusion, the running stitch is the most basic of stitch types. Mainly used for embroidery techniques like underlay, outlining, detail, and redwork embroidery designs.
It’s important to remember the rules of the running stitch, and it’s stitch lengths:
Red Zone: .5mm -The mass of the thread and needle is .3mm, remember too many stitches close together at .5mm, and you’ll create a bird’s nest / hard embroidery!
Yellow Zone: 1mm -1mm is playing it somewhat safe, and it will get you out of the danger of hard embroidery designs.
Green Zone: 1.5mm -1.5mm is your safest bet. As it truly promotes production-friendly designs with minimal hard stitches.
Remember, there is a difference between the maximum stitch lengths of a running stitch depending on if you’re stitching on a wearable or no wearable item. If you’re stitching on a wearable item, 7mm is your max stitch length. If your stitches are any longer than 7mm they could snag if you lean against any rough/coarse objects, like a brick wall, for example.
If you’re stitching on a non-wearable Items, 12.1mm is your max stitch length. If you were to go over 12.1mm, your machine’s trimmer will automatically activate and cause invisible embroidery!
Want to learn more about the running stitch and other important basic embroidery theory? We have a FREE Embroidery Digitizing 101 Cheat Sheet Video Course that’s a perfect start for you. This course will give you a foundation of embroidery digitizing theory that’ll help you understand designs and what’s really happening underneath your needle!
However if you want to dig a bit deeper and really understand the theory behind it all and start your digitizing process, we highly suggest to sign up for our new Beginner’s Embroidery Digitizing Virtual Workshop by clicking here.
Enjoyed this article or have a question about the running stitch? Please leave a reply in the comments below! We love hearing what you have to say… The next step of your Embroidery Legacy starts here with ours ?


It looks like a Dutch picture. (Amsterdam).
It is a great job and i understand you are the winner of the contest.
Yes you’re right, I suppose it does. I love the canals & architecture of old Europe 🙂
Thank you for the kind words!
What would happen to the red curved running stitch design, if I increase the stitch length to what is used in the green design. Would it not make the same end result?
Hi Tina, You can control the amount of penetrations within a curve depending on if you us curved or straight nodes. Straight node reduce the amount of penetrations, curved node will default to the minimum stitch property value within the software. I will use only straight node many times on small details to reduce stitch counts.