
If you’ve seen and felt beautiful embroidery, you will know nothing compares. Now, imagine being able to create the perfect embroidery design to match any occasion & personalize any project. Imagine the look on your friends/families face when you say, “I made it from scratch.” Chances are, if you’re reading this article, you’re ready to dip your toes into the waters of machine embroidery.
However, you may be asking yourself, “I have no idea where to start” or “I’m not even sure what I need to start stitching designs.” In this article, we’ll go over the basics of what you’ll need to start stitching and more importantly, start your own Embroidery Legacy. This article will cover:
Embroidery Machines for Beginners:
Number one on our list is, of course, the embroidery machine. Without your embroidery machine, you can forget about embroidery. It really is the most important piece to this puzzle. There are tons of machines on the market varying in all shapes in sizes, from single needles to multi-needle machines. Let’s briefly go over each of these machine types:
Single Needles:

Single head embroidery machines are generally more user-friendly and are mainly used for basic sewing and digital embroidery designs. Can you guess why it’s called a single needle machine? Because a single needle stays in place while the embroidery arm moves over the flatbed and embroiderers the design you’ve chosen. A small downside to the single needle is that you have to switch the thread every time you have a color change. These machines are widely available within most shopping centers and sewing stores and will most likely be the easiest machine type for you to find.
Although these machines are user-friendly and great for the hobbyist embroiderer, if you’re looking to start a business or make money with your embroidery, this won’t be the right machine for you. The largest hoop size for most single needle machines is 8×12. This means that embroidering jacket backs, hats & caps, bags, and other larger / uniquely shaped items are extremely difficult or impossible to embroider.
Multi-Needles:

While they can be slightly more challenging to master, multi-head machines are the “say all be all” for embroidery. Using a multi-needle machine unlocks unlimited potential for your embroidery. Although there is a learning curve when first starting on a multi-needle machine, it’s nothing you can’t handle, especially with all the great educational resources available online these days. These machines contain 4-16 needles, each of which sews its own thread color. This is a huge benefit, as you’ll save tons of run time without switching colors manually.
Another huge benefit to a multi-needle embroidery machine is the hoop sizes. Commonly, multi-needle hoops start at 4×4 and go up to jumbo-sized hoops (jacket backs, etc.). Most even have cap frames that allow you to embroider hats/caps. Click here to learn how to hoop and embroider on hats.
Not only are these machines more useful than a single needle for production, but they also create incredibly precise and detailed embroidery. Plus, they’re fast, which saves you time and allows you to output more embroidery.
Because these machines are often higher quality and have more capabilities than a single needle machine (keep in mind that this also does depend on the brand), they do often come at a steeper price point. In my opinion, if embroidery is your primary focus (not exactly sewing), a multi-needle is well worth the money you put in.
Are you interested in making money with your embroidery machine? Check out our How To Make Money With Embroidery Workshop, providing you with information and tips for an embroidery business at any stage.
It’s important to find the right machine for you. While shopping for a machine, remember to ask yourself, “How often will I be using my embroidery machine?” or “What products do I plan on stitching?”. You’ll likely need a multi-needle machine if you plan on stitching on larger or unique items like hats or jackets. Also, if you plan to use your machine for business purposes, a multi-needle is a must to increase production and more easily embroider tubular items (like shirts). Learn the best embroidery machine to start a home embroidery business.
Be sure to do lots of research when looking for a machine. What’s right for someone else may not be right for you if you have different embroidery projects in mind.
Embroidery Thread for Beginners:

It’s no secret that your embroidery machine uses thread to stitch out your designs. With so many threads to choose from (rayon, polyester, cotton, metallic, etc.) It’s hard to know which one to choose as well as where to start. Before we begin, it’s important we choose and understand our thread weight.
Thread weight is a little bit complicated as it doesn’t exactly work the way it sounds. For example, a low thread weight number means a heavy, thick thread. In contrast, a higher thread weight number is thinner and finer. Industry-standard embroidery threads are usually a higher thread weight number (Between 30wt-40wt).
The good news is that almost all machine embroidery designs are digitized for standard 40wt thread. There are some exceptions, but most websites will specify what thread weight they recommend you use within the design description.
Now that we understand thread weights, let’s jump into the different kinds of threads:
Polyester: This is the most affordable and popular form of machine embroidery thread, hard to break, simple to use, and available in every color imaginable. This easy to use thread is a great choice due to its strength and attractive shiny look. This synthetic thread type will last the test of time compared to rayon. Polyester thread is machine washable, making it a great choice for embroidered goods that will need lots of washing (clothing, towels, bedspreads, etc.)
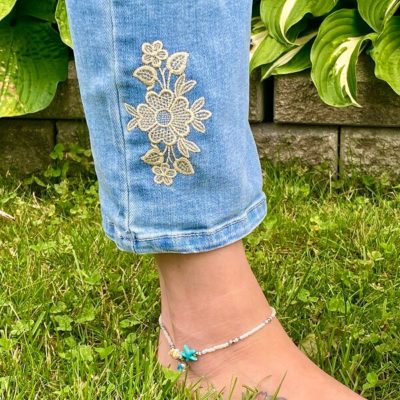
Rayon: Rayon thread is not as synthetic as polyester, and because of this, it’s not quite as strong. This can cause multiple thread breaks with designs that weren’t properly digitized, so I recommend using this thread type with designs from reputable vendors. Rayon is noticeably soft to the touch and produces a beautiful look & feel. Unfortunately, however, it can be run down over time, especially if repeatedly washed. I always recommend using rayon for stitching out our vintage 1950s free-standing lace (FSL) designs to get a beautiful finished product. Click here to learn other tips on stitching free-standing lace.
Cotton: The advantage of using cotton is it gives a more hand-embroidered look and feel to your designs. This makes cotton threads great for rework designs, quilts, and cross stitch designs.
Metallics: Metallic thread gives an incredible look, and a hard wire feel to your designs but can be quite tricky to master. The reason most people struggle with metallic thread is because of all the thread breaks. A lot of the time, people often get too frustrated and give up on metallic thread. Click here to learn the secret to embroidery with metallic threads, and never deal with a thread break again!
Want to learn more about embroidery thread? Check out our other blog article Types Of Machine Embroidery Threads And When To Use Them.
Embroidery Stabilizers for Beginners:

Stabilizers, another must-have to start embroidering. Stabilizers (also known as backing) are used to support your fabric while your machine embroiders. The stabilizer prevents the fabric from puckering and stretching. It’s important to use the correct stabilizer for the embroidery you’re doing, as using the wrong one can completely ruin a design/project. There are many stabilizers on the market, including Cut-Away, Tear-Away, Wash-Away, etc.
Cut- Away: Cut-away stabilizers are the strongest and most stable. While it can be used on any fabric type, it’s best when stitching on stretchy or knit fabrics. The reason it’s called cut-away stabilizer is because of how you remove it. After your design finishes stitching out, you simply cut away the excess stabilizer left around your stitches. Make sure you leave the stabilizer underneath of the stitches in place, as that will keep your stitches in place indefinitely.
Wash-Away / Water Soluble: Wash-Away stabilizers are great for designs/projects that can’t have any trace of stabilizer once the design is finished. A good example of this would be freestanding lace, or a design that will be looked at from the front and back. This stabilizer isn’t as strong as the others but works wonders. Plus, it’s magic… Simply rub water onto the stabilizer and it will disappear! Hence the name wash-away.
Tear-Away: Tear-away stabilizers are used when you need to remove most of the stabilizer on the back of your designs (between stitches and open areas). Tear-away can be used on almost all fabrics, but exclude stretchy and knit fabrics. To remove this stabilizer, all you have to do is simply cut or find an open end to the stabilizer and tear it away.
Want to learn more about embroidery stabilizers? Check out our Complete Guide to Machine Embroidery Stabilizers.
Embroidery Designs for Beginners:
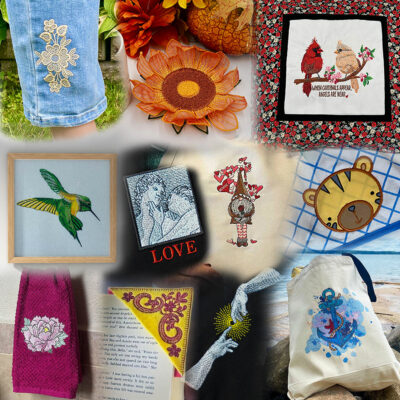
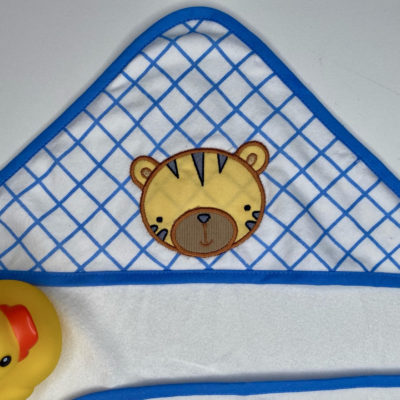
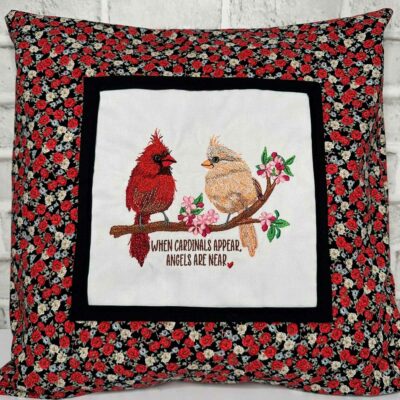
Want to download the 11 embroidery designs shown above for free? Download them now with our Free Embroidery Legacy Design Kit.
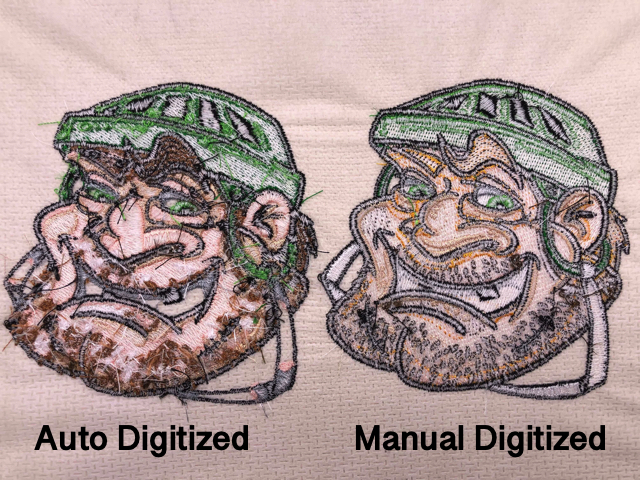
Now that you know what you need to start embroidery, you’ll need designs to embroider! Now, you might be thinking, “I can find embroidery designs anywhere online, so why not just use the free ones?”… Well, let me tell you that this isn’t always the best approach. While you can do that, I’m going to let you in on a little secret that will save you tons of time and agony on your machine.
If it’s a free design on a non-reputable website, don’t download it! I often hear of people downloading free designs, but what appears on their computer screen and what stitches out are two completely different things. Not only can the design look like a disaster, but it can have disastrous results on your machine! If the digitizer didn’t know what they were doing, it can cause multiple thread breaks, bird nests, and sometimes even broken needles.
Simply put, not all designs are created equal and often, you get what you pay for. If an embroidery design wasn’t created properly in the first place by someone who knew what they were doing, you can’t expect it to sew out well on your machine.
Now you may be wondering, where can I find reputable and machine-friendly designs? Talk to your embroidery friends and see what others recommend! My recommendation is, well… us! Our site has close to 30,000 high-quality embroidery designs to choose from, including authentic vintage lace embroidery designs from the bridal industry in the 1950s, step by step in-the-hoop project tutorials, applique designs, and so much more! I feel 100% confident recommending our designs because each and every design was digitized correctly by John Deer, the world’s most awarded embroidery digitizer. Give any design on the site a try, and I’m sure you won’t be disappointed.
Now, if you want to download 11 designs from us for free, you’re in luck! With our Free Embroidery Legacy Design Kit you can download the 11 beautiful designs above (no credit card required)! We’ll also throw in some free beginner tutorial videos to help you master embroidering different types of designs.
Machine Embroidery Design File Formats for Beginners:
Now, if you’re starting with machine embroidery, you will notice that there are many different formats with embroidery designs. File types like .pes, .jef, .art, etc. Your embroidery machine will take a specific type of machine file format. These are file formats that your embroidery machine can read like the ones listed above. If you don’t yet know which file format your machine takes, click here for a chart.
Beyond machine file formats, there are native file formats that embroidery software reads and expanded file formats mainly used by commercial embroidery machines. Don’t worry too much about these for now, as you’re just starting. However, when you do have a free couple of minutes, I suggest you read our article on Understanding Machine Embroidery File Formats to understand file formats in the embroidery world better. Or, check out the video we created to help educate you below:
Embroidery Hooping for Beginners:

Hooping really is the first step when it comes to getting your fabric onto your embroidery machine. If you hoop your fabric too loose and it moves around while in the hoop, you’ll end up with puckering and a finished project that looks horrible. On the other hand, if you hoop your fabric too tight, you will end up with what embroiderers call “fabric burn,” which is when your hoop leaves a permanent mark/indent on your fabric. Hoop burn can be particularly damaging to more fragile fabric types used in machine embroidery such as silk.
Hooping really isn’t too complex once you get the hang of it. Generally speaking, we recommend presetting your hoop to the right size before you actually hoop your fabric. We also suggest you avoid fighting the hoop after the fact, once again, to prevent hoop burn.
If you’d like a complete guide and tutorial on embroidery hooping, click here to read our guide or watch the video below. Our guide features many more tips and tricks than are included in the video below, if you enjoy the video definitely check out our guide afterward.
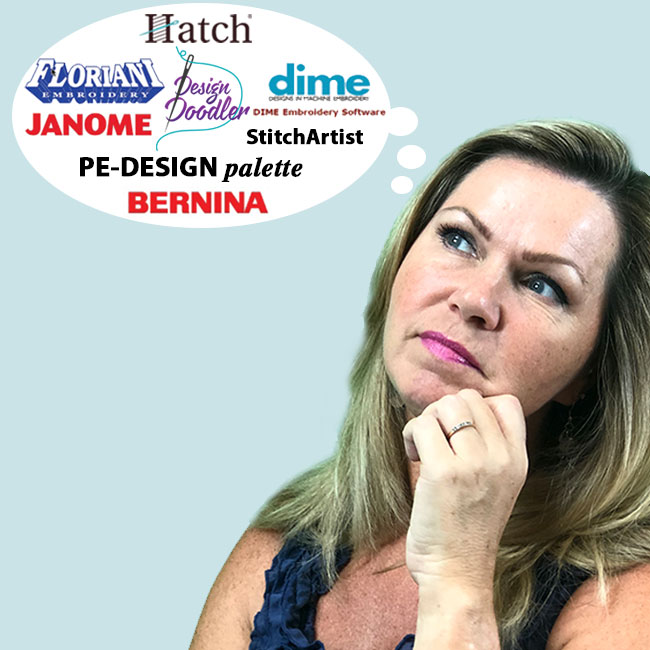
Embroidery Digitizing & Software for Beginners:

Create

Embroider

Impress
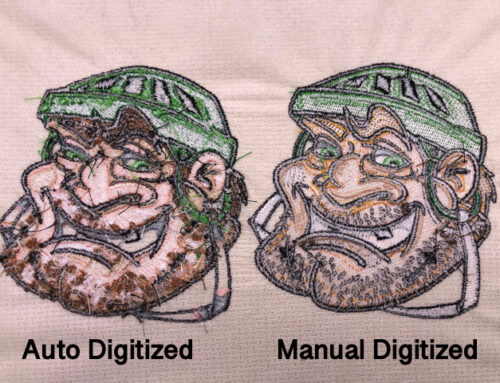
Finding designs online is great. However, it can often feel impossible to find exactly what you’re looking for. As an embroider, when I have a project idea, I often envision exactly what I want before I can even begin searching for a design to use online. In situations like this, learning to create your own embroidery designs is incredibly useful. However, it does take time.
If you want to learn how to create your own embroidery designs (i.e to learn embroidery digitizing), it’s important to understand the theory behind digitizing first. Knowing what’s happening behind the scenes on your machine and within your software is key to optimal results!
If you want to create or edit your own embroidery designs, I would highly suggest starting with our free Embroidery Digitizing 101: Cheat Sheet PDF & video course. As of right now, it’s 100% free and will teach you some basic digitizing theory that’ll improve EVERY aspect of your embroidery. Click here to enroll in the course now.
If you don’t yet have embroidery software, there are many free trials out there. Always try before you buy!
Conclusion: The Next Step of Your Embroidery Legacy Starts With Ours
You now know what you’ll need to start machine embroidery. Learning to embroider is an exciting journey, and we’d love to be a part of yours! Whether you use any of the products we sell or simply subscribe to our newsletter and follow us on Facebook for free education and giveaways, we look forward to seeing your progress and growth!
If you did enjoy the videos provided here as well, please don’t forget to subscribe to our YouTube channel!
Do you have a specific question about starting machine embroidery or enjoyed this article? Be sure to leave a comment below or join our Machine Embroidery & Digitizing Made Easy Facebook group.
P.S. Are you ready for high-quality, always smooth-running embroidery designs? Get the free Embroidery Legacy Design Kit featuring 11 fan-favorite designs.
I have always enjoyed all about your patterns, but what caught my eye this time was the explanation of threads, you talk about weights, but what happens if you start embroidering something and your embroidery thread starts unraveling and tangles up and destroys the pattern? This has happened a lot of time. I do hope you continue with . I do hope that when ever all this over I can attend another of your on the road programs
I’m glad you enjoyed this blog. Thanks for your support RoseMarie!
I have enjoyed the designs and website for years , and am always learning something new. Thanks for all of the education that is made available for us.
Thanks for your support!
I have a Bernina 780 embroidery (single needle) and a Apple Mac laptop can I use your designs. Does the designs that I choose download to my laptop or do they come on a CD or USB jump drive?
Hi Bonnie, yes you can download any design onto a Mac and then save the file onto a usb to transfer onto your machine.
I am trying to specify the HUS for my purchase. Is that possible or due you receive all the formats?
Yes you do! Our embroidery designs come formatted for all popular machine brands including art, dst, exp, hus, jef, pes, shv, vip, vp3 and xxx.
My mane is DiAnna Kidd and I am attempting to download designs from your sight in the HUS format , I am locating an area when I can choose the format. When you purchase do you receive all the formats?
Yes correct you receive all popular file formats 🙂
This is my first time to use a design that did not come stored in my machine’s memory. My machines uses .PES files.
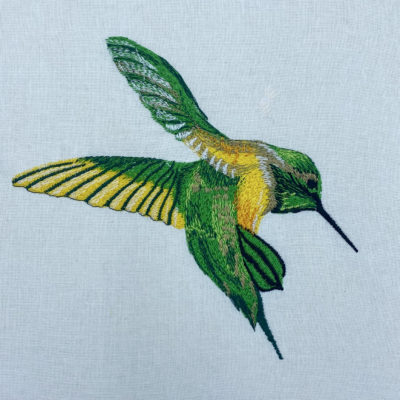
I downloaded your embroidery files for the hummingbird. I have loaded 3 files from the download onto my USB flash drive:
D-4019 Hummingbird Altitude L.PES
D-4019 Hummingbird Altitude M.PES
D-4019 Hummingbird Altitude S.PES
Is this all I will need on my flash drive to stitch the hummingbird?
Yes, you can choose one of those files. The L is the large file, the M is the medium, and the S is the small size. You can choose which design size you wish to embroider
Hi John,
How do I know what format my machine takes? I purchased a Bernina 770QR Plus with the embroidery module, then hurt my back. I cannot carry my machine downstairs to Gaul it to the store to take the classes. I feel like I’ve invested a lot of money for nothing!!
Hi Marsha, Bernina takes .art format which we provide with all our embroidery designs.
“Good morning, I am fairly new to embroidery and I have a Husqvarna Viking designer Ruby machine. And I need a new computer I was wondering if you had any suggestions on what kind of lap top would be best to use for my programs and down loads? Would appreciate any suggestions you might have. Thank you so much.
Great question Angie. Most embroidery related programs are like graphics software which require faster processors and enough ram, I suggest you look at the minimum specs for the software programs you’ll be running and make sure the specs on the laptop are much faster.
I just want to say, “Thank you so much for offering your expertise to us beginners like me!” I just purchased an embroidery machine and wasn’t quite sure where or how to begin…now I do know! Thank you, thank you, thank you!
We’re happy to help on your embroidery journey!
Hello what tape is used to tape fabric for embroidery?
Thank you
You can use painters tape from Walmart or the dollar store 🙂