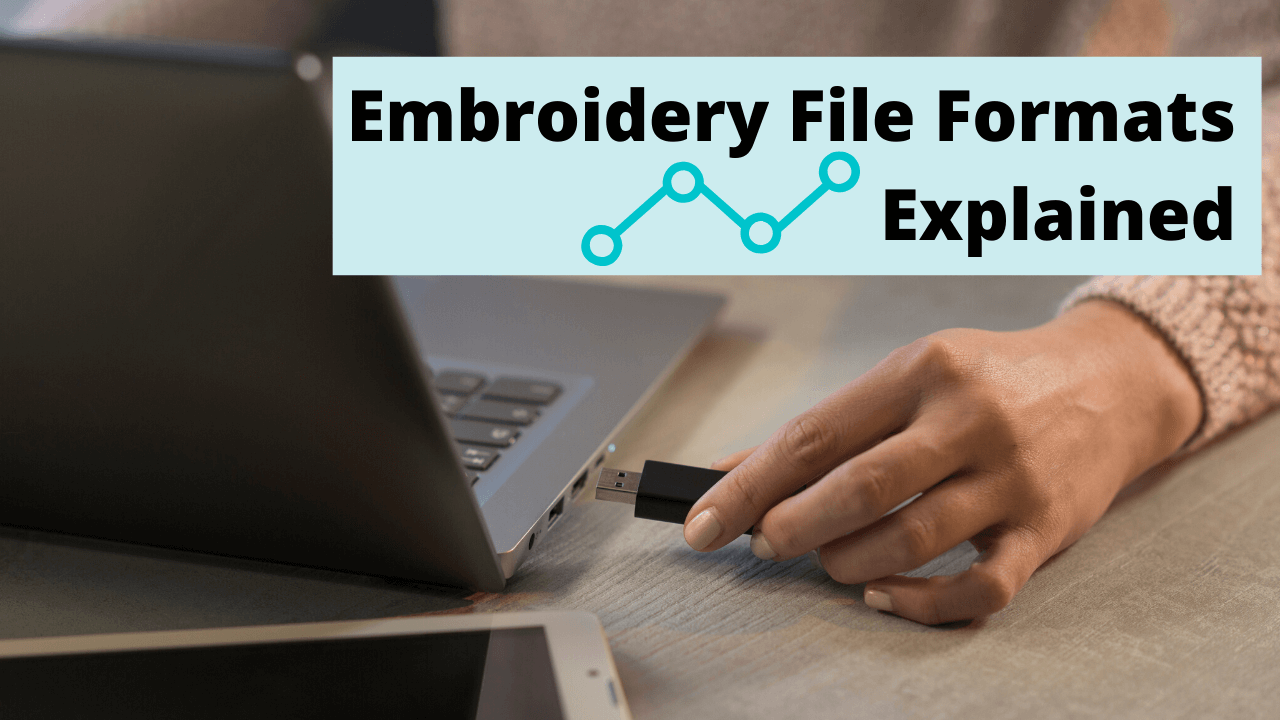
This complete guide covers everything you need to know about machine embroidery file formats. It’ll teach you which file format you need for your embroidery machine and also dive into some essential knowledge that EVERY embroiderer should know by covering the 3 main types of embroidery files formats:
- Expanded file formats
- Machine file formats
- Native file formats

What Are Embroidery File Formats?
Embroidery file formats are how an embroidery design is saved to be stitched out on a specific embroidery machine brand. Certain embroidery machine brands (such as Brother or Bernina) require different embroidery design file formats (such as PES. or ART.). Simply put:
For an embroidery file format to be read or understood by an embroidery machine, it must speak the native language which an embroidery machine brand recognizes.
Make sense? If not, let me try to break it down.
With computers, we’re all familiar that there are PC computers & Mac computers. As you well know, specific programs and files are created to only run on PC, while specific files are created to only run on Mac. In other words, certain programs & files are proprietary towards either a PC or Mac-based operating system. They only run on one or the other. The same thing goes with embroidery file formats. A certain embroidery file format (example: PES.) is proprietary towards a distinct embroidery machine brand (example: Brother)
How Embroidery File Formats Have Evolved
At the beginning of my career, there was only a stitch. That stitch made a running stitch, a satin stitch, and then a fill stitch. It all started with a single stitch. That was over 35 years ago, and I must admit much has changed since I began my career as a manual pantograph puncher.
Since those early days, I’ve seen the embroidery industry evolve incredibly. From manually placing stitches, to paper tape readers, to 5 ¼ floppies, and finally, to the world we now live in where all our data is magically stored in an imaginary cloud.
In the early days of embroidery automation, Schiffli looms were run by reading Jacquard paper tapes. Those tapes were the first embroidery file format, and just like today, they worked within a mathematical foundation. The “automat” at the end of the loom fed the tape through its reader. Much like old paper tape music boxes, the reader consisted of pins that would release through the holes on the paper tape and give the machine commands. I would move X or Y (direction), initiate machine functions like needles in or needle out, slow speed or fast speed, dull plate in or out, and a stop/color change command. In many ways, our modern machines work in a very similar way.

(Schiffli Embroidery Machine – what I learned to digitize on)

(Jacquard Paper Tape)
I can remember when I had to learn how to read Jacquard and then eight-channel tapes in the early Tajima days (the 1980s). It’s important to remember that no designs appeared on computer screens with editing capabilities in those early days. Instead, I had to learn how to edit designs while reading paper tapes. While unwinding the tape, you’d know to look for familiar patterns for running, satin, and fill stitches. Color changes and jump commands had fixed commands, and by piecing all of that together, you would learn to read your way through the design you digitized.
If an error was found, you’d need to cut out the tape section with the error, re-punch that section, and then splice the design back together. Usually, you prayed that everything would line up correctly as you wouldn’t necessarily find your error until you ran it on the machine. To be honest, in those days, I never edited a design that was created by someone else. Understandably, the person who made the design was the one who could most easily correct it, as much of the process was remembering what you did in the first place. You’d almost have memory recall as you unwound the tapes, seeing the commands and patterns.

(Converting Jacquard to 8 channel)

(Tajima Machine)
1- Expanded File Formats
Some of the first expanded formats I used were .dst/Tajima and .exp/Melco formats. These are still in existence today, and almost every embroidery machine, whether in the commercial or home markets, will read one of these two formats. We still supply both these formats when we convert our designs for download (we have close to 30,000 embroidery designs available on our site, click here to browse our designs).
The reason why is that they are what I like the call the written in stone formats. While in the conversion process, they rarely, if ever, get corrupted from the original. Like the originals, they are simply x and y movements and commands. When I convert from my Native file format to a Home format, I notice that there may be a corrupted area. A patterned motif fill looks perfect on-screen but then somehow changes when it embroiders on the actual machine! There are many variables when looking for specific errors, so I always suggest going to the expanded .dst or .exp file.
These expanded embroidery formats don’t mess up; what you see is what you will get, which is the main reason why most people don’t like to use them! They are the smallest embroidery files in regards to data size. Because they only see stitches and commands, they don’t even recognize thread colors.
These files will always set to your machine/software’s default colors, so your pink pigs might default to green if it is the first default color on your machine or within your software program.
2- Machine File Formats

Sixteen years ago, when I began my crossover as an educator in the commercial industry to the home industry, I must admit I was just a little overwhelmed. After learning a dozen programs commercially, the home market had a couple dozen more to digest. Most confusing was all the different file formats.
Commercially when we created and sold a digitized design, we had our software’s native format and then gave the customer that (if they owned the same program) or a .dst/.exp format, and that was it! The home industry had a native format for each program and then machine formats in varying versions for all the different machine brands. I went from providing at the most three formats to creating what I call the Top Eleven.
This is what my list looks like now .emb, .dst, .exp, .art, .hus, .jef, .pes, .shv, .vip, .vp3, .xxx.
Here is a list that should help you figure out which embroidery file format you need for your type of embroidery machine:
(Please keep in mind there are many more than listed below)
Machine Brand Embroidery File Format
Janome : JEF.
Bernina : ART.
Husqvarna / Viking : HUS. & VP3. & VIP
Brother / Babylock / Deco : PES / PEC
Singer : XXX
Pfaff : PCD / PCM / PCS
Tajima : DST
Melco / Bravo : EXP
I have to use four different programs to ensure the best conversions for the files we post for download. I’m so paranoid about conversions that I don’t delegate what should seemingly be a simple task to anyone. I still do every design conversion. Yes, I might be a bit of a control freak, but in my defense, but I know what to look for with regards to all the little things that can go wrong when converting designs. I want to be as sure as humanly possible that the conversions are correct when posted. It would be far too costly to run a physical sample of every design eleven times, so it’s best to remain paranoid.
These machine-specific formats are the preferred formats used today as they do retain color information within the designs, ensuring that your pink pig always remains pink!
In the early days of transitioning from the commercial to home markets, I had to deal with one very unhappy customer. The reason being, she called our toll-free number complaining because the design pack called Red Roses she purchased at an event was showing up on her machine as yellow roses, not red. She insisted that she did not like yellow roses. She only liked red roses and demanded that we make them red, or she wanted a refund. I must admit that I was just a little perplexed at her demand.
As I did not come from the home market’s colorful world, we would simply choose a red thread in the commercial market, and the problem would seemingly be solved. I was eventually able to calm her down and convince her to change her machine’s thread color. Although she did put up a good fight, I still smile when thinking back on that conversation.
Why are there so many types of machine file formats?
Unfortunately, the different embroidery machine brands available in the embroidery industry today don’t exactly play well together. Different brands want to be unique and have their own embroidery file format. Why? Because it creates brand loyalty and makes you less willing to switch machine brands in the future.
Think about it this way; if you were to spend five years building a database of a couple of thousand PES. embroidery designs for your Brother embroidery machine, you would likely not want to get a Janome machine down the line as your old PES. designs wouldn’t run on your new Janome machine. Reason being? Janome embroidery machines use JEF. embroidery file formats, not PES. Smart, isn’t it?
For this reason, if you ever switch machine brands, we provide you with all the main embroidery file formats at once when you download any of our Embroidery Legacy embroidery designs.
Why are there so many versions of machine file formats?

Much like anything technology-based, new “updates” are continuously released to make your user experience better. Just as apps are continually updated to perform better on newer phones, embroidery file formats are continually updated to perform better with newer embroidery machines.
As a general rule of thumb, most embroidery machines will still run older versions of their machine file format. For example, a brand new Brother machine would still be able to run .PES designs saved in older versions. If you’re looking to give away or sell a design you created in your embroidery software, using an older file format rather than the newest one would likely be the safest best bet. This would ensure people with older machines can still run your design file.
3- Native File Formats
Native file formats are the formats created within whatever embroidery/digitizing software you own. Many of these formats (depending on the program) cannot be read in any embroidery machine; they are specific to and created within the software program. After creating a design in your embroidery software program as a native file format, you often must then export it to a machine file format to be read/used on your embroidery machine.
People will often import a .pes file into their software and then save it as the software native format, which is not a true native file. It has been converted, and some of the original data may have been lost in translation.
To further explain, it’s like the difference between a raster and vector art file. A raster file, for example, is like a .png file and has a defined resolution; it could be a low or high dpi (dots per inch). If it’s high, the artwork will remain clean when zooming. If it’s a low dpi the image will become a blurred staircase when zooming. The higher the resolution, the clearer the image, the larger the file.
Vector art files, which are often created in Corel or Illustrator, are made up of nodes, not dots per inch. An arch might consist of only three nodes, and whether you put it on a matchbook cover or a billboard, the artwork will always be the same, perfect! You can convert a .png file to a vector file; the software will look at the arch and automatically define the shape. But it won’t do it using only three nodes. It might put in twenty to define the same curve.
Our embroidery software works much in the same way. We have our native file formats created within the software using the original node and properties you chose. If you want to make changes or resize a design, it will always be faster and give better results using the native format over an expanded machine format.
The native file format developed by Wilcom is called .emb, and is now available within Hatch embroidery software for home embroiders. It is by far the most advanced native file format available. The Wilcom platform is both intuitive and intelligent. It puts the user on autopilot and helps choose the right properties for creating production-friendly designs at the click of a button. Resizing designs, changing fabric types, and generating object-based lettering is something the home industry has never truly seen until now.
Being a Wilcom user for 30 years commercially, I realized that their software was the defining difference between the home and commercial markets. As an official Hatch reseller, the last four years have been exhilarating, as I get to see people’s reactions when I show them the automated features now available in Hatch.
If you’d like to download a free 30-day trial of Hatch embroidery software & try these features for yourself, click here.
I remember over 30 years ago, the first Native format I used was called Melco .cnd. It was my first board-based system where I didn’t have to create stitches one at a time. The board, called a Digitrac, consisted of a pad that had marks and function keys. Mark 1 was the start of an object, mark 2 was a continuation of the object, and then you move point-counterpoint to define the object and create stitches. Mark 3 had to be perfectly placed with the center radius between your mark 2 to create a curve.
Confusing by today’s standards, but I can assure you it was a miracle at the time! I still remember seeing an embroidery design appear on a computer screen for the first time. My eyes were like saucers, I’m sure! The ability to move a single stitch with a trackball was more than I ever could have imagined.

Today we have intelligent and easy-to-use software available that automatically improves the running ability and stitch quality of designs.
All I can say is we sure have come along way from where my family started in 1958, and I’m so excited to see what is to come!
Can I Edit Finished Embroidery Files?
Yes, you can certainly edit/adjust finished embroidery files within almost any format. One thing to remember though, is that if you want to edit or resize a file, you will always have the best result when using the format native to the software you use.
Wilcom’s native .emb format used within the Hatch program will allow you to resize files and change all the properties with a design at the click of a button. You can use the “fabric assist” tool to go from Thai Silk settings to Terry Cloth, and within seconds, the underlay, density, pull compensation, and stitch count will adjust correctly. It’s amazing! But if you bring a PES file into Hatch and convert it to an EMB file, it will work, but it will not modify as well. I guess you could say it got lost in translation. If you’re looking for a program to help you edit embroidery file formats, be sure to try the 30-day free trial of Hatch.
Can I Convert Between Different Types Of Embroidery File Formats?
Yes, you can convert embroidery file formats from one to another. Although most times, the process is not perfect.
Keep in mind that with some conversions, information can get lost throughout the process. Think about it like a game of broken telephone or translating between two different languages. If I told a translator something particular in English, chances are it wouldn’t come out exactly the same when being “converted” into French. Here are a few notes to keep in mind when converting file formats:
- It is often best to convert a native file format (software-specific) into a machine file format (embroidery machine-specific).
- When converting an expanded file format into a machine file format, color information will still be missing.
- Converting between different machine file formats (for example from .PES to .JEF) will often damage your design’s integrity.
If you’re more of a visual learner, here’s a great quick tip video I put together that should help.
Subscribe to our YouTube channel now for more great embroidery tips & tricks!
Conclusion: 3 Main Types of Embroidery File Formats
I know we went over a lot, but the main take away for this article is that there are three main types of embroidery file formats:
- Expanded File Formats: These formats are commercial embroidery machine formats such as .dst and .exp. They are the smallest files in size and mainly consist of simple x and y movements and commands for your embroidery machine to follow. They also do not retain color information.
- Machine File Formats: These file formats are specific towards different embroidery machine brands and tell your machine the commands necissary to embroider designs. They include .jef, .art, .hus, .vp3, .vip, .pes, .pec, .xxx, .pcd, etc.
- Native File Formats: These file formats can not be read by any embroidery machine but can be read and written by embroidery software. These are the best “working files” to edit a design with and are later converted into a machine or expanded file formats to run on your machine.
I hope this article has helped you to better understand the confusing world of machine embroidery file formats. Although there is a lot to grasp at once, the nice thing is that there really are only three main types of embroidery machine formats. As I mentioned throughout the article, regardless of what embroidery machine you own, Hatch embroidery software is a perfect all-in-one solution that’ll allow you to easily edit and convert your designs and file formats. If you haven’t already, click here to download the 30-day free trial of Hatch through us now.
Still have questions about embroidery file formats? Post your question below.

Is your hatch wilcom embroidery the maker of the Bernina designer system ? Or the other way around. ? I’m not good at either it have both. And they look similar. I am old and in a senior citizen computer class who is helping me organize my computer. And bought designs. And hope he doesn’t mess up !
Hi Nile, actually Wilcom is the creator of both Hatch & Bernina. However, because Wilcom’s name is behind the Hatch software (and they do not simply white label it like they do for some of the other home programs they create such as Bernina) there are more features in Hatch. For instance, ESA font technology (amongst other features). If you already own both I would recommend using Hatch, however if you are more comfortable with your Bernina software, than that would be your best bet 🙂 Good luck in your computer class!
I am looking into coding and embroidering at our maker space.
Is there a machine you would recommend we purchase?
I am learning it should be an EMBROIDERY only machine.
The plan is to use TURTLESTITCH to teach the kids to code and then have them embroider their creation.
Any help from you guys would be truly appreciated.
Kindly,
Adriana
Hi Adriana,
I would recommend you check out the Redline 1501 machine. It’s a great commercial machine that runs extremely smoothly and isn’t crazy expensive (in fact quite the opposite). We just had one shipped to our office for testing a month or so ago & have been quite impressed thus far. Also, if you do end up getting one, be sure to let them know we referred you with the code DEER19 and we’ll send you a free small Echidna Hooping Station as a bonus. Hope that helps!
Hello,
I just purchased the Hatch software and was wondering , when saving the design digitized in a machine format that works with either of my machines, do I need to be aware of the problems you indicated above when not using the “native” software for my machines format?
Really am enjoying the Hatch software and your classes.
LW
Hey Linda,
Congratulations on your new software! Very happy to hear you’re enjoying the software & my classes.
You’ll be fine if the file was originally created as an .EMB file in Hatch and then later saved (or exported) to a machine format (such as .PES) to run on your machine. The key here is that if possible, designs should always be saved in their native file format if you plan to work on / edit them again in the future. If the file was a design you purchased elsewhere already in a machine format (for example .PES), you can continue to work with the file as a .PES file in Hatch but may not get the same results as you’re editing a machine, rather than a native, file format.
What an interesting article! I am wondering if it will ever be possible to do a design in Photoshop or other design software and convert it to an embroidery file? I do most of my drawing and designing on my iPad in Procreate. It seems to be my best medium if you will. Anyway I certainly learned a lot and you explained everything so well!
I saw the comment you answered about the Redline machine, I’m going to look into that. I find the newer machines both sewing and sergers are very temperamental and I feel fortunate that I have sewn since the age of 5 and kind of manage to get myself out of jams by experience of knowing my way around the mechanics of things. Anyway I hope the Redline is easy to find.
Thanks again!
Hey Mary,
Glad you enjoyed it 🙂
Yes, of course you can! That process is called digitzing (turning artwork into an embroidery based stitch file to run on your machine). If you’d like to learn more about it, I highly suggest you checkout our free Digitizing 101: Cheat Sheet & Video Course: https://www.digitizingmadeeasy.com//embroidery-digitizing-beginner-cheat-sheet/
Hope that helps & thanks for commenting!
I am seeing some designs with .pes and v6.pes. What is the difference? I know that Brother uses .pes or .pec, but which machines require the .pec? I am not seeing pec as an option when I unzip designs.
Hi Sandra,
v6.pes is just an older version of pes, new brother machines will read the older versions but the older machine may not read the newer versions. Most digitizers (including ourselves) will save our pes files in the older version to avoid potential issues with owners of older models not being able to read the files.
I use an old, no longer supported software OESD Explorations for my Bernina 750. Fonts could be added (.tba files), but I don’t see those available anymore… are they available anywhere?
Hi Chris, unfortunately to my knowledge I am not aware of anywhere you could still find those.
You’d likely get better results with a newer font file format.
I am having a problem with some
.cnd files that I have downloaded from Dakota Collectables and I use
Hatch v2.0. A lot of the designs have
A run stitch that stitches across the
Design. Not sure if downloading a .dst file from site would eliminate the problem or is it something that must be done in hatch. Any advice would be appreciated.
Dave
Hi Dave, .cnd files are a very old Melco format that is pretty much a thing of the past. Under “software settings’ in Hatch please try choosing “leave file as stitches”. If that doesn’t work the .dst would be your only option as .cnd files really aren’t common practice today. Hope this helps! 🙂
What is a vector PDF file. Someone sent it to me as a digital file but it came across as PDF only.
Hi Lyn,
Vector files are images that are built by mathematical formulas that create points on a grid. While more common raster files are made up of the colored blocks (known as pixels). Because they can infinitely adjust in size without losing resolution, vector files are more versatile for certain types of tasks than raster files. They are also easier to modify and change. Hope that helps 🙂
i have saurer epoca 2 machine so can i use your software for it?
it use pat & npf formats
Hi Badr, is that a commercial loom machine? No, unfortunately, Hatch and most other home embroidery software brands will not export to these formats.
Hello
I originally learned on Brother single needles and have used PES files for a while. My newer machine is a Melco. I do a lot of photo conversion to stitch file (using Embird, mostly, but also Wilcom now and again). Once I leave the “vector space” of EMB (Wilcom) or EOF (Embird), I need to get it into my Melco machine (which can “read” most formats, but prefers OFM or EXP). If I want my color data to be understood by may machine, I have to go from vector file to PES, then I use a Melco product called Design Shop to convert the PES to OFM, then I can read that from the machine. There has got to be a better way! Plus, I was told that PES format is not exactly the “most efficient” or “cleanest” stitch file format. I’d like to use DST or EXP, but all the color data is stripped away. Do you have a thought about the best file format (to get me from Wilcom or Embird) into my machine, and keep the color information? Thanks a bunch
Hi George,
As OFM is the Melco native format I don’t believe there are any other options to assign colors other than Design Shop.
Hope that helps!
What is the inf format do. when I download my designs I delete all formats not necessary to my machines. I download Vip, Jpg, Pes, Vp3..Will they work if I don’t download INF?
Hi Tina,
I’ve never heard of an “INF” format. That said, you shouldn’t need it to use your other formats 🙂
does hatch have a way to convert embroider files into ‘art’
Hi Marcia,
Yes, Hatch can convert embroidery files into most popular machine brands including art 🙂 Simply click on “File” in the top left-hand corner, then “Export Design”, then select “art” under the “Save as type” section and click save.
Happy stitching!
I have a friend with a computerized longarm quilting machine that uses “.QLI” files to stitch out on her longarm. Is there anyway to digitize .QLI files with embroidery software such as the Hatch software? I use Embrilliance Stitch Artist 1 however do not see that file extension on the drop down list. Just wondering how are QLI files are created for quilters? Thanks!
Hi Kathy, great question. Unfortunately, no embroidery software programs (that I know of) can digitize .QLI file formats for quilters.
Do you offer a service to convert my logo into the top formats? Thank you!
Hi Christine,
We don’t personally offer a service like that. However, if you download the free 30 day trial of Hatch you can do it yourself using the “Export Design” feature 🙂
I have an EPS format logo file that I’d like to have converted to Singer’s XXX format. How might I do that?
Hi Paul,
Most embroidery software programs have the ability to convert from one embroidery file format to another.
Just keep in mind that sometimes certain attributes of the design may get “lost in translation” during the process.
If you don’t yet have software, please feel free to download the 30-day free trial of Hatch through our site to give it a try 🙂
Hello,
I am just beginning to use embroidery in my quilting. I have an older Singer Legacy that was given to me. However, it only reads XXX files. Is there another fomat that it will read. I have lots of multi format patterns, but none of them have XXX files. Is that format compatible with art, dst, exp, hus, jef, pes, vip, or vp3 at all. Or is this a machine that will be a shelf ornament?
Hi Kathy, at embroidery legacy we do include the xxx. files. Also, you can purchase base level of Hatch (Organizer $149) and it will allow you to export to xxx for your files you have in other formats. https://www.digitizingmadeeasy.com//hatch-products/
Can a machine file such at ART be viewed in a pdf viewer or as a jpg or some other photo file?
Hi Annabelle, unfortunately no. Embroidery specific software is needed to view the files.
Hugh help! My 5D Pro Viking is wonderful and works well with my Viking Topez 20. As a backup, I’m considering getting a Brother se. You said the software is compatible. Do I need to adjust the software settings when switching machines? Can importing patterns via flashdrive6 damage the machine?
Hi Mary, importing designs on multiple machine brands should not cause any issues. If it runs well on one machine, it should on the other as well.
I purchased an embroidery font which is a bx file. I do not want to use the font with an embroidery machine. I just want the font. I’ve asked them to send it as a jpeg or pdf. Can they send it as I requested? Or what do I need to do to open this file? They are very slow to respond to my questions. I have a MAC computer.
Hi Judy, BX is specific to the Embrilliance platform and pdf or jpeg are graphics files that embroidery machines cannot read. I’m not sure how to assist you with your question.
Could you outline the process you use when checking various machine export files? I sell embroidery designs that I have digitized. After creating in my native format (in my case Bernina ART or Hatch EMB – I use both), I then export the design to various machine formats.
If I open a PES that I generated and exported, will I be seeing the design as an end user would? Or, in opening the exported PES in Hatch or Bernina v8, is that PES then compromised?
I’d love to streamline my quality control process, as well as make sure I am not missing any design glitches that occurred during export.
Thanks so much!
Hi Marlee, No easy answer for that question. I comer across corrupted files all the time and to this day I’m the only one who does our conversions. I use four different programs to convert my files and even then have to fine work around when issues arise.
So an ART file is not a native file format? I’m still a bit confused. When using Bernina Embroidery Software V8, or now V9 just announced, a design one creates is saved in ART80 or ART90, respectively. Should I be saving in another format, such as EMB?
Hi Jim, ART is the native format for Bernina, EMB for Hatch. If you own Bernina your native format would be ART90.
If I have a choice of opening various design files (ex. DST, PES, VIP, EXP, etc.) which one should I choose to open in Hatch as to retain the color? I am having a terrible problem exporting the design to an EXP. The colors all change and I end up printing a picture of the design so I can get the colors right.
Hi Lucinda, machine formats like PES and VIP retain color information, expanded formats (dst and exp) do not retain colors.
My dealer recommends VP3 format for my Pfaff Creative Performance, which I have been using with no issues. Should I change my format for John Deer designs?
HI Sandr, we also include the VP3 format with our designs along with other machine formats. You are fine to continue using that format for your machine 🙂
Can PDF files be converted into .pes files?
No they cannot
When I buy an emroidery pattern online for instant download, I get all the different file types. Do I download them all or just the VP3 that my machine reads? Common sense would be just the VP3, but I would just like a confirmation. I’m “new to the game” as they say.
Well, welcome to the embroidery world Kathy! When you purchase our instant downloads it will download the whole zip (it is up to you if you’d just like to keep the VP3). Some people think keeping other formats take up too much room on their USB or computers, and others want all the files incase they purchase a different machine in the future.
Two questions:
I would like to buy this for my daughter who has a Brother NS2750D and is kinda new to embroidery, but wanting to take her designs and incorporate them into her creations. Is this a good product for beginners?
What us the difference between PEC and PES files? I.e., why would she use one vs. the other?
Hi Michael, what product are you referring to?
What is an edo file and how is it used?
Sorry, I’m not familiar with that format.
I have a MAC and iPad. I’m using a Pfaff creative vision 5.5 embroidery machine. Will downloaded files onto my Mac or iPad work on my Pfaff CV?
Hi Deb, we provide formats that will run on all machine types. VIP/VP3 for Pfaff.
Hi I have a pfaff creative, 1.5. Does your site /classes/ designs support this machine?
Yes 🙂 Our embroidery designs come formatted for all popular machine brands including art, dst, exp, hus, jef, pes, shv, vip, vp3 and xxx.
We have a very old kenmore machine manufactured by janome. It only uses .sew files.
what do you recommend?
Hi Bob, you’d need a program that will convert your files to .sew, keeping in mind that format has limitations with size and stitch counts.