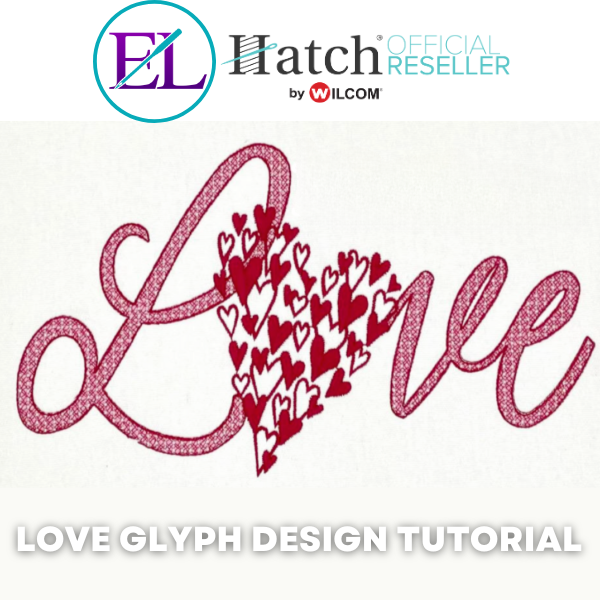

This Love Glyph Design Tutorial is by Linda Rayburn
In this tutorial we will learn how to use ESA Flexi Fill Fonts and ESA Glyphs.
Remember to download the EMB file for this project below.
ESA Flexi Fill Fonts are made up of 1 object with 1 stitch direction. When you break it apart you unlock all kinds of creative possibilities. ESA Flexi Fill fonts are keyboard fonts and can easily be reshaped and resized.
ESA Glyphs are little designs that can be made up of many objects. The ESA Glyphs can also be easily resized. When you break apart an ESA Glyph you will be able to reshape and change their object properties.
Here are links to the ESA Flexi Fill Fonts and ESA Glyph we are using today:

- Bring in the .EMB file provided for this design using the Design Icon and finding it where you have it stored on your computer. Let’s take a closer look at them.
- Notice how the letters are made up of one object with one stitch direction. We will break them apart in a moment to unlock the object properties.
- Notice how the glyph is made up of many objects. You can easily resize it now because they are still locked together.
- If you break the glyph apart all the little objects will be separated on the Sequence Docker.
Give it a try. Select it Edit Objects > Break Apart. Notice all the objects appear on the Sequence Docker. Select the Undo Icon to bring them back together.

2. Select the L, V, E > Edit Objects > Break Apart- This will allow us to change the Object Properties and have some fun.
3. Select the E and move it so it overlaps the V.
4. Select the E and the V > Edit Objects > Weld. Now the VE becomes 1 object.

5. Select the LVE > Change to Tatami > Change the Stitch Spacing to .60mm > Check Travel On edge.
a. Select the Settings tab and Remove all Underlay
6. Duplicate the LVE

7. Select the L,VE and change the Color. Now Duplicate it.
8. Select the first L,VE change the Stitch Spacing to 3.0mm > Travel on Edge > No Underlay > Change Stitch Angle to 45
9. Select the second L,VE Change the Stitch Spacing to 3.0mm > Travel on Edge > No Underlay Change Stitch Angle to 90

10. Duplicate the L,VE and change the color.
11. Select it and change to a Motif > Circle 01. Change the Motif Width to 2.0. The height will automatically change because they are locked.

12. Select the L,VE > Select Create Layouts > Outlines and Offsets > Backstitch > Select your color
13. Move the Heart glyph to the bottom of the sequence docker.
a. Select the Heart and move in place, resize and rotate if you’d like.
14. You can resize the overall design by selecting all and entering your desired size.
a. Center the design on the screen by placing a 0 in the X and Y position.
b. Save as an .EMB file and export in your favorite machine file format.
Congratulations you have just created your love glyph design!
Now get creative & post your designs.

Join our Wilcom Hatch Embroidery Software Facts Facebook group for more helpful tips & tricks or any Hatch-related questions. Don’t forget to check out our 1,000+ ESA fonts to perfectly embellish your next embroidery project.
Interested in downloading this Hatch tutorial? Feel free to save this easy step-by-step Hatch tutorial in PDF format by clicking the button below.
This was my first follow along and I really enjoyed it. I will stich this out and see how I did and report back. B.
Awesome, we can’t wait to see your results Brad!