What do this article, a birthday present, and a Christmas gift all have in common? They’re all wrapped up with a bow! Embroidering on ribbon is often overlooked, but it is fun and can be used for more than just gift wrapping!
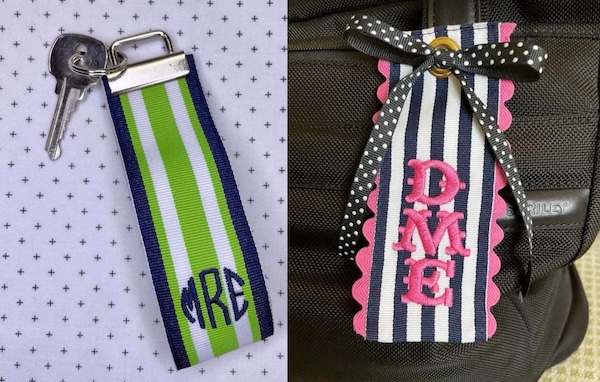
Many embroiderers, new and experienced, shy away from using ribbon. It produces a great result, but how do you do it? With care, you can create beautiful and creative gifts!
Let’s further discuss embroidering on ribbon. Throughout this article, we’ll discuss the two most popular types of ribbon and their pros and cons with embroidery. We’ll discuss some tips and tricks on how to embroider on ribbon, problems that can occur and how to avoid them, and we’ll also give you some cute embroidery ideas you must try!
Machine Embroidery On Ribbon
Machine embroidery on ribbon has been around in the commercial industry for a long time but is now becoming quite popular with crafters, designers, and embroiderers.
Ideally, it would be best if you used the best quality ribbon you can find, but until you become more skilled at working with ribbons, less expensive craft store ribbons will work and be great practice.
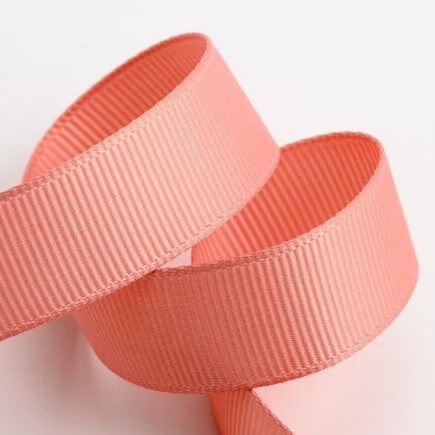
- The Grosgrain ribbon is sturdy and does not show as many marks. It is a great place to start. It’s been around since the 1500s, it has been a woven ribbon with warp and weft threads of different sizes, producing the “lines” across the ribbon.
- Satin Ribbon is soft and slippery. It is more difficult to embroider and requires more careful preparation. It can show marks from hooping or (if you like to use it) tack down stitches. (In this blog, we are just talking about floating with adhesive, but you may choose to tack down your ribbon.)
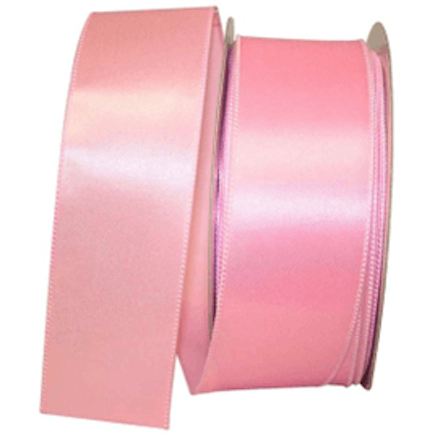
- Acetate ribbon is an extremely cheap crunchy version of satin ribbon. It is pretty stiff and can be used for crafts or gift baskets, but it is not soft to wear.
Is it possible to machine embroider on ribbon? Absolutely! However, it does require more preparation and careful measuring. But once you practice and find a method that works, you’ll be up and stitching quickly. The two main considerations in ribbon embroidery are:
- Slippery, slithery fabric. Satin ribbon is beautiful but slick and will move around as it is being embroidered. You will need to focus on how to hold down the ribbon while stitching out.
- Stitching straight lines. This might be the hardest part of your stitching process, but we have some ideas for you! You must line up your ribbon so your name or design stitches out correctly.
How Do I Machine Embroider On Ribbon?
Because the ribbon movement is so challenging, we’ll start there. You can float or hoop ribbon, and there are advantages to both.
When working with ribbon, remember the two golden rules: secure your ribbon and MEASURE carefully!
Hooping Ribbon For Machine Embroidery
Many people opt to hoop their project for longer stretches of embroidery, so it is anchored down. When hooping, you need to secure the ribbon to the stabilizer first and then hoop the stabilizer/ribbon in the hoop, measuring the distance from the sides so that it is completely straight in the hoop. Anything less will create crooked lines.
Hooping this way is easy; you stick your ribbon down by lightly spraying the stabilizer with temporary adhesive spray and placing the ribbon down on that stabilizer.
Want to learn more about how to master using adhesives in your embroidery? Click here to read more.
The whole thing is then hooped using the edge of the hoop as a guideline. You can draw a straight guideline or use a straight edge to ensure it is not wavy.
This method is best done in a square or rectangular hoop as you need the edge of the hoop as a guideline.
How To Hoop Ribbon For Machine Embroidery
This method is suitable for longer, wider strips of ribbon. Here are the materials you will need:
- Square or rectangular embroidery hoop
- Tear Away stabilizer (medium weight)
- Ruler
- Marking pencil
- Temporary adhesive spray
To embroider your ribbon, you will need to center the ribbon in your hoop.
Follow these steps:
- Lay your stabilizer on your workspace and draw a single line using the ruler from right to left.
- Measure your ribbon (for this example, we will use a 1.5-inch ribbon).
- Divide the measure of the width of your ribbon in half (it should be ¾ inch on each side of your center line.
- Using the ruler, mark a guideline for each side of your ribbon.
- To create the line for the edge of the hoop, use your centerline, mark 2 points that are ½ the height of the hoop, and draw a line to use for aligning the hoop.
- Lightly spray your stabilizer down the center line.
- Carefully lay down your ribbon between the two guidelines you drew.
- Carefully hoop your ribbon/stabilizer in the hoop using your guidelines. Your ribbon should run down the center of your hoop.
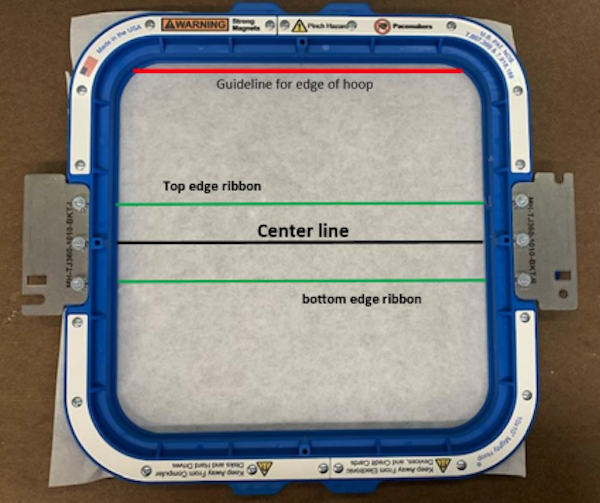
You can also use your embroidery software to create these lines by hooping a piece of stabilizer and stitching the guidelines- un-hoop, tack down your ribbon, and re-hoop using the top guideline to ensure the hoop is aligned correctly. Always make sure to center the needle in your ribbon for best results.
9. EMBROIDER!
Floating Ribbon For Machine Embroidery
Many people find floating easier, and a little preparation will produce a great result! It would be best if you used a tear-away stabilizer (sticky backed or regular), some temporary adhesive spray, and either a ruler or digitize a guideline in your embroidery software.
How To Float Ribbon For Machine Embroidery
Floating ribbon is generally an easier method of embroidering for most people. It is not as secure as hooping, so you will not want to try long lines of lettering, but it can be done. This method also requires measurement and preparation, and, like the hooping method above, the more care you take, the better the result.
Follow these steps to embroider on ribbon:
- Hoop a piece of medium tear-away stabilizer in a hoop.
- Stitch guidelines.
- Remove the hoop from the machine and lightly spray between guidelines stitched onto the stabilizer.
- Lay the ribbon between your guidelines and return the hoop to the machine.
- Stitch your ribbon!
Some people like to use sticky-backed stabilizers, but there are pros and cons. To use a sticky back, hoop the stabilizer, and then use a pin or needle to score the paper inside the area you want to expose and peel back the paper. You can then stick down your ribbon in the exposed area and stitch. A sticky back can have some residue remaining.
If you are working with a ribbon that will not be on clothing or as a hair accessory, you can iron on a stabilizer and embroider. There are many, many different options for strengthening the ribbon.
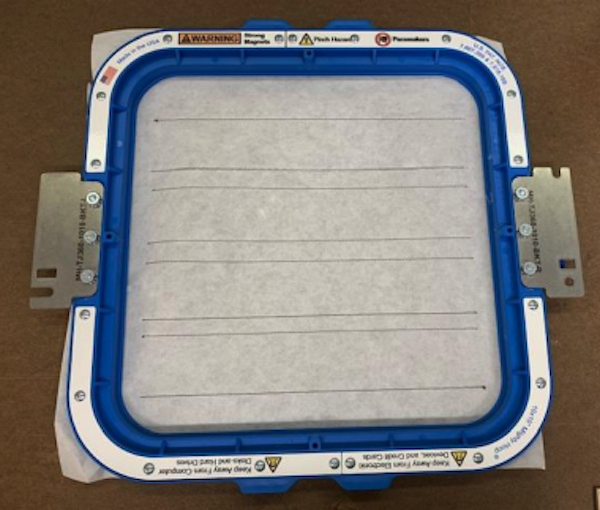
Above is a hoop with stitched guidelines.
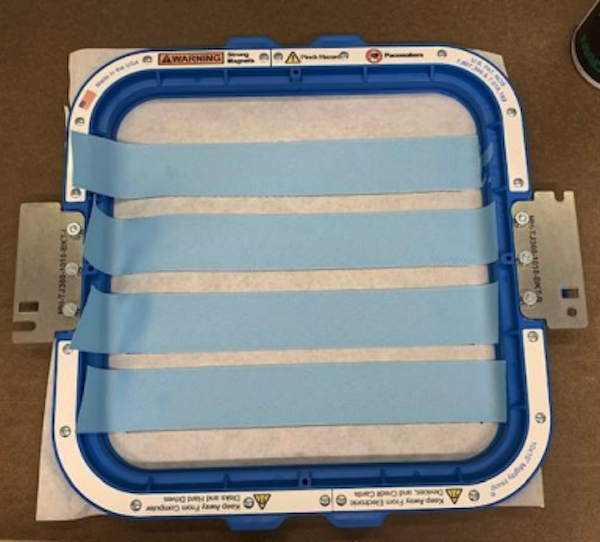
After stitching our ribbon guidelines, we know where to place our ribbon within the hoop.
Problems You Can Encounter When Embroidering Ribbon
Unfortunately, life is not always perfect, and you could encounter problems with ribbon embroidery until you learn what works best for you and your materials. Here are some examples of things you might see:
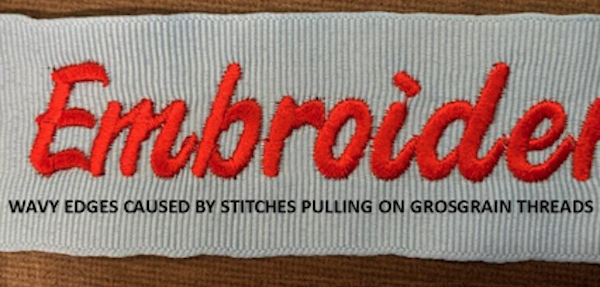
- Wavy Edges are caused by the needle catching the weft threads (horizontal). Avoid wavy edges by using a new needle and not stitching too fast. The greater the tension, the greater the pull. Much of this can be removed by a good steam iron (from the back), pulling it firmly while ironing.
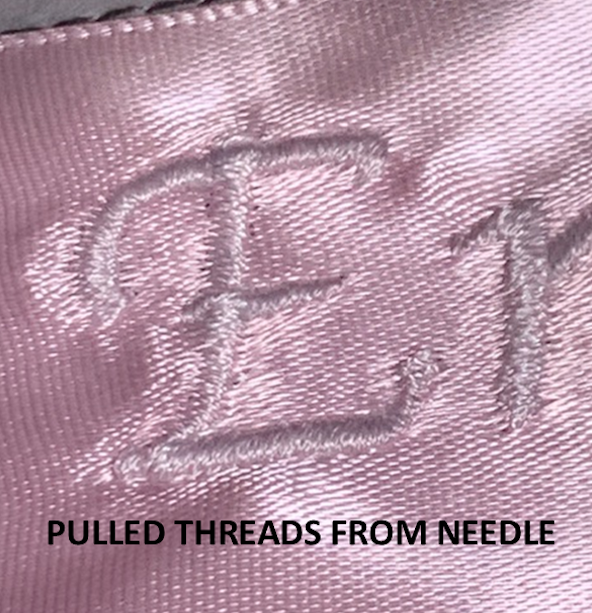
- Pulled Stitches can also be caused by a dull needle and too much speed. You will also want to make sure that you aren’t trying to embroider too large a letter or object; otherwise, you will need an additional stabilizer. Unfortunately, with satin ribbon, this will happen- good ironing with steam from the back will also help to lessen the look.
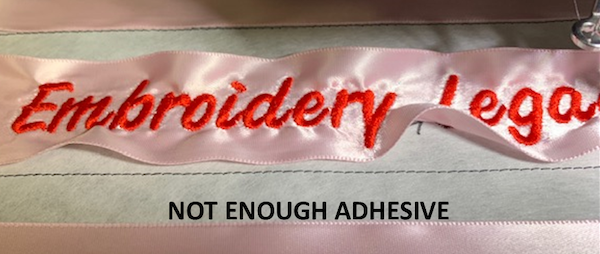
- Curling ribbon often occurs with satin ribbon and is most often caused by insufficient adhesive. Without an adequate stabilizer and not being secure, the ribbon contracts where the stitching is and leaves a curly edge. If you have a longer line of stitching, switch to hooping.
Machine Embroidered Ribbon Projects
When ribbon comes to mind, you may just think of wrapping up a gift, but so many possibilities come to mind for us!
Let’s explore some creative options:
- Bows and Hair bows: embroider the ends of Grosgrain or satin ribbon to make a cute hair bow; perfect for pep squads, kids, pups, and more! Embroider the ends of the ribbon and tie it over a ponytail or create a looped wired ribbon with creative ends.

- Bag handles: embroidering a Grosgrain ribbon with a name or object is an easy way to personalize a tote bag!
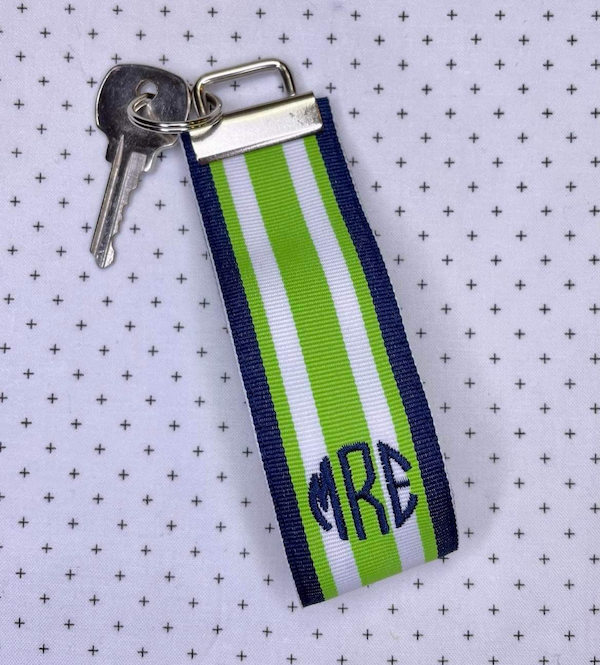
- Keychains
- Create your own ribbon: did you know you can create your OWN ribbon? Pick a fabric you like, embroider satin or motif edge in straight lines and then embroider on a name or image. Make sure to use sturdy WOVEN fabric as knits will move too much.
Need more embroidery design options? Check out our almost 30,000 high-quality embroidery designs by clicking here.
- “Winner ribbons”: everyone likes to get a winner ribbon! Whether it is the dishes, chores, being the best kid/dad/mom/friend/nurse etc. Create an easy winner ribbon and make their day! Use a pin to display on clothing or bag.
- Luggage Tags: this could be a long ribbon with a picture or emblem (remember, don’t put personal info on luggage tags- put that inside). This is for you to know your bag while in a pile of others.
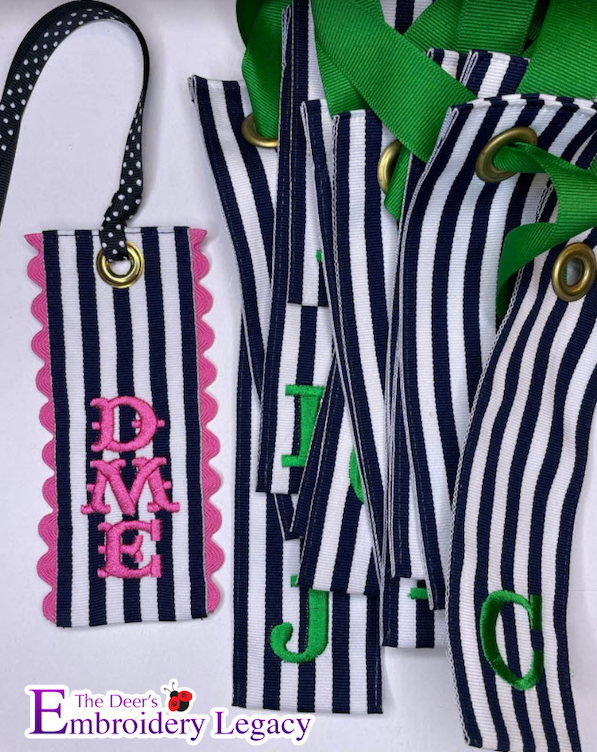
- Personalized Ribbon Tag: these are great on backpacks, lunch bags, or computer bags to include your initials to easily help you recognize (or cutely decorate) your bag.
Machine embroidery fonts can make or break any project. Did you know we offer over 1,000 different embroidery fonts in BX fonts, ESA fonts, and Stitch File fonts. Click here to check them out.
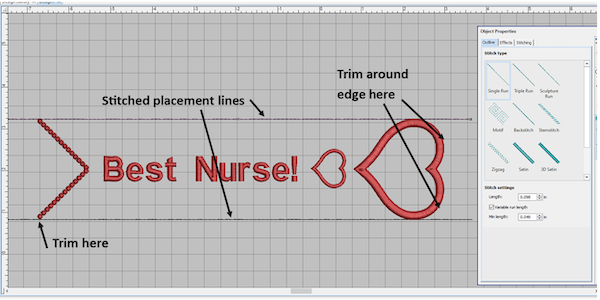
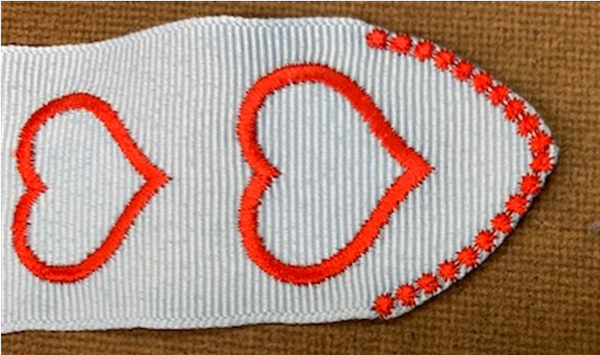
- Embroidered beaded edge: you can create a wonderful effect by embroidering an edge where the ribbon will be cut and then carefully cutting close to the stitching. If you feel brave, use a lighter or stencil cutting iron to sear the extra fabric sticking out
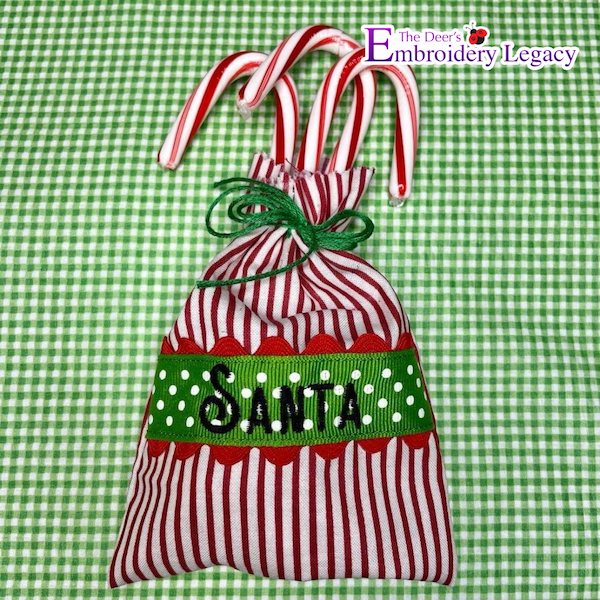
- Ribbon treat bag: these make great goodie bags that you can decorate seasonally to fill with your favorite snacks or to keep your change in.
Conclusion: Embroidering Ribbon Doesn’t Have To Be Hard
So much information! We know you are going to take this and run with it! Embroidering on ribbon is a skill, and you will need to start small on inexpensive materials first and then try your hand at one of the projects above!
This should get you going for now, but let’s review some key points for you to remember:
- Measure carefully!
- Adhere well
- Take your time
These basic guidelines will help you have straight embroidered names and soft, supple stitch outs. You may be frustrated when you begin to do ribbon embroidery, but time and practice will get you where you need to be.
Until next time, happy stitching!
P.S. Don’t forget to check out our 1,000+ embroidery fonts to personalize your next embroidery project!


Leave A Comment