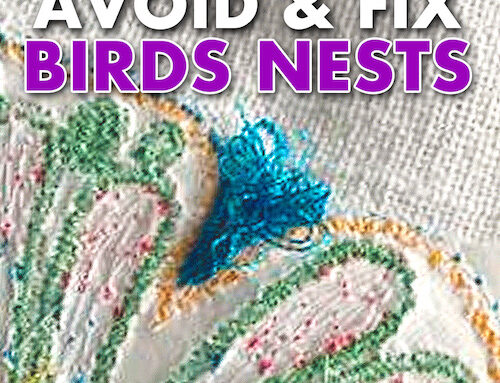
When I embroider, I really don’t want my project to have puckering, so I’m willing to do anything to prevent it. When I first started embroidering, it was a huge issue for me. After many mistakes, I’ve learned ways to avoid it when I’m embroidering a design.

What Is Embroidery Puckering?
OK, so maybe you are new to embroidery, and you’re thinking, “What is this puckering she speaks of?” It is when a bunching of the fabric around the stitched area of your embroidery design. When you have puckering, the material no longer lies flat; you see folds in the fabric.
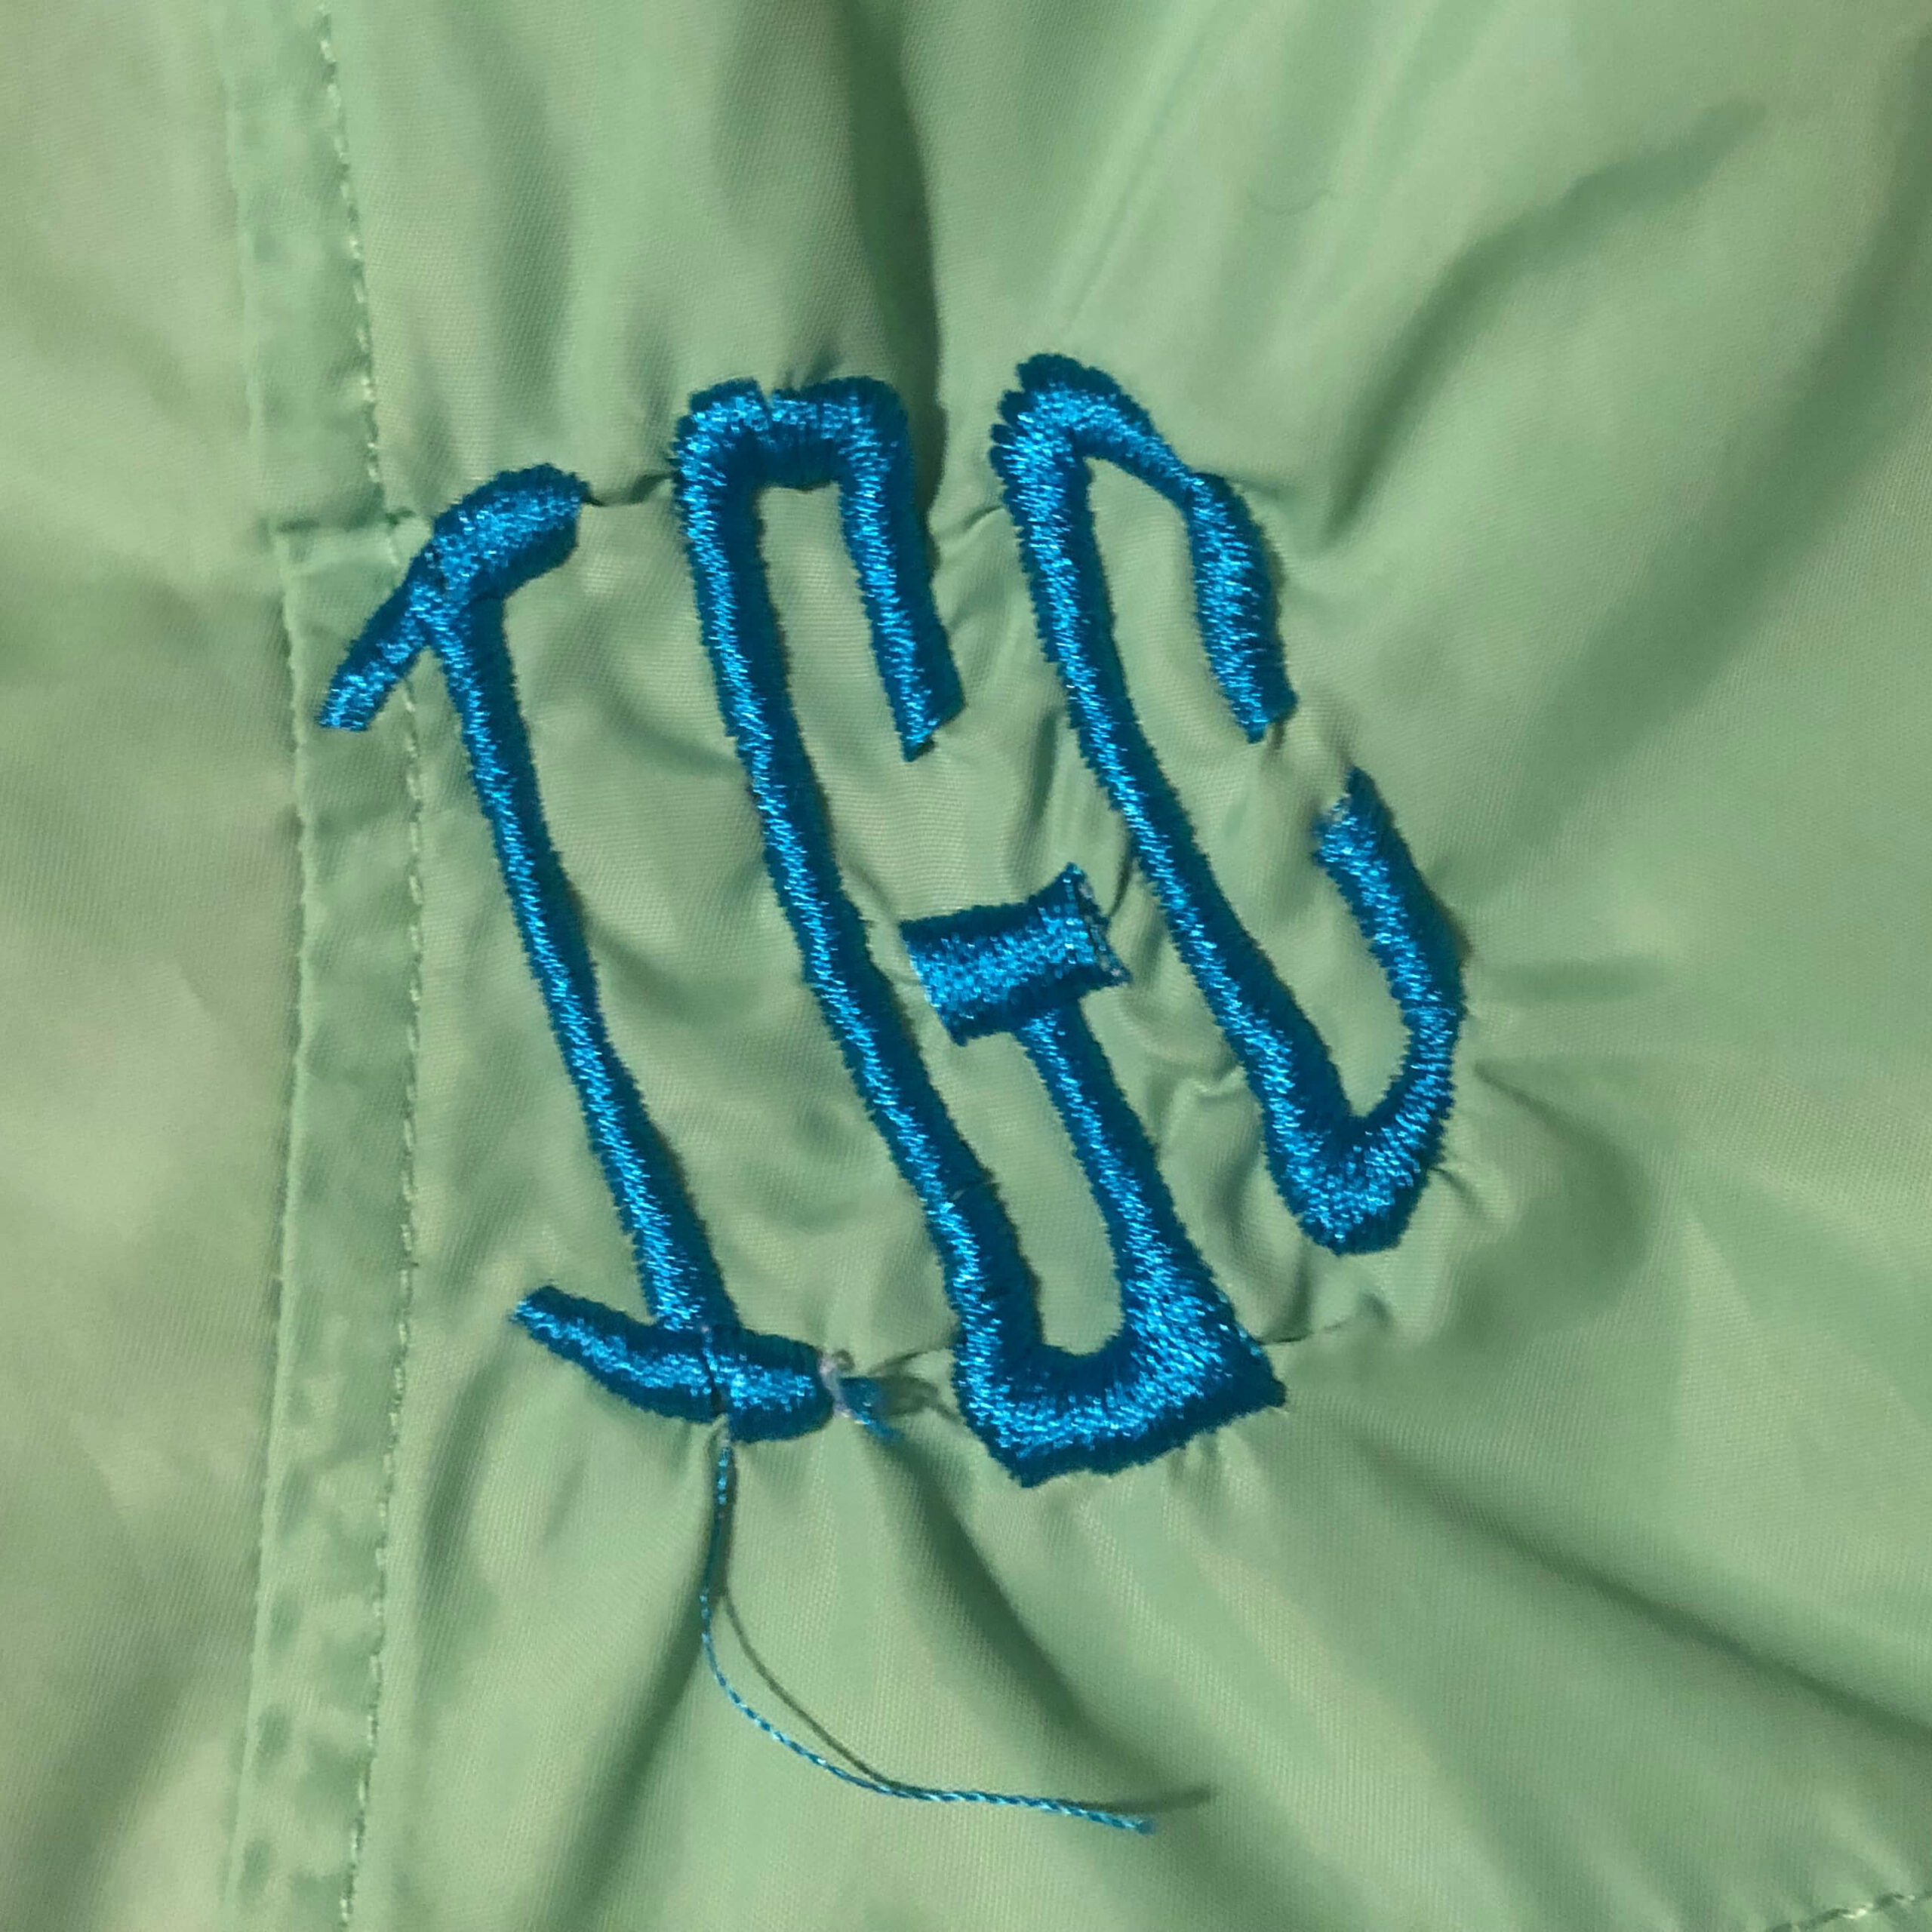
A great example is this windbreaker with my daughter’s monogram. (Fortunately, I don’t have to take credit for this terrible monogramming job.) But I shouldn’t criticize too much here because windbreakers tend to pucker.

Do you see the fabric not lying flat around the stitched letters? This, my friends, is classic puckering and exactly what we want to avoid.
Why Does Machine Embroidery Puckering Occur?
Puckering happens when your fabric moves around during the embroidery process.
There are three types…
The Bunching Pucker
This occurs when you “trap” fabric and stabilizer within an area. If you embroider from the outside of the design to the inside, the needle foot will cause the fabric to move forward. This makes the fabric get trapped until it has nowhere to go, causing you to experience puckering in the middle of the design.
Imagine working on a construction site. The person opposite you pushes dirt towards you, causing a pile to form.

The Stretching Pucker
This occurs when you pull the fabric super tight when hooping. The stabilizer holds the fabric in place and looks great, but it snaps back when you remove it from the hoop. All that stretched fabric relaxes and locks the center flat, resulting in distorted fabric.

The Density Pucker
Tightening an area of stitching causes this because of a really dense design. This one will have puckers in between two sides of stitching. The fill contracts the fabric and stabilizer. Lessening the density will greatly help.
So why does puckered embroidery generally happen?
If the fabric moves while your machine stitches, it will bunch up instead of lying flat. Therefore, keeping your fabric in place while stitching out an embroidery design is the secret to avoiding puckering.

But for some fabrics, this is easier said than done…
How to become a pucker detective!
While puckering is frustrating, learning to be a pucker detective is still important! When you look at the puckers, they vary, which can help you learn how to solve them.

Which Fabrics Are Most Likely To Pucker?
Slippery fabrics like nylon and satin are prone to puckering because they can slide around on the stabilizer. The monogrammed windbreaker is a great example of a slippery fabric that is challenging to embroider without any puckering.
Knit fabrics like t-shirts and polos can also be problematic because they stretch. It may pucker if you stretch the fabric excessively or do not adequately support it on the hoop during embroidery. You will see fabric puckers when you remove your garment from the hoop.
Another tricky category of fabrics that can easily pucker is very lightweight textile-like broadcloth or linen. Because they are flimsy and thin, they can bunch up while embroidering, which leads to puckering.
The solutions vary for these fabrics to prevent puckering as they are very different, but let’s discuss them now!
How To Keep Machine Embroidery From Puckering On Slippery Fabrics
Your strategy in preventing puckering with satins and nylons is to stop the fabric from slipping in these tightly woven fabrics. Running a basting stitch to prevent the design from moving may seem tempting, but it’s likely not a good idea. After you remove the basting stitching, you will likely still see holes in your piece of fabric. Pinning the nylon windbreaker on a floated stabilizer in the hoop is probably not a good idea for the same reason.
One of the best ways to prevent slippage is to hoop and not float the fabric. We recommend hooping when embroidering two layers of fabric to prevent the top layer from shifting. This is especially important when working with a windbreaker, which typically consists of a lining and a top layer. Hooping your garment will hold the layers in place and ensure a better-stitched result.
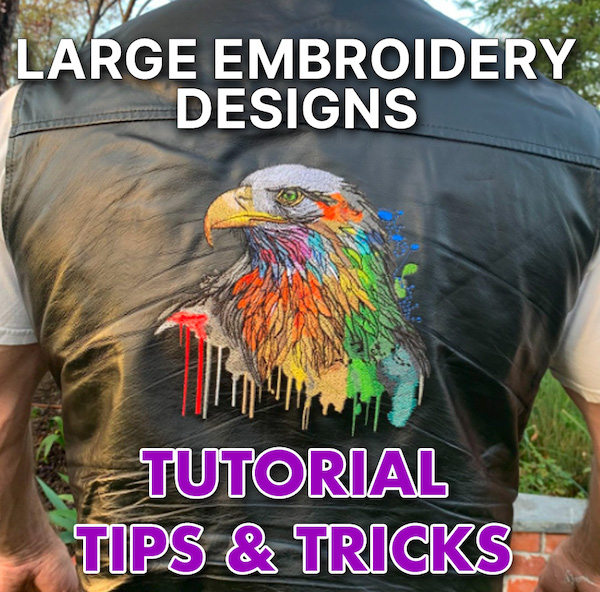
Learn more about embroidery hooping with our tutorial, tips, and tricks to level up your embroidery.
To keep both layers from moving, use a cutaway stabilizer on the back while hooping them.
Stitching with a new, sharp needle can also improve your pucker-free odds. An old, dull needle can snag and bunch up the fabric, making it pucker. In addition, using a water-soluble topper can also help.
If you try embroidering on a slippery, satin ribbon, you will face additional puckering challenges. The thinness of the ribbon prevents it from being hooped properly. You can attach it to a stabilizer and tape it down to keep it in place.
Wonder how to embroider ribbon properly? Learn how to easily machine embroidery ribbon with great results.
How To Stop Embroidery Puckering On Knit Fabrics
Hooping helps prevent puckering on slippery fabrics, but it may not be the best choice for embroidering on knits. If you hoop a knit fabric too tightly, you can stretch it while stitching. Then, when you take it off the hoop, the fabric relaxes and bunches up around the stitching.
Knitwear can be a difficult fabric to use in embroidery; check out our helpful tips to make embroidering knit less difficult.
Instead, place a piece of fusible poly mesh on the wrong side of the fabric (underneath the design). Then, hoop some tear-away stabilizer and float the knit fabric on top of it. Stick the knit fabric to the tear-away material using a spray adhesive or self-adhesive tear-away stabilizer.
You can pin the knit fabric to the stabilizer around the design area. Knits are forgiving and won’t show pin holes. Finally, float a piece of water-soluble topper over the design area.
You can improve your overall results with a couple of additional precautions. Fusible poly mesh can shrink, so it’s a good idea to wash and dry it before use. You should also embroider knits using a stretch needle. Regular needles break the fabric fibers, and needles designed for stretch fabrics push them out of the way.
How To Avoid Embroidery Puckering On Light Natural Fabrics
Embroidering on hankies and light materials is challenging because of their delicate nature. The stitching can bunch them up and cause puckering.
So, the secret to preventing puckering with the lightweight fabric is temporarily giving it some heft. You can do this in a couple of different ways.
Spraying it with heavy starch is a good way to start. Then, use at least one layer of tear-away stabilizer, although most people recommend two. Adhere the layers of stabilizer to the cloth using temporary adhesive and hoop it all together.
Light cotton broadcloths behave like knits in that they can stretch a bit. Avoid over-stretching them in the hoop. Unlike knits, though, they are best embroidered with a smaller and very sharp embroidery needle and not a stretch needle.
Which Embroidery Designs Are Most Likely To Pucker?
Did you know your embroidery machine speed can affect your embroidery results?
A note from John:
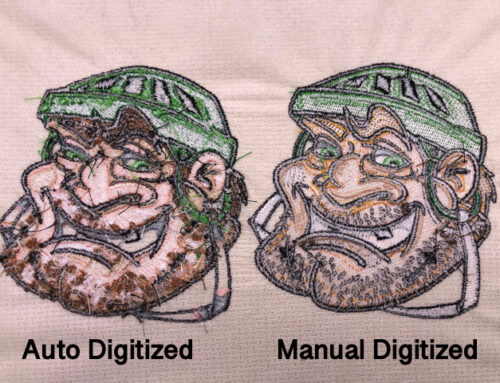
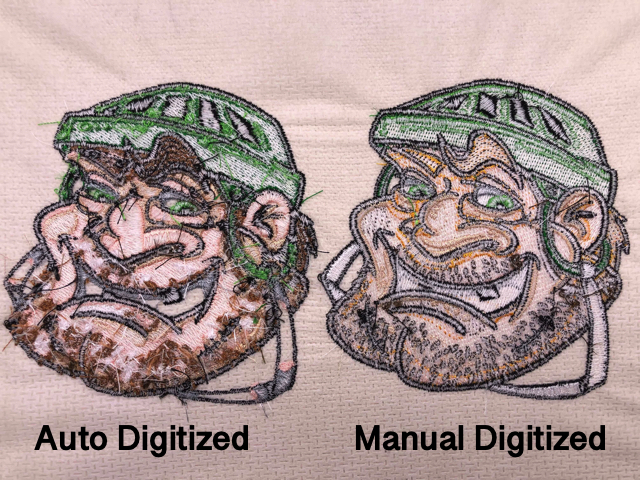
“From my experience, poorly digitized embroidery designs are one of the top reasons why puckering occurs.
After all, the quality of any embroidery design depends on how well it was digitized or created. If the digitizer didn’t know what they were doing, or if a design was simply auto-digitized using embroidery software, chances are you might run into some issues (puckering of course being one of them).
If the correct type of underlay wasn’t used by the digitizer when creating the design, no solid foundation is stitched into the area in which the design will be sewn. This can cause registration issues and make the design pucker.
To help avoid this issue, be sure to purchase your designs from reputable companies who know what they’re doing and have a proven track record. Oftentimes, “free” designs online may not be the most machine friendly options or produce the best embroidered results.
If you’re looking for a suggestion, I do recommend trying our designs to see and sew the difference quality digitizing makes. Download our free Embroidery Legacy Design Kit to experience 11 of our fan-favorite high-quality designs.
How To Fix Puckered Embroidery
Fortunately, there are a couple of ways to rescue a project if you notice puckering is happening. Stop the machine and stick a layer of tear-away stabilizer underneath your hooped fabric, then resume stitching.
This extra layer of stabilizer may be the solution to fixing the puckering while it’s happening. Good ironing can sometimes minimize puckering after completing a project.
Puckering is a pain we all deal with, so be sure to take precautions and use professionally digitized embroidery designs.
I hope these suggestions have been helpful.
Happy stitching,
Julie
P.S. For more machine embroidery tips, resources, inspiration, and fun designs, check out my website: http://www.machineembroiderygeek.com
P.P.S. Use Embroidery Legacy embroidery designs to avoid common embroidery problems like puckering and misregistration that can be caused by poorly digitized designs.
Thankyou for this informative explanation!
You’re most welcome Shirley!
Thank you got this blog. I seem to have a lot of puckering so definitely going to try some of these
Our pleasure, hope they help Mary 🙂
Thank you, some great tips here
Glad you enjoyed it 🙂
Thank you doing my first hoodie.
Most welcome Eva, happy stitching!
Thanks for these information. This helps alot.
You’re most welcome 🙂
This was the best explanation of solving puckering in embroidery I have ever read in my 15 or more years in the hobby. I thank you very much and truly appreciate all of your tips to help solve many of the problems I have had in the past.
Glad to hear that Alice, thank you for the kind words!
Hi guys! I just saw all your comments and I’m so flattered. It took a lot of mistakes to learn how to prevent puckering. So, I’m glad you found my post to be informative! Julie (post author)
my opinion is, to put clear topping over any fabric to prevent puckering.
the only fabric you can not do anything is probably vinyl because of its high density it will not let the thread in.
Not only did you describe different fabrics that pucker, you explained why which makes it easier to remember. I just stumbled upon your post and it is most informative. Thanks.
Glad you enjoyed it Elaine, thanks for reading!
Stumbled on this post on Facbook and it’s so informative and has really helped me with various ways of handling Puckering on different fabrics.
I am nee to the business and I look forward to more insightful post that can help me better my business.
Thanks for taking the time to read, check out our youtube channel for more content 🙂 https://www.youtube.com/channel/UC9mQiNJuVXtaVyvOcXhAWHg
Thank you so much for your info. I’m still learning. I will try your free design ( if I can find them). Thanks again.
Thanks Gloria, feel free to join our Facebook group for some free designs https://www.facebook.com/groups/EmbroideryLegacy
Thanks for sharing ur knowledge
I will have another go fingers crossed I can solve my puckering
Thanks for reading Kerry, hope this helped 🙂
You wash and dry the fusible polymesh stabilizer?
Hi JoAnn, if you’re asking if I wash and dry prior to use, personally I do not. I’d suggest posting in our Facebook group to see what other embroiderers do 🙂 https://www.facebook.com/groups/EmbroideryLegacy
Why does my embroidery -which looks fine when i’m finished with it, pucker when ironed?
Brenda great question but there are too many variables to give an accurate answer. This would be a great question to ask in our Machine Embroidery facebook group 🙂 https://www.facebook.com/groups/EmbroideryLegacy
Another great tip is to use T pins on the outside of the hoop. Place the pins through the fabric right next to the hoop. Hope that makes sense.
We totally agree Leslie! We actually have a video about it here 🙂 https://www.youtube.com/watch?v=MofFh5UDZPo&t
This is a great article!! I am keeping this one for my future knit projects!! Thanks for sharing!!
Thanks Judy, we’re glad it’s helpful!
Such a detailed and useful guide to puckering! Thank you
Glad you found it helpful, thanks for reading Susan!
Great article and was excited to see it came from Julie Griffey. I have taken several courses from Julie, she is a wonderful teacher and so easy to follow.
Yes, thanks for reading Sharon!
Wow! What great tips. I’ll be sure to review this time and time again when I embroider something.
Thanks for reading Lucinda 🙂
Dear John, thank you for a very informative article.
I sometimes find testing the tension of the thread used helps as well.
I find that even with the same brand of thread used, but a different colour can also
cause puckering. When doing a large design I try to test the different colours before
stitching. It is a bit time consuming, but well worth it in the end.
Great suggestion Heather! Always something to learn and practice with embroidery 🙂
This is a great education for anyone doing what we love. Good habit’s to have and lessons for new comers. This is getting printed for the shop operations manual.
Thanks for reading Brad!
It seems like all my designs pucker. I’ll try your suggestions. I got a new machine and it only has about 8 designs. I’m going to try your suggestions.
Congrats on your new machine! Let us know which tip helped you the most.
Thanks for this! I am having a problem with puckering on velvet, you think that these tips will work for that??
Yes definitely give it a try 🙂
Thank you for the embroidery tips. I will be starting to embroider on onesies for my great-grandchildren on their way.
Congratulations! How very exciting.
Our pleasure 🙂