When you think you have gotten the hang of good solid block and cursive letter at a “normal” size, you find out there is a whole tiny world waiting to trip you up. But don’t worry; we are here to help you get the best results when embroidering small letters.

What Are Tiny Embroidery Fonts, And Why Can They Be Difficult?
What are tiny fonts?
They are just how they sound; they are small. There are a handful of smaller fonts available for embroidery.
What are they used for?
They can be used in many ways, but the most common are logos or patches.
What factors go into deciding to use them?
You must consider the material used, the font, how many letters, and what size.
Customers or friends want what they see on their printed material. As embroiderers, we must gently educate them about which fonts to choose and which will not work.
Complications With Small Embroidery Fonts
You guessed it. When embroidering such tiny fonts, you may encounter some problems.
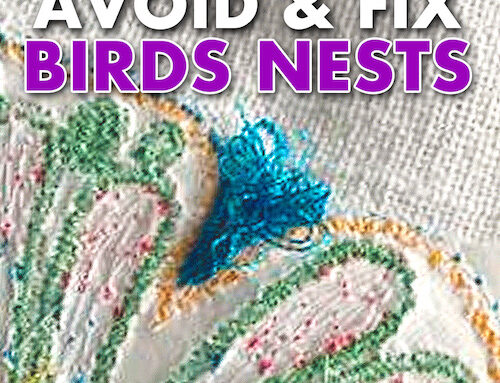
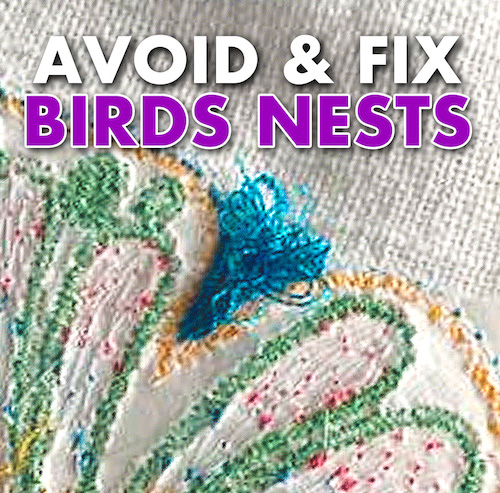
- Birds nests: can be created when there are so many stitches in one place that the needle has a hard time returning to its upright position and the thread is trapped.
- Hard to read: the more stitches you have, the smaller they get, resulting in difficulty in reading them. Factor in the type of fabric you use. When using cotton and other fabrics which can shrink, the problem becomes worse.
- Holes: great on a golf course but not on your performance polo. Any time you have a lot of small stitches, say, in a circle, you run the risk of cutting a hole in your fabric.
5 Things to Remember When Using Tiny Embroidery Fonts
We talked about the bad news. Is there any good news? There is! You’ll be up and stitching in no time by making smart choices in your font, fabric, and stabilizer! Let’s discuss the different factors that can impact your stitch-out.
1. Fabric Types For Tiny Embroidery Fonts
Pique knits are thicker 3D knit that is breathable and used for many sport and performance shirts. Often called “Honeycomb” weaves, they are sometimes difficult to embroider because the stitches can sink into the fabric.
Soft and silky fabrics can also be tricky as they don’t have a lot of stability, and textured fabrics distort the letters. It is also best to avoid sheer fabrics, such as anything netting.
Remember, the more stable the fabric is, the easier it is to embroider—Woven materials that are well-stabilized work best for tiny fonts.
Learn more about different fabrics used within machine embroidery and what will work best for your next project.
2. Tiny Embroidery Font Stabilizer & Underlay
When using small fonts, they must have underlay.
What is underlay in embroidery? It is the foundation of your embroidery design, there are different ways to apply it, but they all have the same objective: to bind your design together and minimize distortion. Learn more about underlay stitches for embroidery.
Here are a few things to keep in mind with underlay regarding small fonts:
- A center-run underlay is best for tiny fonts and aids them in sitting on top of the fabric. You can use a zigzag or edge run with larger and thicker fonts.
- Knockdown stitches are a type of added underlay (do not get rid of your fabric stabilizer) which looks like a tatami stitch and will knock down nap and fluff of “fun” fabrics and towels.
- Never use edge run on small letters. There is not enough room for more.
Using an underlay and less density will improve- believe it or not, less is more! You will get a better result by using an underlay and not increasing the density over the normal for that font.
When it comes to using a stabilizer, more stabilizer means better stitching. We would suggest using at least two layers.
Tip: When using a “no show” stabilizer, turn one of the stabilizer layers at an angle.
Learn more with our complete guide to machine embroidery stabilizers.
3. Considerations About Letter Style
As a general rule when choosing or preparing artwork for embroidery digitizing; less detail = better result, especially when creating small designs.
That said, using swirl or bold fonts is always more fun, but when choosing small letter fonts, the very basic fonts turn out better! In this case, less is more.
You want to choose fonts with no serif or fancy features. Avoid serifs (little tails on older lettering styles), swirls, and curlicues.

Tip: Choose block letters over cursive for a more readable small font.
The smallest text legibly to be used is 4mm, but some 3mm are possible. The smaller the size, the harder it will be to read clearly.
Remember that the font size uses the largest sizes (the capital letters) as a guide for the size- the lowercase letters are smaller.
4. Needle & Thread Suggestions For Small Embroidery Fonts
When embroidering smaller fonts, we suggest trying a smaller needle size. Smaller needles leave smaller holes after penetrating the fabric.
Depending the material you embroider on will also influence which needle you should use. For woven materials, use sharp point needles as they pierce the fibers; knit fabrics, use ballpoint needles that go between the fibers and do not cut them.
Learn more about the embroidery needle and the many components that make the embroidery machine run so smoothly.
The embroidery thread size you use will also affect your results. 60-wt will come out nicer as you go smaller. It’s always best to try a sample before embroidering on your final garment to see how it works.
Below you will find some comparisons of 40 and 60-wt thread with 75/11 or 65/9 needles.
We used a standard block font and did not alter it in any way to show what happens. These were done on cotton woven twill fabric with a medium tear-away stabilizer.

You can see a difference between the regular 40-wt thread using a thinner needle.
Next, let’s see what happens with a thinner thread!

As you can see, there is a definite difference between the 40-wt and 60-wt.
Combining a smaller needle and a smaller thread will improve your results. For a 65/9 needle, use a 60-wt thread.
As a guide: letters 5 mm and larger sew with a 75/11 needle; for 4 mm, you can use a 75/11 needle with 60 wt thread or a 65/9 needle with the same 60 wt.
We also suggest slowing down your machine! It is very important to work slowly. There is less rebound pulling, and the stitching will be more even. Whatever the extra time, it will be worth it as you’ll have better results.
5. Small Embroidery Font Density & Stitch Length
We suggest not altering the density of the micro font. Use the pre-programmed density digitized for the font. Density under 0.25mm leaves not enough fabric for the stitches to hold onto and will eventually create a hole. It is like playing musical chairs with ten people and only one chair.
You can try to increase the pull compensation a bit. This will beef up your letters but can also make the embroidery unreadable if you use too much.
We suggest leaving the stitch length to at least 1 mm, no smaller. Stitch length should always be set to at least 1 mm, and it’s always best to keep the stitch length from the default of that font.
The letter opening must be a minimum of 1 mm, or it will cut a hole. These include the centers of letters like “e,” etc.
Important: The Tips Above Only Work if You Use Quality Embroidery Fonts
If you’re using finished keyboard embroidery font designs, remember that the embroidery digitizing behind them will have a bigger impact on your stitch out than anything else. The embroidery font you use for your next project, it can make or break your stitch-out.
All embroidery fonts are not created equal, so be sure to use high-quality embroidery fonts to give you the best results.
Check out our 1,000+ embroidery fonts, including BX, ESA, and stitch file fonts.
Did you know with our Embroidery Legacy Design Club, you can save up to 78% on our embroidery font library using your membership points?
Conclusion: Small Lettering With Good Results Is Possible
Embroidering small fonts is possible with patience and practice. Remember these key things when using tiny embroider fonts:
- Slow down your machine, resulting in less rebound pulling, and the stitching will be more even.
- Be sure to stabilize your fabric. The better the surface, the better the stitching!
- Choose the right fabric. Woven fabrics work best, but some fabrics will not work with small fonts (such as fleece, fluffy fabrics, knits, and sheer fabrics like netting and satin).
- The smaller the needle and the smaller the thread, the more clear your results.
- Choose the right font, don’t get crazy if you want the lettering to be legible.
Always do test stitch-outs and be patient until you get the result you want.
We are here to support and guide you in your Embroidery Legacy, until next time!
P.S. Don’t forget to check out our large selection of 1,000+ high-quality embroidery fonts to give you the best results.
Leave A Comment