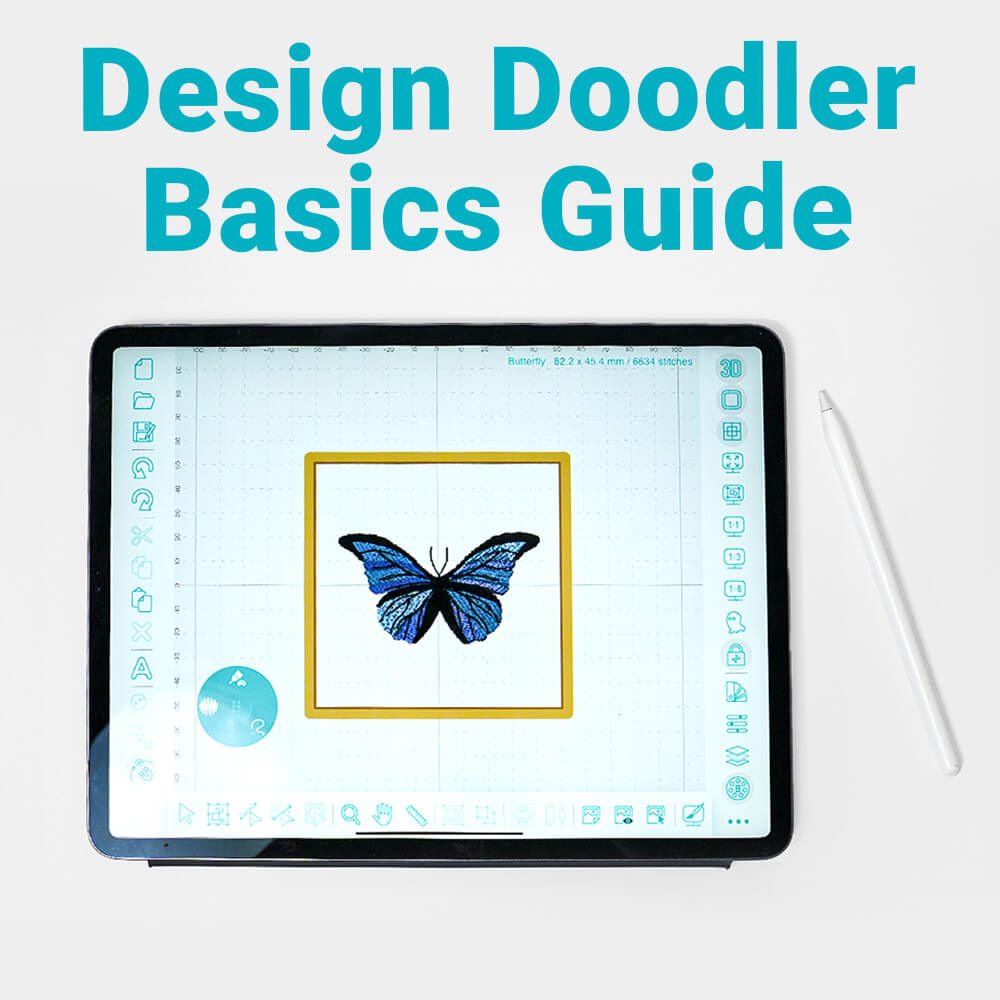
You’ve downloaded the Design Doodler, and we get it; with all the excitement of being able to create your own embroidery designs, you just want to get started!


But before you put your creative ideas into stitches, let’s review some basic software tools to make your Doodler journey even easier and avoid any frustration. Why not get the best results possible?
What do I need to use the Design Doodler?
- Genuine Intel Pentium IV, 2.8 GHz PC computer (Or an equivalent PC system)
- Microsoft® Windows® 10/11 64-bit operating system
- 4 GB RAM
- Minimum 1 GB hard disk drive space available
- Mouse or Touch/Pen support
Check out our recommended products, such as pen-tablet computer monitors & pocket pens for the doodler.
- An iPad Generation that supports the Apple Pencil
- An operating system of iPadOS 16 or later
- 2 GB Ram
- 200 MB available Hard Drive Space for installation
- Open the app store on your iPad.
- Click on the search tab and type “Design Doodler”.
- Embroidery Design Doodler will appear.
- If it’s your first time downloading it, click “get”.
- Follow the app store instructions to download.
- Once it’s done downloading, the Doodler app will appear on your main screen.
- Open the Design Doodler purchase confirmation email. This email includes the download link, access to the online classroom, and your unique serial key.
- Log into your classroom to download the latest version of the Design Doodler. Access your “ downloads” tab and click on “Design Doodler Set Up” to start the download and installation process.
- Once the download is complete, navigate to your downloads and locate the zip file. Double-click to unzip it.
- Double-click the unzipped “Design Doodler Setup” folder.
- Double-click “DesignDoodlerSetup.exe” to run the setup. Follow the provided instructions to complete the installation.
- Once installed, you can open the Design Doodler program by clicking on its icon on your desktop. Enjoy doodling!
Toggle layout
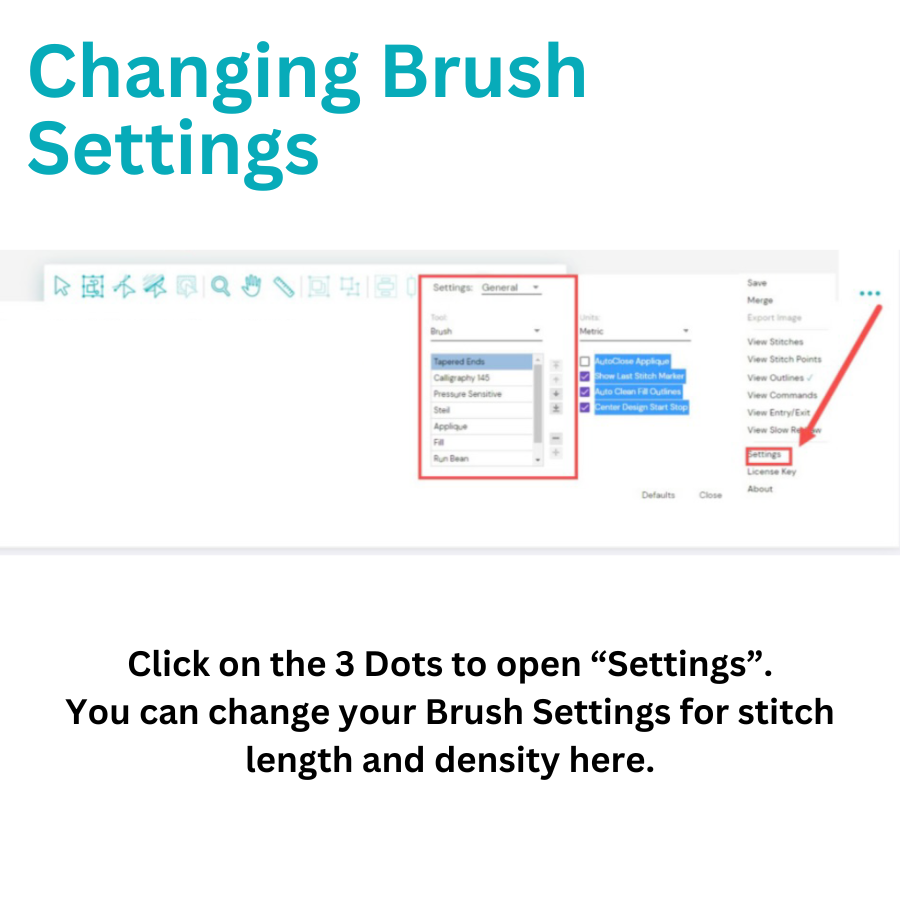
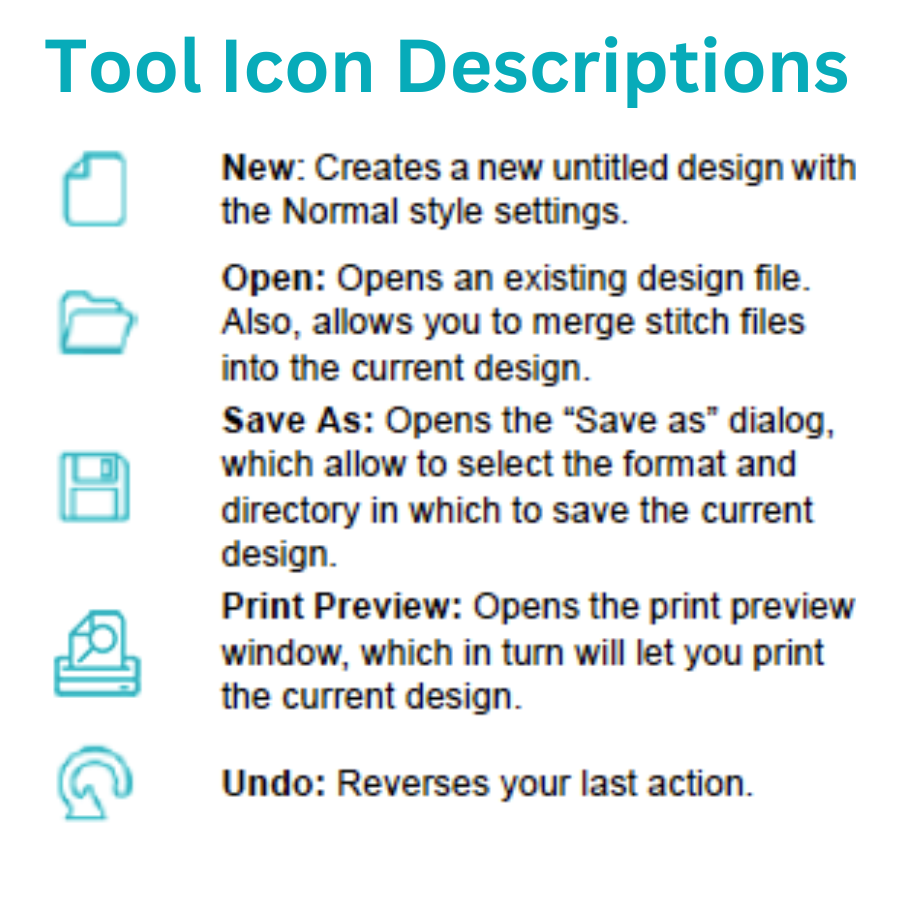
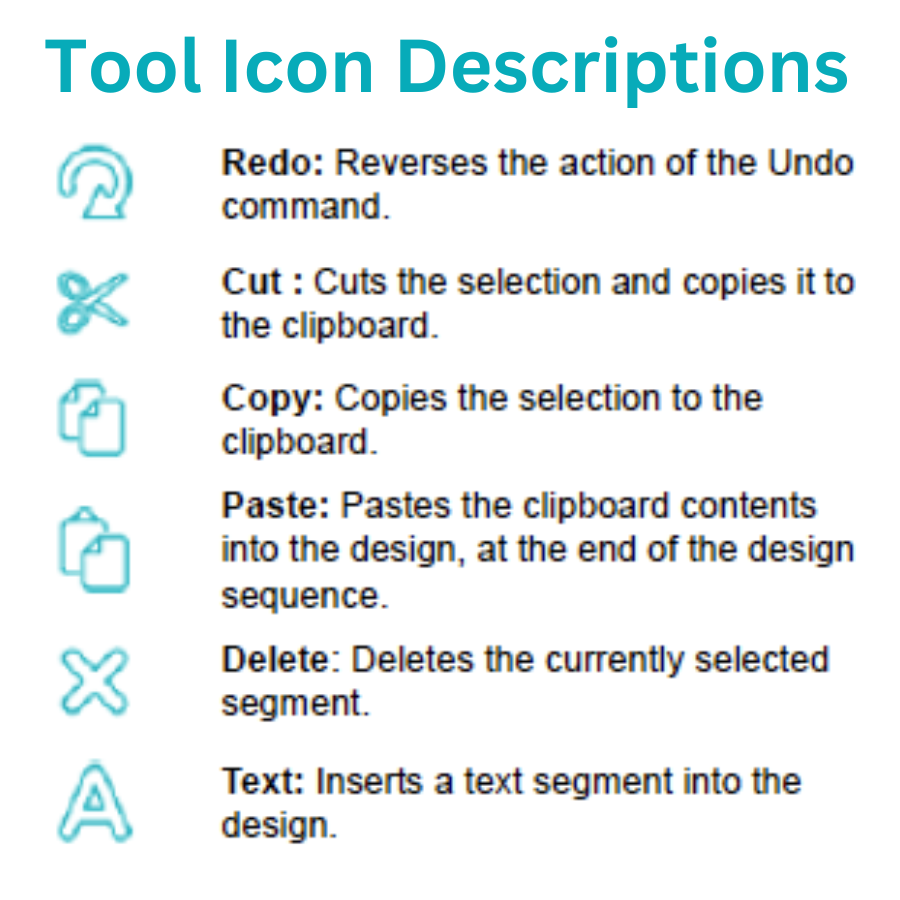
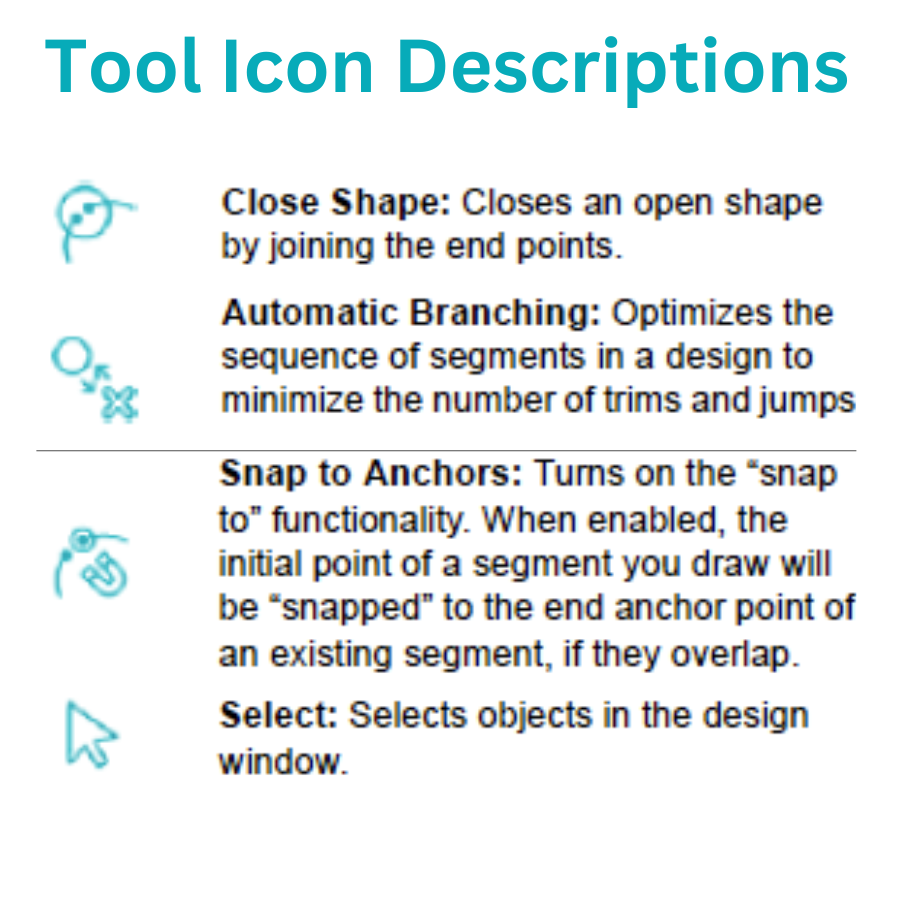
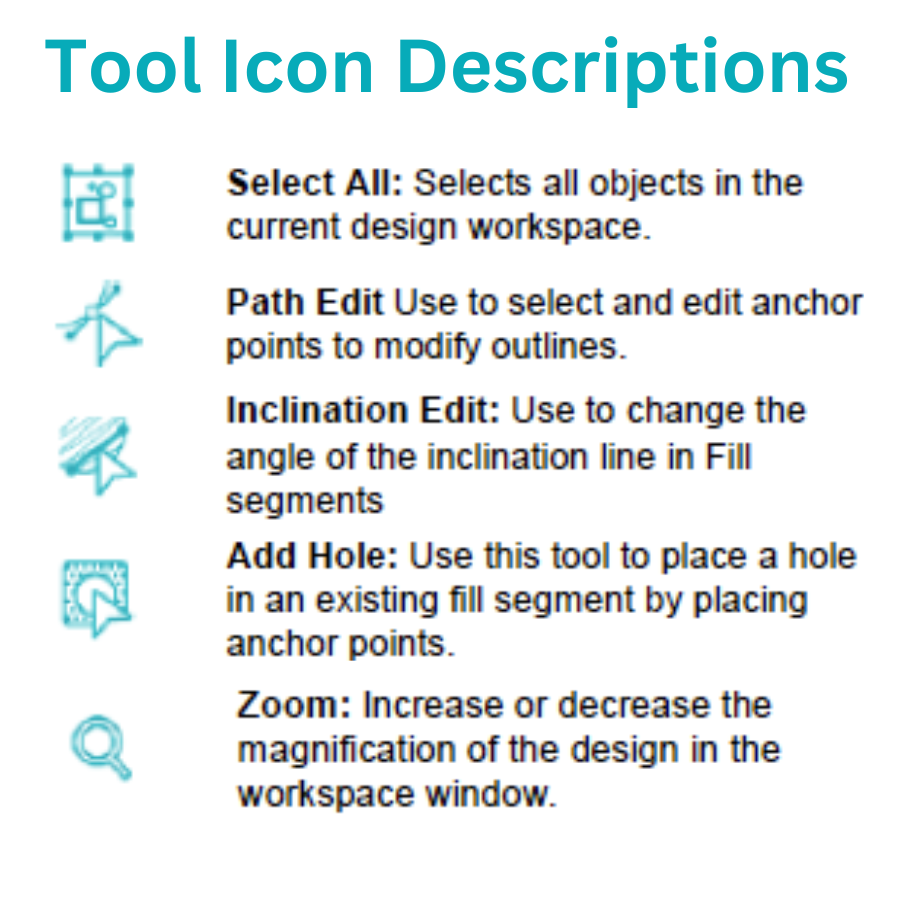
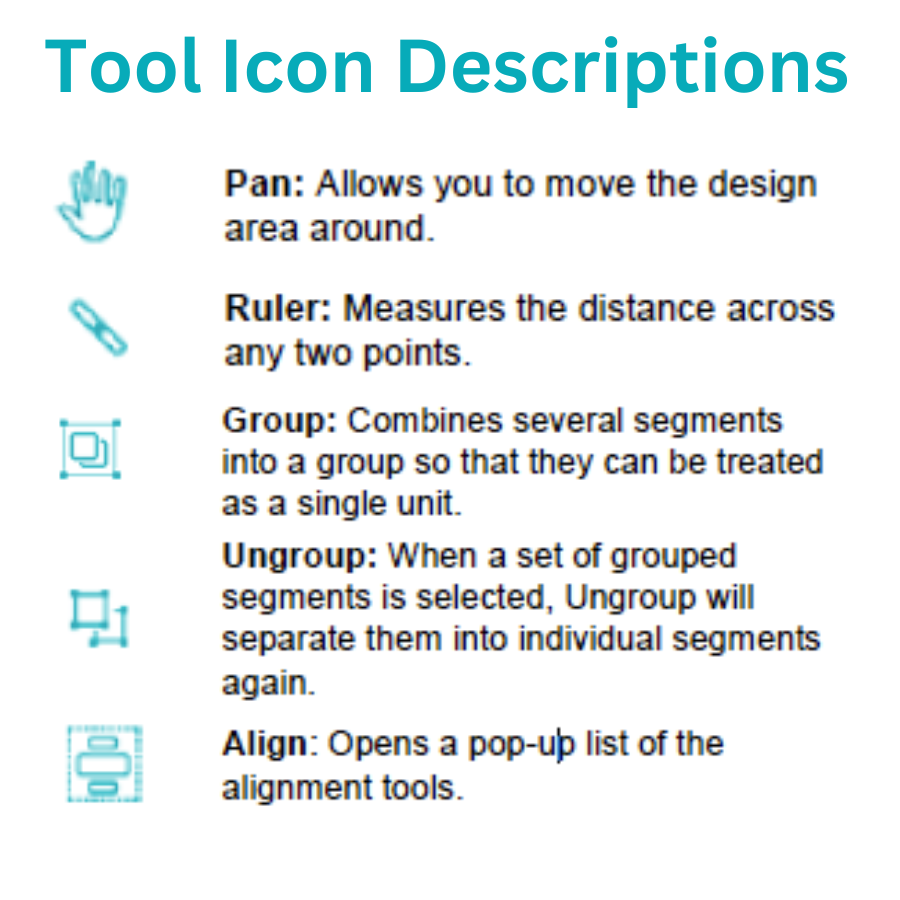
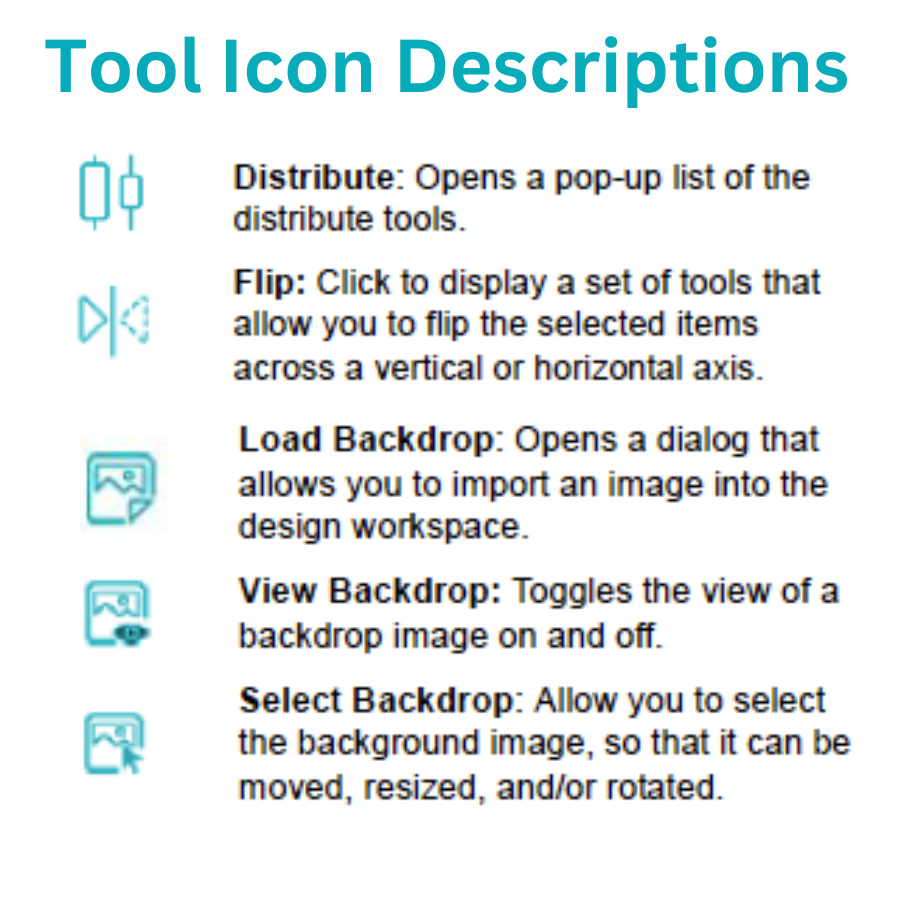
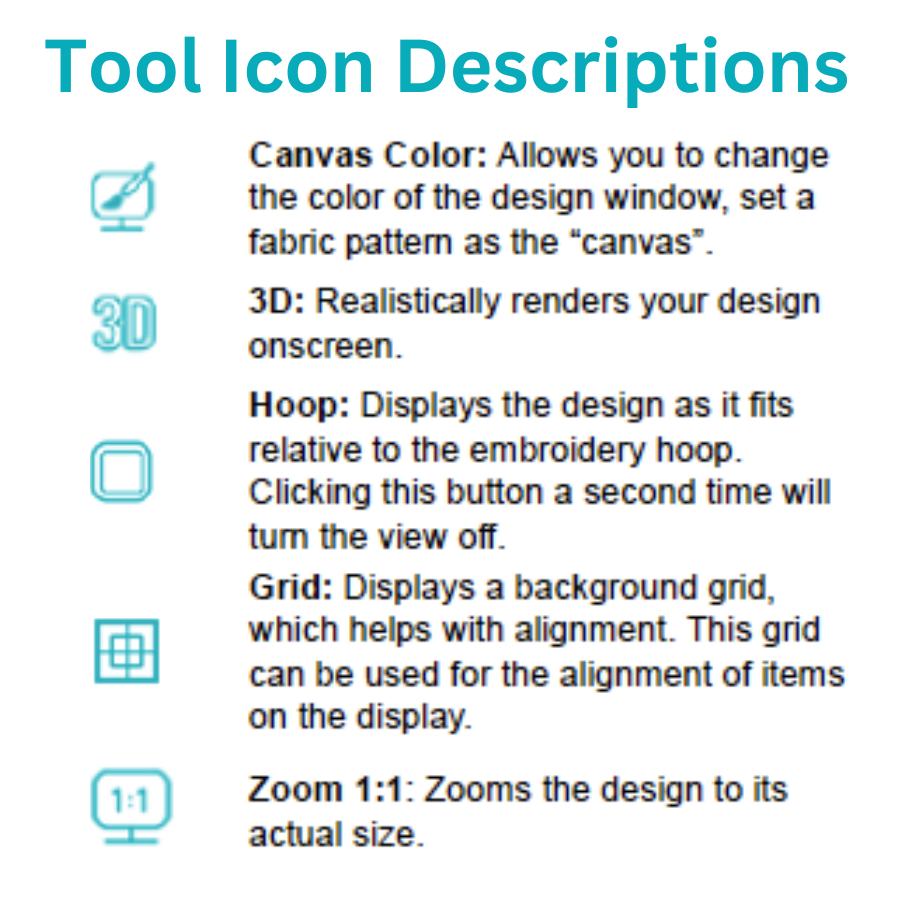
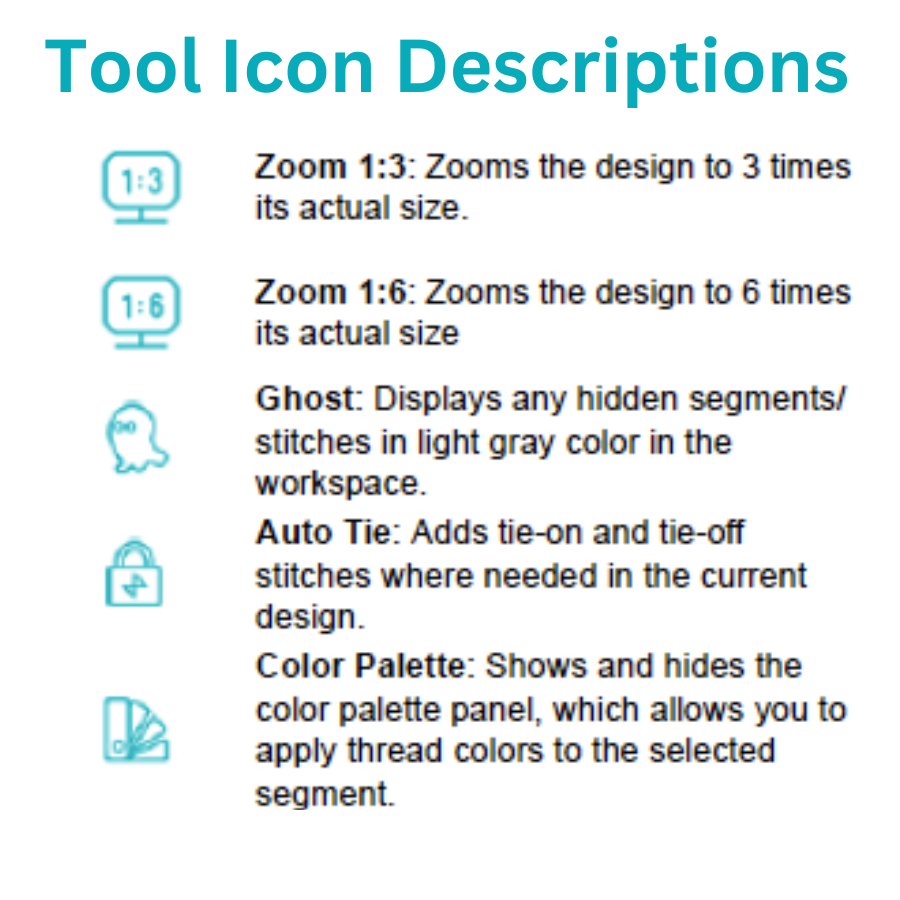
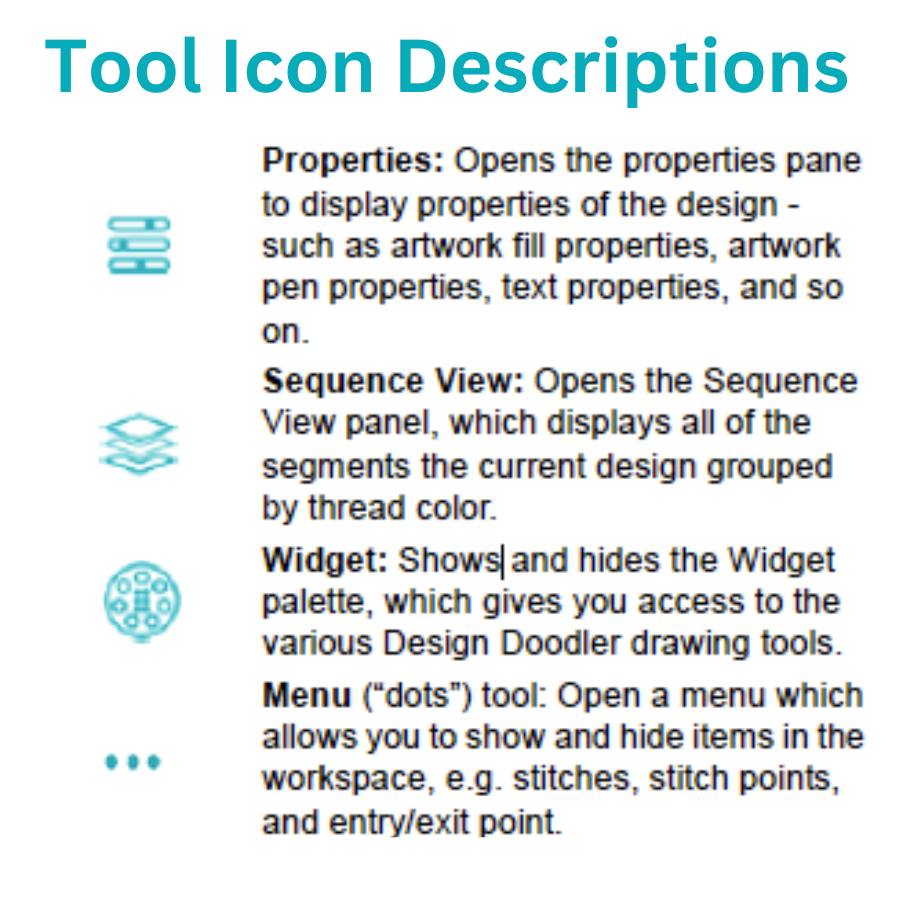
Tools icon descriptions

Using the Design Doolder (basic features)
- The Design Doodler will open most bitmap or vector file types (e.g. . BMP, .JPG,.AI, etc.).
- On the toolbar, click the Backdrop tool.
- Find the location where your image is saved.
- Select the photo you wish to import and click “Done.”
- To adjust the image size, click the Select Backdrop tool.
- Click on the image, and you can move it and change its size using the handles.
- Click the properties bar to adjust its opacity and change its dimensions more precisely.
- Use the view backdrop to view or hide the image as you Doodle!
- Save your Doodler file on your iPad by pressing the “Save File” icon.
- Name your design file and click “OK”. Your file is now saved as a .jds format.
The .JDS file format is the format the PC Design Doodler can read and import.
- Go to your iPad homepage and locate the “Files App.”
- On the left, click ‘My iPad’ and locate the ‘Design Doodler’ folder.
- Open the folder. Here, you will find all of your saved files.
- Click and hold on to the file you wish to share. This will bring up more options.
- Select “Share”.
- Choose your preferred method of sharing. Options may include emailing the file to yourself or sending it via Skype or Telegram (or whatever app you have installed).
- On your PC, now download the file you emailed yourself, shared to your Drive, or sent via apps.
- To import iPad Doodles to the Doodler, ensure that you have saved your Doodle on the iPad.
- Send the Doodle to your email, a cloud drive, or an app of your choice for transfer to your computer.
- Download the Doodle from your chosen source onto your computer.
- Click “Open” within the Doodler software on your computer.
- Locate the .jds file that you downloaded from your iPad.
- Double-click the .jds file to open it in the Doodler on your computer.
- Your Doodle should now be accessible and editable within the PC Doodler.
- Note that you can load both .jds and .jdx files on your PC, but on the iPad, only .jds files can be used since it is the native format for the iPad version of the Doodler.
- Save your Doodle first by clicking “Save As” in the .jdx format to retain the native version for potential future edits.
- Within the Doodler software, select “Save As” once more.
- Change the “Save As Type” to match the embroidery machine format you need. For instance, if you own a Brother machine, opt for the “.pes” format.
- Refer to your embroidery machine’s manual to ensure you’ve chosen and saved the correct file format, as different machines may require specific formats for compatibility.
- Open the Doodler app on your iPad.
- Import your image and create your design.
- Once you are done, save your design file (this is in a JDS format).
- Share your file to your email, drive, or any preferred method.
- On your PC, download the file from the method you’ve shared it from.
- Import the downloaded file onto the Doodler for PC.
- Make any adjustments you’d like to the design.
- Click save to export to your specific embroidery machine file format.
- Remember to save the file format as your specific machine (for example, PES is for Brother machines).
- Transfer the file you’ve exported onto your USB.
- Your design is ready to be embroidered!
- Click the “Print” button on the toolbar.
- You will see a page displaying the Design colors and the design.
- Press “Next” to view the stitch order.
- Click on “Settings” to make necessary adjustments.
- To save as a PDF, click “Set Up” and select “Microsoft Print to PDF,” then click “OK”.
- Click “Print” and save it to your desired location.
- You can now view your PDF anytime.
Tutorials & manuals
There are a couple of options (and we highly suggest you check them all out):
- You can access the tutorial lessons after you log into your classroom. They are considered the most effective way to establish a strong foundation for your successful journey into the world of doodling.
- Check our YouTube channel for tips, tricks, and tutorials. (We have a whole playlist dedicated to the Doodler!)
- Join our active Design Doodler Facebook community group for additional assistance, support, and some amazing inspiration from fellow users.
- To obtain the Doodler manual, log in to your Classroom.
- Once logged in, navigate to the “Downloads” section.
- Scroll down until you come across the “Design Doodler Embroidery Software.”
- In the list of downloads, you’ll find two options:
- The first is “Set Up,” which is the download file for the software itself.
- The second is the manual, complete with its latest release date.
- Click on the manual option to initiate the download and access the manual for your reference.
Checking & updating your version of the Doolder
- Open the Design Doodler.
- Click the three dots at the bottom right of the screen.
- Click “About”.
- Here, you can see the current build version and your end-user agreement.
- Open the app store on your device.
- Click on your account at the top right.
- Select “Purchased”.
- Search for “Design Doodler”.
- If it says “Open,” you have the latest version. If it says “Update,” click on it to update the app.
- Once the update is done, you can open the app.
- Open the program and click the three dots located at the bottom right of the interface.
- From the menu that appears, select “Check for updates.”
- If an update is available, your program will display a message indicating that “Your software is up to date!”
or
- Log into your Digitizing Made Easy account.
- Access your “Downloads” section on the website.
- Locate the “Design Doodler setup” file in your downloads.
- Follow the same installation steps as you would for a fresh installation, but this time, the option will say “Modify” instead of “Install.”
How to get the full version
- Click the “Software” tab on our site and click on the “Design Doodler” tab.
- Scroll down to locate the “Design Doodler” section.
- Select “Start Making my Own Designs” from the available options.
- Follow the billing information provided on the website.
- If you already have an account, click on the relevant option to join.
- Place your order when you are ready to purchase.
- After completing your purchase, you will receive an email that includes the following:
- A link to download the Design Doodler program.
- An invitation to join the Design Doodler Facebook community.
- The serial number that you need to add to your new Design Doodler software for PC and iPad.
- Open your email from the email address you used to purchase the Design Doodler.
- Find the “Your Order is Now Complete” email.
- Scroll down until you see the Serial Activation Code section.
- Copy the Serial Key Code.
- Open the Doodler software.
- Click the three dots at the bottom right of your screen.
- Select “License Key” from the options.
- Enter (or paste) the serial key in the provided field.
- Click “Activate” to finalize the activation of your Design Doodler software.


DOES This import to a mac or only Pc
The Design Doodler is only compatible with PC desktops and has an accompanying app for iPad
Can you load a design into Doodler and then just stitch it? Does it automatically make that design into a stitch file? Or is is just a template in the background to doodle over?
Great question, you cannot bring in an outside design into the Doodler. You can however create a design in the Doodler and bring it into another embroidery software and edit and add as you wish.
I bought the Design Doodler program, but haven’t created anything really good yet. I’m just going to go through the possibilities like I did in Hatch. It’s really fun! I’m very happy that I can watch the lessons on YouTube, where I can benefit the most with German subtitles and a slightly slower speed, so thank you very much for that!
We’re glad you’re learning 🙂 be sure to join our Design Doodler Facebook page for inspiration, tips & tricks! https://www.facebook.com/groups/embroiderydesigndoodlersoftware
I am a caregiver and I am light yeas behind what I want to learn and create. The road ahead in my learning to use the Design Doodler is so far i cannot see the light at the end of the tunnel….HA HA HA
You got this Martha! Be sure to join our Doodler Facebook group for extra support, tips, tricks, and inspiration! https://www.facebook.com/groups/embroiderydesigndoodlersoftware
I’m sorry for listen but I’m trying to understand how do i find the embroidery. I have a brain tumour which makes me stupid, but the drs have said the more I use my brain the less chance of developing other symptoms. I’m not trying to scam or anything I just want to learn new things
The Design Doodler is a fun software where you can create your own embroidery 🙂