Creating your own machine embroidery designs can be great for your personalized projects or advertising selling in your business. Who doesn’t love a customized design of their cherished wedding photograph or their cutest four-legged best friend? Learn how to bring your portraits to life, one stitch at a time!

Many people have asked for an embroidery portrait tutorial. We have created tutorials to teach you how to create embroidery from photos! We’ll look at outlines, texture fill, adding color blocks, and how to combine them all for a fantastic result! You’ll be creating your own custom embroidered portraits in no time.
Creating Embroidery Designs From Photos
It seems daunting to imagine creating your own embroidery from a photograph, but it’s easier than you think! Tracing a line from a picture is simple with a regular mouse, pen mouse, pen monitor, or Apple pencil.

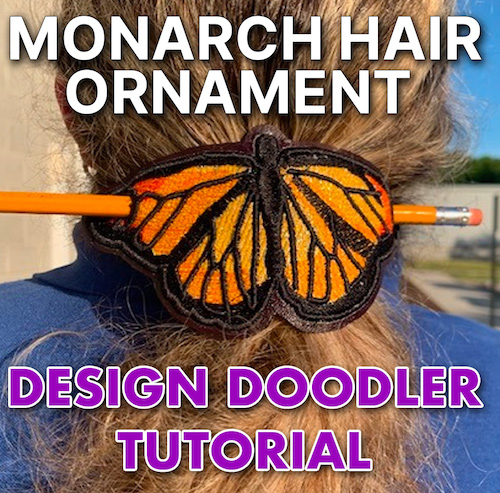
Doodled by the talented Christine Buhr
Want to easily turn your drawings into stitches without any embroidery digitizing? The Design Doodler Software easily converts your doodles into machine-ready designs with a few clicks!
You can draw and trace images and customize your design to be as simple or complex as possible. So easy; even kids can create embroidery designs! Try a free demo of the Design Doodler now.
Let’s discuss things to keep in mind while working with photographs.
- Keep it simple while you learn, and don’t try to recreate everything!
Start with the basics until you learn, and add more detail. Starting your portrait journey will be easy if you learn how to create a solid outline. Practice on more simple photos and develop your style. - Develop your style. Your point of view, tastes, and skills are unique to you. Stick to the steps we’ve outlined to help you structure your drawing so it works for you.
- Don’t try to add all the details. At one point, there will be too many details.
A great rule of thumb in embroidery is “your brain fills in the details.” You don’t need every detail to know it is a dog or a flower. If you think you put in too much detail, you probably have. - Be patient with the process. This type of embroidery can take time to perfect. So, friends, dig deep, try something new, and practice.
Types of Embroidery Portraits
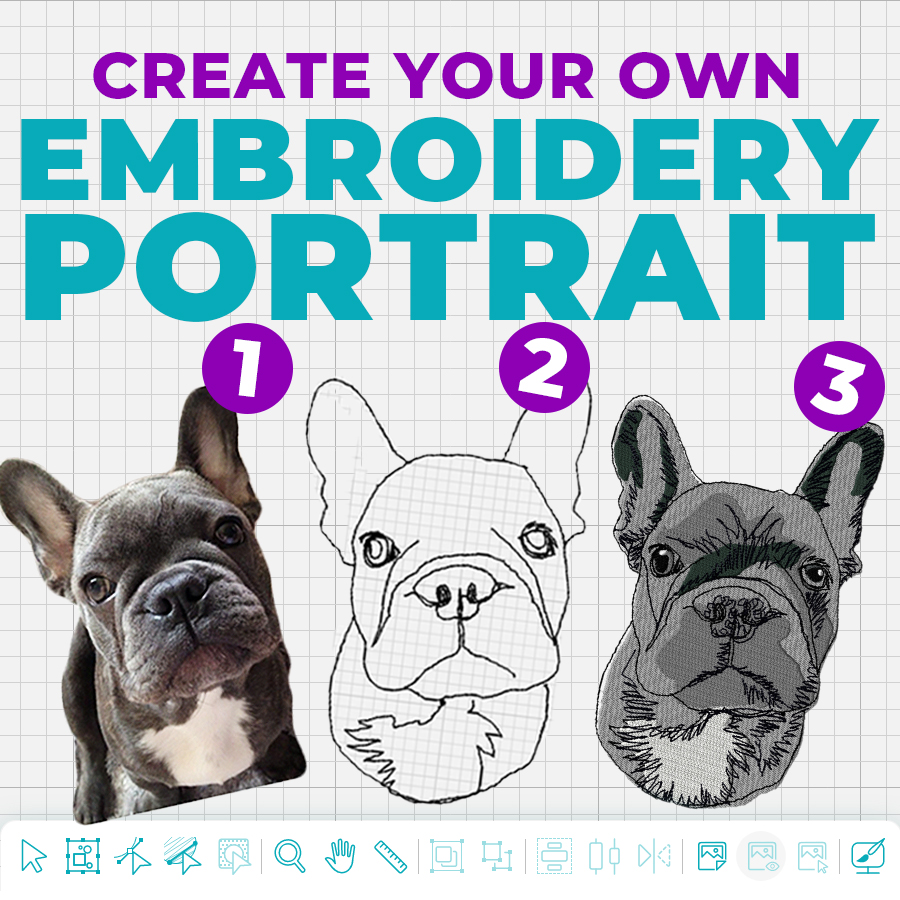
We made different drawings, from easy to hard, but here are four ways to use a photo for an embroidery portrait. These creations are made from a starting photo and can be created using Design Doodler. The creation process requires a pen monitor or pen mouse.
The only skill you need is tracing!
1. Outline Portrait Embroidery

Outline embroideries are popular, and they are fairly easy to do! You can create pets, people, buildings, or anything you’d like! Many of our Design Doodler Facebook members have done bride and groom outlines for gifts, outlines of family and friends, pets, and more!
We highly recommend checking out our Embroidery Design Doodler Software Facebook group for some great inspiration, tips, and tricks!
Let’s talk about pet portrait embroidery. This darling little Frenchie is a great beginning point. Even with just lines, you can tell who he is; there is even character in his face and stance.
Here are the steps we took to create this playful pup!
1. Insert good quality artwork at the “finished size” into your workspace. Your artwork must be the size you want for your stitching.
2. Trace around the entire outline of the subject. Theoretically, you can stop here, but there are a few items you can add.
3. Eyes: or at least a little of the eyes. You will have expression even if you include the upper eyelid and the iris/pupil.

4. Eyebrows: pencil-thin eyebrows are not (currently) in fashion for people, but they sure work on embroidery portraits! They help establish the face and expression.
5. Nose: to find the bottom of the nose, draw a line between the nostrils and circle the tip. This helps define the nose and add detail to our character.
6. Mouth: an easy cheat is to draw the line between the lips, and if the lower lip is full, a second, smaller one under that.

7. Laugh/frown lines: ladies hate them, but they give character.
Pets all have these lines, too, so make sure to try out these techniques.
Less is more in outline drawings. Your brain fills in the rest! Avoid putting too much detail, or it can ruin your portrait.
2. Texture Fill Embroidery

Texture fills are more lines added in to flesh out the design. We suggest trying this after working through the outlines. These will provide detail and can bring the subject to life.
To add more detail:
- Be sure to zoom in. For example, you will often get a better result if you look at an eye as a series of lines and shapes.
- To create fur texture, try not to fill in all the lines of the fur. Pick some of the darker areas and make the lines of your fur more dense. It serves two purposes: it implies color and shows shadow.
- You don’t want to add too much to make fur texture on white fur. Only place a line or two to show the direction of the strands.
- To make short fur, use small strokes or zigzag.
3. Color Block Embroidery

Color blocking is choosing how many colors to use and applying them to a simplified picture. Different from painting. Many people use an editing “cartoonizer” program that simplifies the colors for them!
Primary colors range from extremely dark to light. Using those colors, we can lay down a background. Make sure that these overlap; this creates a more stable base.
Generally, tatami stitch is the best fill stitch. Still, we recommend lessening the density and removing the underlay (we want color coverage but not dense fill).
Do you know what a tatami stitch is? Learn about the three main stitch types with our free Digitizing 101 Course.
We use black-and-white images with color blocks to show highlights and low lights. Here is another example of how that works:

Adding the dark and light brings this bunny to life!
Color blocking
- Run your photo through a cartoonizer or editing program to create color “fields.” Or, as we did, digitize a fill of the entire subject within the outline using the most prominent color you see in the picture.
- You can color block both if your subject is multicolored (a dog, for example) in black and white. When using black, we have found it helpful to move up one color to charcoal and then use your black highlights over it.
- When you have a base color for your subject, you can return and add overlays of the other colors you see in the picture. Make sure to lessen the density of every layer you put on going forward. You want to have some of the base colors show through.
- Place your outline over the color-blocked background and see how it looks.
Let’s look at our Frenchie…

We decided where dark and light were on our own, but a program would work here, too!
Remember that in this portrait, we don’t have to fill every space, but you can! Include the fur colors white, black, and grey.

In a future lesson, we’ll discuss drawing eyes. But for now, we drew the colored part and added a small white dot to make it look shiny.
Remember that the highlighted reflections (the white) are not in the same place on each eye. Eyeballs are not round, so where that reflection hits will be different on each eye.
Let’s move on to putting them all together.
4. Texture and Color Block Embroidery

We’ve taken the outline, the texture we added, and the color block to put our little pup together. We were not trying for a photographic result; we wanted to capture his character!
Let’s recap how we created this fabulous Frenchie!
To create the outline, these are the steps we took:
- Insert a good-quality picture into your machine embroidery software, we recommend using Design Doodler®.
- Using a pen mouse, a pen tablet with a stylus, or Apple pencils (for our Mac users), trace an outline of the subject. You will have a better result if you zoom in.
- To add more details, we suggest selecting two or three things that help to define the subject. Remember that less is more.
- Remove your artwork by hiding it, and check out your result.

This is a line drawing while using permanent ink pencils. Super simple, as you draw and activate with water!

Doodled by the talented Christine Buhr
Check out part 2 of this portrait blog series, From Thread to Fur: Create Stunning Custom Pet Embroidery Portraits, as we’ll move from something slightly more complex like the image below!

Doodled by the talented Christine Buhr
Conclusion: Creating Embroidery Portraits Are Easier Than You Think
A whole world awaits your creative input when considering pet and people portraits. We will revisit this topic with a series of lessons designed to strengthen your skills in each area. We’ll provide ideas on combining these techniques with applique and texture to make your portraits POP!!!
PS. Don’t forget to download the free Design Doodler demo to turn your photos into embroidery designs easily. Try how fun and user-friendly the Doodler is for yourself at no cost! Your personalized portraits await!
PSS. If you have any further questions about creating portraits, be sure to join our Embroidery Design Doodler Software Official Group for some helpful answers from Christine Buhr and other great members!


This was valuable information, thank you so much.
You’re most welcome Darlene!
I have not read this before nor seen it. I have just laptop PC. I’m 84 years old and things are a little bit hard for me to learn and understand. But I think this program with some work would help me a lot. But first I have to buy the machine and I can’t download these things. As I am the only one in the family that enjoys doing the embroidery, or has time to do the embroidery with a child. It’s hard to get help, from home.
We totally understand! Learning something new is always intimidating. If you’d like to learn more about the Design Doodler you can try our free demo here https://www.digitizingmadeeasy.com/embroidery-software/design-doodler/free-trial/
Leanne at our office is always here to assist if you need it 🙂