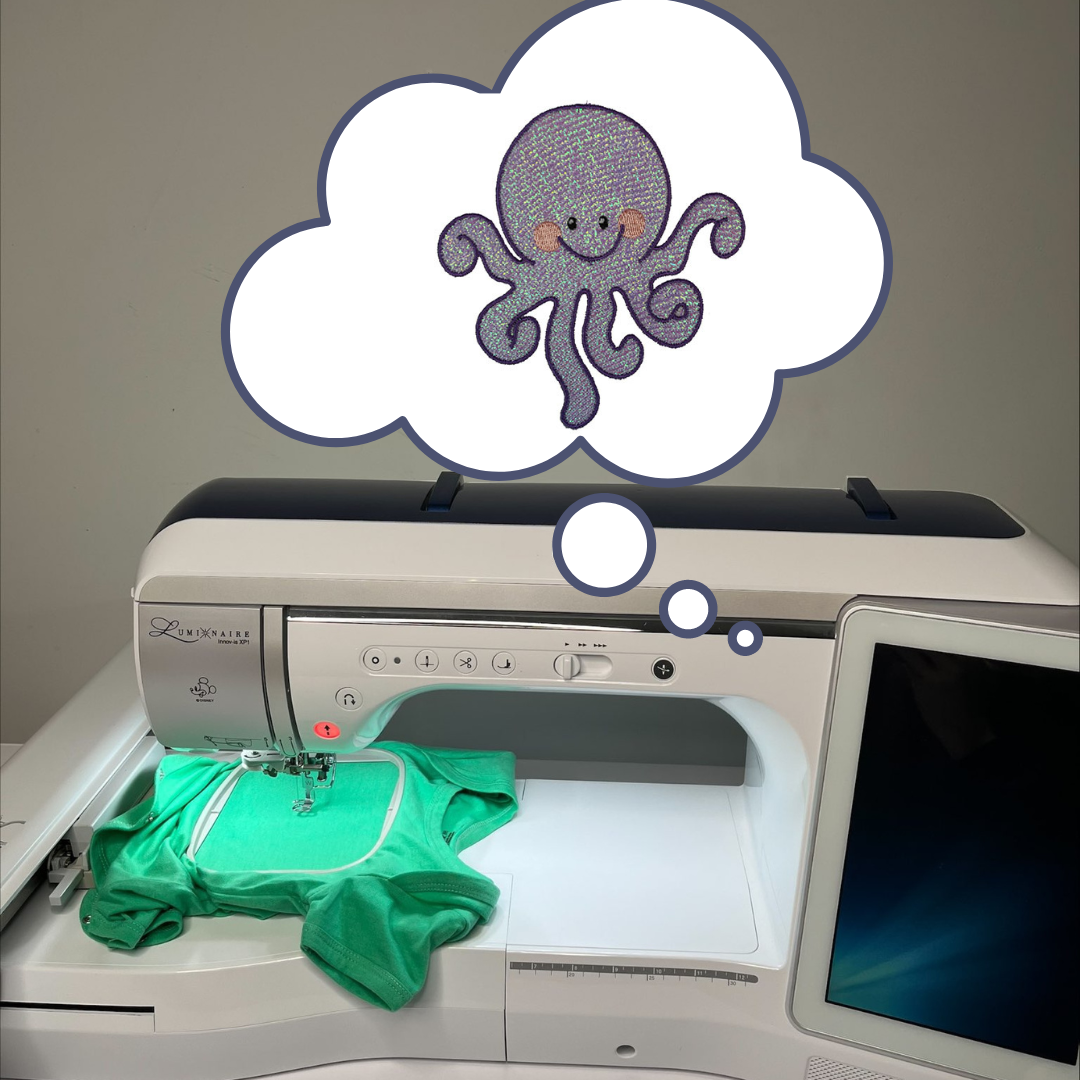
Ever look at your embroidery machine and wonder what is going on in there? What do they think, how do they think, and why do they not understand us?

Today we are looking into the mysterious unseen world of your embroidery machine and why it can be so frustrating yet delightful. Now caution, we’ll take a little trip back to those good ‘ole days of mathematics- graphing and charts and stuff. But don’t be scared. We’ve got you covered!
Embroidery Machines As Machines
When it gets right down to it, your embroidery machine is just that… a machine! They don’t think; they react. They have no emotions or judgments. In this day and age of personalized assistants on your phone, tv, car, and all around your home, we forget they are not people. Let’s touch on how your machine looks at the info you provide.
Early “Computerized” Embroidery Machines
Let’s start with early machines. Yes, believe it or not, in the 1860s, Schiffli Embroidery machines ran on long-punched tapes. These tapes had little holes punched in them that were fed into the machine and “read” much like a player piano or a music box. A hole came along and triggered a lever which allowed a stitch or stitches to be made.
Want to learn more about what it means to be a puncher (now more known as a digitizer) or see these schiffli machines in action? Watch this wonderful history of our Embroidery Legacy business that started in the 1960s. Designs were created and punched into a graph and moved a handle from hole to hole to make the embroidered design.
Did you know that our CEO John Deer is the last Schiffli master digitizer still alive and teaching in North America? Click here to learn more about our Digitizer’s Dream Course which combines a solid foundation of age-old digitizing theory, with today’s modern technology to help you create your own custom embroidery designs!
What is a CNC Machine?
Anyone who knows a machinist or metal worker might have a passing knowledge of a CNC machine (Computerized Numerical Control). These modern marvels read code or input coordinates to move a cutting, engraving (or, in our case) embroidering head. It is a modern equivalent to earlier tape-fed machines.
A CNC machine moves back and forth in what seems like a random pattern but isn’t. Your embroidery digitizing software tells the bed of the machine to move back and forth so that your object is created in the way it was digitized for embroidery.
Think of it as similar to keys being cut at the hardware store. The info (the key shape) is read and transferred to a head that cuts. If you’re not familar with digitizing, our what is embroidery digitizing article is for you!
Embroidery Machines & Stitches
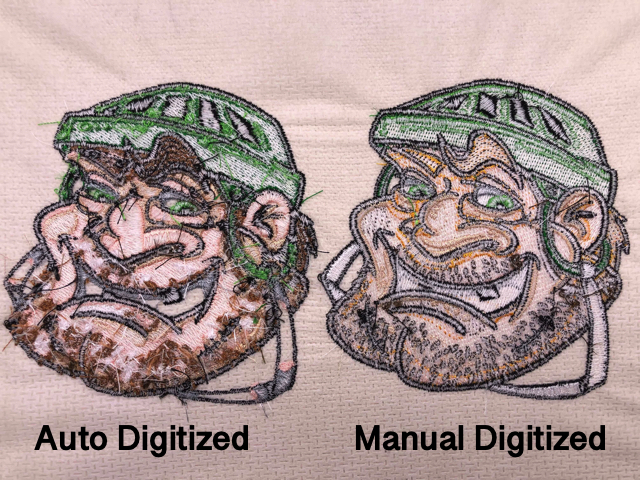
All your machine does is read a code sent to it! “Put a stitch here… now one here…another here… and trim.” It will follow this list of instructions like a recipe until it gets to the last trim. It can be frustrating when things don’t go as we want, but unfortunately, the old computer adage “garbage in, garbage out” is most often true. A missing single stitch, a forgotten color change, or a decimal point can change the info, and the machine does what its told and marches on through hoops, birds’ nests, broken needles, and more.
What is an XY graph? Well, they look like this….

You’re dreading it, but here’s the math portion.
There is a vertical axis (the X axis) and a horizontal axis (the Y axis). These two lines help us to understand where things are located within a space. In this case, it’s two-dimensional since we are working on a flat plane. (You can sigh relief that we’re not talking about 3D space today).
This is the space your embroidery machine sees when you give it information. If you can imagine a very, very dense graph with all the points the width of a hair, that is the vast number of intersections your machine needs to work. Take a look at an iPad or an iPhone (or any other tablet), and you will see lots of little points in a grid- these are similar. That grid helps your tablet understand where your finger, pointer, or embroidery head is at any given point.
Here is a “large” version of what your embroidery machine sees. The grey portion? Those are a lot of little squares…

The instructions for the machine to know where to stitch are like a “connect the dots” on a teeny tiny grid like the one above. If I want to outline an apple, you draw around it on your digitizing program, but if you lay that apple on a graph and mark every intersection in which the edge of the apple touches a line. Those are the anchor points that help the machine.
Want to learn more about embroidery software? For user-friendly embroidery software, try the Design Doodler.
We use a very, very fine grid to get the best reproduction. The more intersections, the more information to make better stitching. With a really fine grid (like on your machine) you get a nice smooth line. With a little less fine line, you get spaced-out dots and a more jagged stitch line.

This is what our apple looks like as a “connect the dots” laid on a large grid.
Imagine how much info we get from using a very fine grid…

So, let’s recap… The machine needs points plotted on an XY graph to know where to move the machine. And most importantly, machines don’t think; they just process the information you provide.
How Do Embroidery Machines Understand Different Stitches?
How does a machine know how to do tatami or satin? Or patterned tatami? Well, it’s the same thing. The embroidery file you insert comes with instructions on how to make these stitches. “Go this many stitches this direction, this large”… “go the other way and place the stitches on these points.” Patterned stitches are just long and short stitches placed on certain points. Here is an example:

See the little white dots? Those are stitch points. That fill sequence is programmed into the file you made in your software, and the machine works, placing the stitches in the correct place using the grid as a guide.
Intersted in learning more about how to digitize? Enroll in our free Embroidery Digitizing 101 Course. You’ll receive a video course & cheat sheet to learn the basics of creating and editing your own embroidery designs.
How about the satin stitch?
Here is what the stitch points look like.

Wait! Why are there not any points in the middle of the object? There were in the tatami! That is because the satin stitch goes back and forth to make that rich, satiny result. So satin stitch uses an outline around the object and anchors it to them.
Keep in mind that when using the satin stitch more than 7 mm wide with the “auto split” feature will place a stitch point in the middle to make the stitch shorter. If the stitch is wider than 10 mm (the threshold for most machines), it will skip those stitches because the machine is unable to make them.
Can embroidery machines alter tension and pull?
“How do I set my machine to lessen the tension?” This is a common question. Keeping in mind that our machines are just machines, we know they cannot understand tension and don’t care. They just stitch the stitches we tell them to, where we tell them.
Your embroidery machine does not solve any problems regarding pull compensation. Remember, they only react to your information. Pull compensation is affected by how large the image is. Need to lessen pull? Make the image larger to “compensate” for the contraction.
There is more detail regarding push and pull compensation in digitizing and your embroidery; watch John as he helps explain this essential digitizing topic.
Conclusion
If there is one takeaway from this article, it is that embroidery machines are super simple when you take away all the lasers, buttons, bells, and whistles. All they do to create beautiful embroidery is move the embroidery bed to points on a graph, make a stitch, and move on to the next.
If you get frustrated and something goes wrong with a stitch out, it is always best to go to your file or check the digitizing because a majority of errors can be found there. We know it is frustrating to have errors, but we hope that understanding how embroidery machines think will help you in your embroidery journey.
P.S. If you want to learn about and begin your journey with digitizing, don’t forget to check out our free Embroidery Digitizing 101 Course to learn the basics of creating & editing your own designs at your own time in your own home!
Until next time, happy stitching!

Always appreciate your blogs and the free embroidery design is a wonderful added benefit to members. Thanks so much for all that you provide
You’re most welcome Donna! We appreciate your support