A plain t-shirt makes the perfect canvas to add some creative machine embroidery.

T-shirts stretch, but embroidery designs do not. And what about placement? Where exactly should you place the design on the t-shirt, and how do you make sure it is straight?
How To Machine Embroider A Shirt
Embroidering on a T-shirt is the perfect project for a beginner. T-shirts are affordable and easy to find, with many options available at thrift stores.
If you are considering starting an embroidery business, mastering embroidery on T-shirt fabric is necessary. Many companies and organizations want their employees to wear branded, embroidered T-shirts and polos.
Before starting embroidering, ensure you are using a high-quality embroidery design. Nothing is worse than running your shirt with perfect placement and hooping, only to have it ruined by a poorly digitized design!
Looking for a reliable design to use on your next embroidery project? Check out our 30,000+ high-quality embroidery designs.
Placement Of Embroidery On A T-shirt
When embroidering on t-shirts, the common placement for embroidered designs is in the center or on the left chest.
How To Center A Design On A T-Shirt
First, turn the shirt inside out. Match the side seams and the seams at the shoulder. Then, fold the shirt in half and iron it. Now, you have an apparent vertical line down the center front of the shirt on which you can center the design.

Next, you must decide how high to place the design on the t-shirt. Here are our recommendations for a center placement:
- Baby onesie: The top of the design should hit about 1.5” from the center front of the neck hole.
- Kids’ t-shirts: The top of the design should hit about 2” from the center front of the neck hole.
- Adult t-shirts: The top of the design should hit about 3” from the center front of the neck hole.
Now that we know the distance from the neck, how do we center?
You will add together the distance from the neckline we mentioned above plus one-half the height of the design. This will correctly place the design mid-to-upper chest. The size of a design can also affect this. Embroidering a 3-inch design will be a bit higher than a 10-inch design.
For example, if you are stitching a design that is 5” in height on a kid’s t-shirt. The center point would be 2” + 2.5” = 4.5” from the top center edge of the neck hole.

Remember to trust your perspective. You can print a paper copy of the design. Place it on the shirt to see how it will look.
Left Chest Design Placement On A T-Shirt
Identifying the center point of a design intended to go over the left chest is also pretty simple. Again, turn the T-shirt inside out and find the center by folding it in half. Once you have a center line of the shirt, the center of the design going on the left chest should fall between this fold line and the left shirt sleeve seam.

Align the original and side seam lines to create another vertical fold line to serve as your center line. Your new fold line will lie between these two lines.
For women’s shirts, the top of the design should be about 5 inches from the highest part of the shoulder seam. For men’s shirts, it should be about 7 inches.
Find the center point of your embroidery design on the t-shirt. Mark it with a pin. Insert the pin from the front to the back of the shirt.
One of the best investments an embroiderer can make is a quality hooping station. These stations ensure consistent and straight placement.
We both promote and sell the Echidna Hooping Stations as we’ve found them the easiest to set up and use. They’re also friendly to all machine brands, both home and commercial. Because they work on the principle of magnets, even the new magnetic hoops can be easily used.
How To Embroider A Shirt With a Machine
Hooping your shirt is crucial to get excellent results.
Remember not to make the hoop too tight, as it can cause hoop burn. If the hoop is too loose, it may distort and move the design. Learn more from our How To Easily Avoid and Fix Hoop Burn guide.

Learning to “pre-set” your hoop will reduce both scenarios. Here is a video that shows exactly how to “pre-set” your hoop.
Hooping in embroidery can be difficult! Check out our embroidery hooping tutorial, tips and tricks!
With proper placement and hooping taken care of, it’s time to start embroidering!
List of needed materials:
- T-shirt
- Scissors
- Painters tape (or adhesive spray)
- Marker
- Measuring tape
- Design template print out
- Iron
- Embroidery design (we used Beach Babe)

Step 1: Fold your shirt in half and iron it to get a good center line to base your placement off.

Step 2: Take your design printout (in actual size) and measure where you want to put it in your shirt. Here we want to be 3″ below the top of our shirt.

Step 3: Use painters tape to surround your template and place small dots as to where your horizontal and vertical axis is. (You can use a fabric marker but this makes less mess!)

Step 4: Take your bottom hoop. Use painters tape to keep the stabilizer from moving on the hoop. Place it under your shirt.
For most T-shirts, a medium-weight cutaway works and provides a good stabilizer. No-show mesh is a good choice as it is softer, but you might need two or more layers. You can use iron-on fusible interfacing, but this can create marks from the edges of the stabilizer on the back of the shirt.

Step 5: Position your design template back on your shirt between all of your markings.

Step 6: Properly hoop your shirt. Use your tape for correct placement.
When choosing your hoop, ensure it’s as close to the design size as possible.

Step 7: Turn your shirt inside out after hooping and remove the tape.

Step 8: Place clips around your garment to hold extra material. Put your hoop onto your embroidery machine and start your design!

Step 9: Finish stitching your embroidery design.

Step 10: Once your design is completed, remove it from the hoop. Turn your shirt inside out and cut away your stabilizer.

Step 11: Turn the right way out and you have a perfectly placed embroidery design on a t-shirt!
If you see hoop burn on your garment, lightly spray it with water. Let it dry and see the hoop burn disappear, keep the fabric type in mind.
You’re ready to wear your newly embroidered shirt!

Tips For Machine Embroidery On T-Shirts
Other than placement and hooping, here are a few other tips that will improve the outcome of your project.
- Use an appropriate embroidery needle. A ballpoint needle is best when embroidering on a stretch fabric like a t-shirt. It gently pushes away the fabric when stitching instead of shearing it.
- Use a water-soluble topper for a more polished result. Water-soluble toppers are often used on nappy fabrics like towels and can also improve the look of a T-shirt.
- Use Cloud Cover to soften the inside of a t-shirt. The back side of an embroidery or applique design can be irritating when it is in direct contact with the skin. Cloud Cover is a product you iron on the back of the design to cover the scratchy stitches.
- Print out the embroidery design to scale to help with placement. Figuring out how high to place the design on the t-shirt can be tricky. Please print out the design to scale, position it on the t-shirt, and mark the center point with a pin.
Learning how to embroider on a t-shirt is a valuable skill. It can help you start a successful embroidery business or create gifts for those you love.
Mastering this is the key to building a solid foundation. With some practice and patience, you’ll create beautiful and functional garments in no time.
P.S. Don’t forget to download our free Embroidery Legacy Design Kit that includes 11 fan-favorite designs!

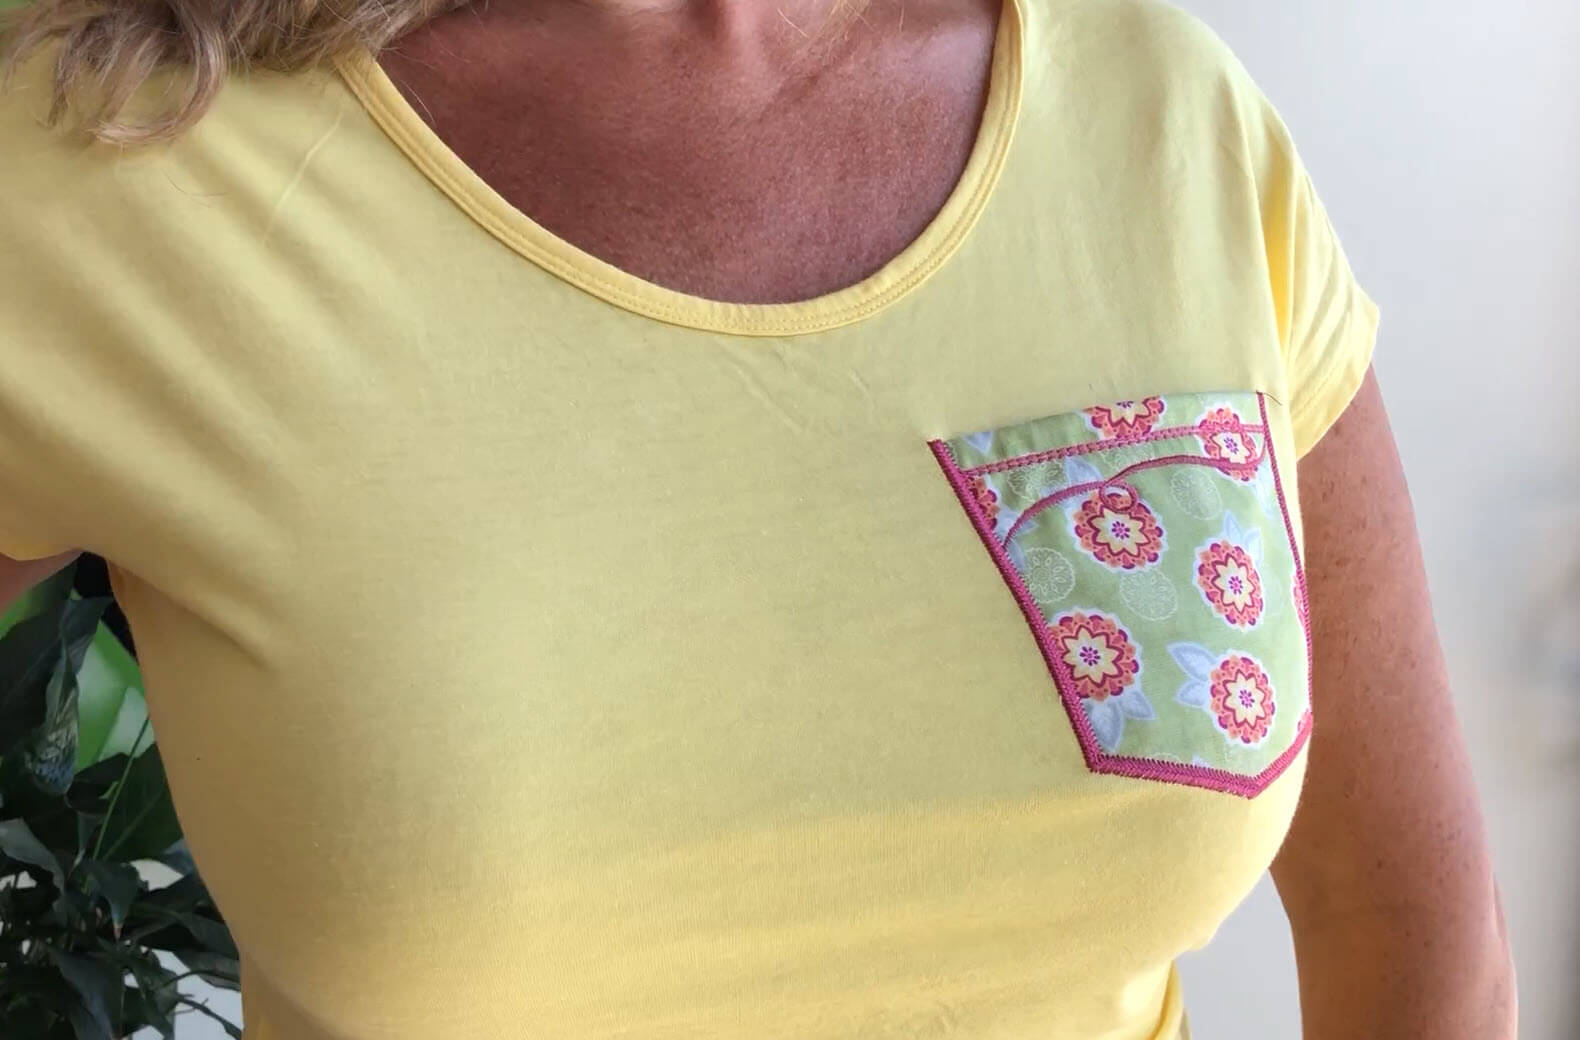
I have been a dressmaker for at least three decades and have sewn many a pocket to a garment, but my embroidery machine, I have only had for two years. This video showing Legacy Embroidery Pocket Designs is like a breath of fresh air. I can pre make my pockets in any colour or design and then when the opportunity arises, use them to instantly stitch on a garment. They are neat, quick and a pleasure to make, thank you Embroidery Legacy.
That’s wonderful Gill, happy to hear the pocket designs are making your job easier!
Thanks for the kind words.