If you’re an embroidery beginner this article is for you! You’ve finally found the perfect embroidery design online and can’t wait to see how it will stitch out. However, here’s the tricky part, you don’t know how to transfer the design from your computer to the embroidery machine!
")
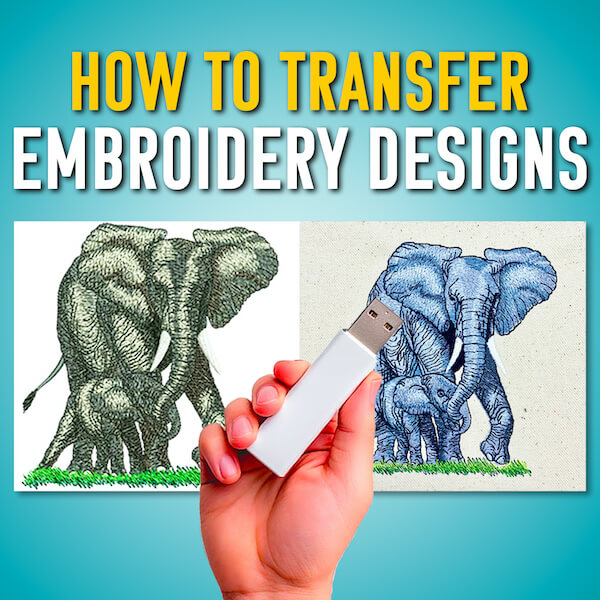
Stay calm and stitch on! Let’s discuss how you can transfer your embroidery designs from your computer to your machine in three simple steps.
Step 1: Finding Your Machine Embroidery Design
I’m sure we can all agree that finding quality embroidery designs online can be either a hit or a miss. Not all embroidery designs are the same. What looks good on your computer screen may not look good when embroidered (and no one likes bulletproof designs!).
Want to try some high-quality embroidery designs? We recommend downloading our free Embroidery Legacy Design Kit to try some of our embroidery designs that’ll impress!
Did you know at Embroidery Legacy we have 30,000 quality designs to choose from? From applique and mylar to true vintage lace, we have something for your next embroidery project!
After browsing the site I’ve decided on this “Elephant with baby” embroidery file.

Now that I have my design selected I’ll simply add it to my cart and proceed to check out. After I successfully download my new embroidery design it will appear as a zip file in my downloads section.

To see the different file formats included in the zip file, simply double-click the folder.

Choose the stitch file format needed for your embroidery machine brand.
Step 2: Downloading Embroidery Designs to USB Stick
Now that we have our design downloaded to our computer we’re going to need a USB stick thumb drive. The brand/type of USB does not typically matter as long as it has enough free space on it for the design.

Plug your USB thumb drive into your computer via the USB port and open it. As you can see, it appeared as “TOSHIBA” on my computer.

Next, you will select the design file format you need from the zip folder we downloaded. Because I’m using a Babylock machine, I’m going to select the PES file. Make sure you select the correct file type for your machine.
Need help understanding machine embroidery file formats? Check out our complete machine embroidery file format guide for everything you need to know.
Click your selected file and either copy and paste it onto the USB folder or drag and drop it.

Now that our design is on our USB drive we’re ready to put it onto our machine!
Step 3: Transferring Embroidery Designs to Your Machine
We can now put the design on the embroidery machine! Ensure that you connect the USB and switch on the machine. Now look for the USB logo on your machine, here’s what the USB port looks like on mine.

Plug the USB into the machine.

For the final step, click the USB logo on the screen of your machine.

Now, you can browse through the files loaded on the USB stick. Select the design you put onto the USB, select your design colors, hooping your garment, and you’re ready to begin stitching!

How To Transfer Embroidery Designs From Computer To Machine
Want a super quick visual tutorial? Check out this short reel where I show you how easy downloading your designs to your machine truly is!
Now that we’re past the learning curve, it’s time to explore and have fun! What’s the first design on your embroider-to-do list?
PS Don’t forget to download our free Embroidery Legacy Design Kit! It includes 11 fan-favorite designs that will work perfectly on your machine!
Happy stitching!

Hello friends, its great paragraph about educationand fully defined,
keep it up all the time.
Glad you enjoyed the article!
Hi, want you to know that this article saved my mind! I had purchased a very unusual design -3 different sections. Was in the process of getting it to the USB, and my daughter said something, and suddenly, I couldn’t remember how to get it to the USB – something I’d done for years! After 2 days and many frustrated tears, I remembered this article you had written. I zipped over to your site, re-read the article, did my thing, and it worked like it was supposed to. I took the liberty of printing the article out, put it in contact paper, and it’s now taped on the lid of my laptop. I truly thought I’d lost my mind..! gone in seconds..! At 72 years young, you just can’t be to careful bout what buttons you push. Thank you, thank you.!!
We’re happy we could help Sara! Sounds like you just needed a little reminder 🙂 happy stitching!
If some one wants expert view concerning blogging afterward i recommend him/her to go to see this webpage, Keep up the good work.
Thanks for the kind words,
Glad you’re enjoying the articles!
Thanks very nice blog!
My pleasure, glad you enjoyed 🙂
We’re a bunch of volunteers and opening a new scheme in our community.
Your site provided us with helpful information to work on. You’ve performed an impressive activity and our whole neighborhood shall be thankful to you.
Thank you for the kind words! We’re very happy to help 🙂
First off I want to say wonderful blog! I had a quick question that I’d
like to ask if you don’t mind. I was interested to know how
you center yourself and clear your mind prior to writing.
I’ve had a difficult time clearing my mind in getting
my thoughts out. I do enjoy writing however it just seems like the first 10 to 15 minutes
tend to be wasted just trying to figure out how to begin. Any ideas or tips?
Thanks!
Thank you for the kind words! I wish I could say it comes naturally to me but I often need some “prep” time to get my thoughts together. I’ll usually figure out my topic title and them create some bullet points around it, once that’s in place then I fill in the rest. I know most writers have different strategies but I always begin by putting an outline in place. Hope that helps!
Hello! This is my 1st comment here so I just wanted to give a quick shout out and tell you I genuinely enjoy reading your posts.
Can you recommend any other blogs/websites/forums that deal with the same subjects?
Appreciate it!
Thanks for the kind words! Glad you enjoyed it.
There are many other reputable companies out there that can provide you with good information. I would checkout and join our Facebook group, this is a great place to ask questions see links that others find useful 🙂 https://www.facebook.com/groups/ladybugembroideryclub/
If some one desires expert view regarding blogging and site-building afterward i advise him/her to pay a visit this weblog, Keep up the fastidious job.
Thank you!
I really like it when individuals get together and share opinions.
Great blog, continue the good work!
Thanks! Glad you enjoyed it.
Great website you have here but I was wondering if you knew of any discussion boards that cover the same topics discussed
in this article? I’d really like to be a part of community where I
can get comments from other experienced individuals that share the same interest.
If you have any suggestions, please let me know.
Many thanks!
Thank you! Glad you’ve been enjoying it.
One of the greatest resources out there to join a community of engaged embroiderers is embroidery related Facebook groups.
Although there are many great ones out there, here’s a link to one of ours: https://www.facebook.com/groups/ladybugembroideryclub/
Sweet blog! I found it while surfing around on Yahoo News.
Do you have any tips on how to get listed in Yahoo
News? I’ve been trying for a while but I never seem to get there!
Thank you
Thank you, very glad you enjoyed it 🙂
To be honest I didn’t even know we were featured in Yahoo News haha. I suppose just that consistency pays off, we try to publish a blog and 2 YouTube videos for our amazing supporters every week.
Fine way of telling, and nice piece of writing to get facts about my presentation topic,
which i am going to present in academy.
Thanks, glad you enjoyed it!
When I initially commented I clicked the “Notify me when new comments are added” checkbox and now each time a comment is added I get three e-mails with the same comment.
Is there any way you can remove me from that service?
Cheers!
Thanks for letting me know! We appreciate any opportunity to improve. I’ve had our web team remove you from that service and remove that option so it doesn’t bug anyone else.
Hi excellent website! Does running a blog similar to this require a large amount of work?
I have virtually no knowledge of computer programming but
I was hoping to start my own blog in the near future. Anyhow,
should you have any ideas or tips for new blog owners
please share. I know this is off subject but I just needed to ask.
Cheers!
Thanks, glad you like the site! No problem, happy to help 🙂
It’s not too much work if you’re just looking to blog & share your embroidery thoughts. I’d suggest looking for a programmer to help get you set up & explain the publishing process. The creative process is different for everyone but the biggest tip I would have is to write on embroidery topics that excite you and be consistent with putting new content out. Good luck!
naturally like your web site but you need to take a look at
the spelling on quite a few of your posts. Many of them are rife with spelling issues and I in finding it very bothersome to tell the truth then again I’ll surely come back again.
Thanks for letting me know. We appreciate any and all opportunities to make our user experience better for our wonderful customers 🙂 I’ll have someone on our team look into this asap.
After looking into a number of the blog articles on your website, I seriously like your way of blogging.
I saved as a favorite it to my bookmark site list and will be checking back soon.
Thank you! Glad you like it 🙂
I enjoy reading through an article that will make people think.
Also, thank you for permitting me to comment!
Glad you enjoyed it! You’re most welcome 🙂
I don’t unremarkably comment but I gotta say appreciate it
for the post on this one :D.
Glad we could help! Thanks for leaving a comment 🙂
I got what you mean,saved to bookmarks, very nice website.
Thank you!
If some one wishes expert view on the topic of blogging
and site-building after that i propose him/her to pay a quick visit
this webpage, Keep up the nice work.
Thanks Susie!
Howdy! Someone in my Myspace group shared this site with us so I came to give it a look.
I’m definitely loving the information. I’m bookmarking and will be tweeting this to my followers!
Excellent blog and wonderful design.
Thanks disqus, glad you’re enjoying it!
I appreciate you sharing it as well 🙂
Howdy! Someone in my Facebook group shared this website with us so I came to check it out.
I’m definitely loving the information. I’m book-marking
and will be tweeting this to my followers! Outstanding blog and amazing design.
Happy to hear you’re enjoying our content!
Also, thanks for sharing with your followers. We sincerely appreciate the support 🙂
What’s up friends, nice piece of writing and pleasant urging
commented here, I am genuinely enjoying by these.
Glad to hear it Bart, happy stitching!
I don’t normally comment but I gotta tell appreciate it for
the post on this perfect one :D.
Happy to help 🙂 Thanks for commenting
Major thanks for the blog article.Thanks Again. Will read on…
Thankyou for helping out, great info .
Good facts, Thanks a lot.
Glad to hear you’re finding the blogs useful Tiffaney 🙂 Thanks for the kind words!
An excellent post, congratulations !!
Glad you enjoyed it 🙂
I hope I can ask a question on this site. When I purchase an embroidery design and download on a jump drive at the same time, on the computer they are together. When I put jump drive in my embroidery (NQ1600E) machine, the three sizes are not together. My jump drive is saved in the order that I purchased the design from the oldest to the most recent. It seems I have to go in and out to find the right size to embroidery. I know this may be a computer question, but help will be appreciated.
Hi Gayle, we would need more information. Please email our office at contact@embroiderylegacy.com so we can further assist you