Bathtime! The worst time ever when we were kids (but now we consider it a luxury!) What’s a person to do to get that muddy little tot in the tub? Make it fun, bubbly, and easy!
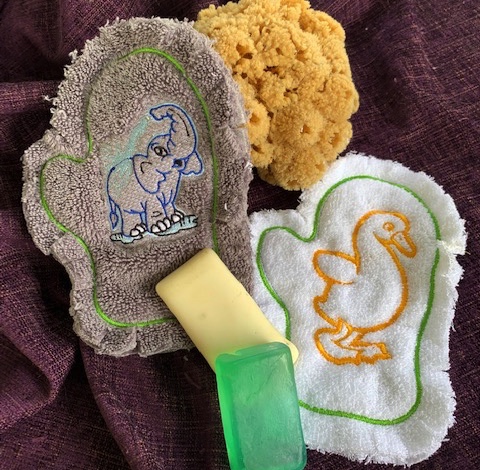
These super easy embroidered kids’ bath mitts can be made from new or old towels or other fun fabric scraps. With some simple materials and creative soft and supple embroidery designs, you’ll hit that bathtub or shower and be the hero of the night.
Supplies Needed For These Easy Kids Embroidered Bath Mitt
- New or old towel pieces or other fluffy material like fun fur or sherpa
- Water soluble stabilizer (you can use medium cutaway if you want more stability)
- Polyester embroidery thread
- Embroidery scissors
- Embroidery designs. For this project, we used:
Check out our over 1,000 high-quality baby embroidery designs. From little boy/girl designs to cute animals and everything in between, we have what you’re looking for.
Kids Embroidered Bath Mitt Tutorial
To create this easy project, you can trace your child’s hand to create the mitt outline. Make the mitt approximately an inch larger to allow room for your kid’s hand and make the soap surface greater. You will hoop the stabilizer and stitch, then add the back. No need to finish the edges- we will clip those into strips for more soapy fun. Here are the steps you will want to follow:
Digitizing Your Bath Mitt
1. Draw your child’s hand by having them lay it down with their fingers slightly apart. Leave an inch of a border.
2. Scan or photograph your mitt outline and save it as .png or .pdf.
3. Insert the artwork into your Hatch embroidery software (or other embroidery digitizing software)
New to Hatch or wondering what is embroidery digitizing? Download your Free Hatch embroidery software trial today.
4. Digitize a running stitch line around the mitt outline.
5. Copy and paste the outline in place and convert this second outline into a satin stitch 4-5 mm wide.
6. Change the satin outline to the color of your choice (make sure the first line is a different color, as this will produce a stop on the machine to allow you to place your fabric).
7. Insert your embroidery design.
8. If you have chosen a design that has detail, it will not show in the loft of the terry towel. You will need to insert a “knockdown stitch” under your design. This smashes down the terry loops and allows the top stitching to show!
Watch how to create your own Knockdown Stitch to get quality embroidered results on fabrics with high piles.
9. Copy your first running stitch and paste it in place.
10. Convert this last running stitch into a triple stitch. This will stitch the back to the front of the mitt, which has the design.
11. Create the opening for the mitt by selecting this last outline and using the knife tool to slice off the bottom of the mitt at the wrist.
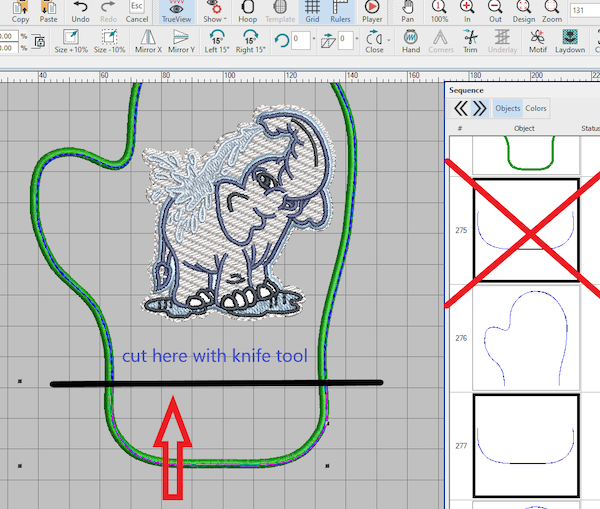
12. Select the bottom portion you cut off and delete it.
Embroidering Your Bath Mitt
To Stitch out your mitt
1. Hoop wash away stabilizer (will depend on your fabric type).
2. With a light embroidery adhesive spray, lay down a piece of terry cloth that measures 2 inches wider and two inches taller than the outline of the mitt.
Master how to use adhesive spray with embroidery to avoid problems.
3. Stitch all of the design but the last triple-stitch outline.
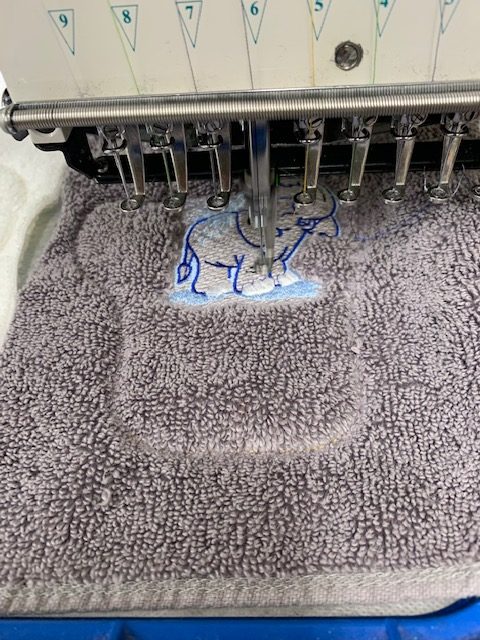
4. Remove the hoop from the machine
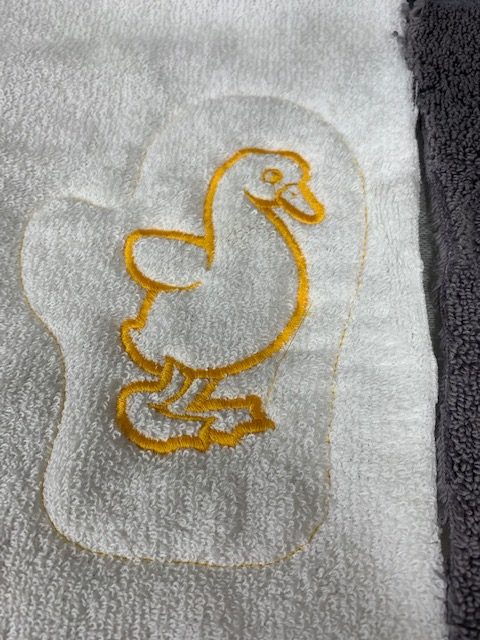
5. Turn the hoop over with the back side up and lightly spray the second piece of towel with temporary embroidery spray,
6. Lay down the fabric and pin the corners (you will be attaching this to the WRONG side).
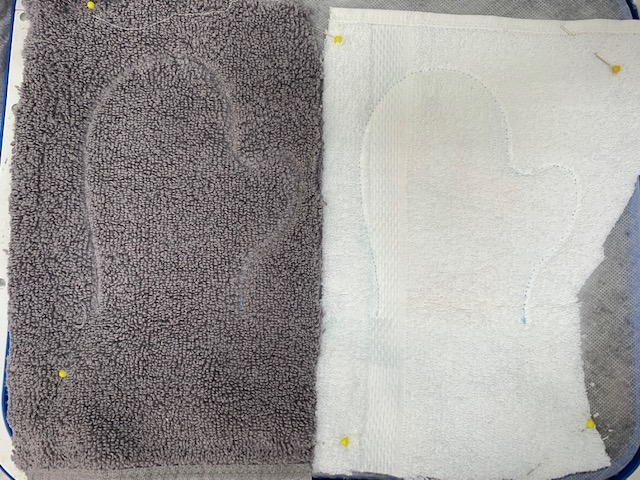
7. Carefully return to the machine and stitch the last partial outline.
8. Remove from the machine and trim with a 1-inch border,
9. Carefully using scissors, clip every inch or so up to the satin border to create small flaps. Do not cut through the satin border.
10. Shake out the mitt and wash before use.
Conclusion: Kids Embroidered Bath Mitts Are Quick & Easy
These make fun and functional gifts for any child (or adult) and can be used over and over. The beauty of this project is that you can recycle towels and small pieces of fur or soft material and make bath time more fun! The design choices are endless, be sure to use high-quality embroidery designs to ensure your new project gets lots of use!
Here are a few takeaways to remember:
- Use new or old terry towels or other sherpa, fuzzy or fluffy fabrics that are soft on tender skin.
- Make sure to use a wash away medium stabilizer (fabric type) so that the inside and the outside of the mitt are soft and porous.
- If the terry towel or other fabric is thick and luscious, use the Hatch Smash to knock it down and provide an even surface for your stitching.
- Wash before use and toss in the laundry whenever you want them clean and fresh!
We have so much fun sharing these easy projects with you! Let us know how you like them, and be sure to post your stitch-outs in our Machine Embroidery and Digitizing Made Easy Facebook group or Wilcom Hatch Embroidery Software Facts Facebook group.
P.S. Check out other high-quality embroidery designs to perfectly embellish your next embroidery project!


Leave A Comment